Plugin information
| Version | 1.0.4 |
|---|---|
| Author | Dataiku (Alex COMBESSIE, Joachim ZENTICI) |
| Released | 2020-09 |
| Last updated | 2021-09 |
| License | Apache Software License |
| Source code | Github |
| Reporting issues | Github |
With this plugin, you will be able to:
- Detect objects in images to obtain labels and draw bounding boxes
- Detect text (up to 50 words in Latin script) in images
- Detect unsafe content (nudity, violence, etc.) in images
Note that the Amazon Rekognition API is a paid service. You can consult the API pricing page to evaluate the future cost.
How to set up
If you are a Dataiku and AWS admin user, follow these configuration steps right after you install the plugin. If you are not an admin, you can forward this to your admin and scroll down to the How to use section.
1. Create an IAM user with the Amazon Rekognition policy – in AWS
Let’s assume that your AWS account has already been created and that you have full admin access. If not, please follow this guide.
Start by creating a dedicated IAM user to centralize access to the Rekognition API, or select an existing one. Next, you will need to attach a policy to this user following this documentation. We recommend using the “AmazonRekognitionFullAccess” managed policy, as shown below:
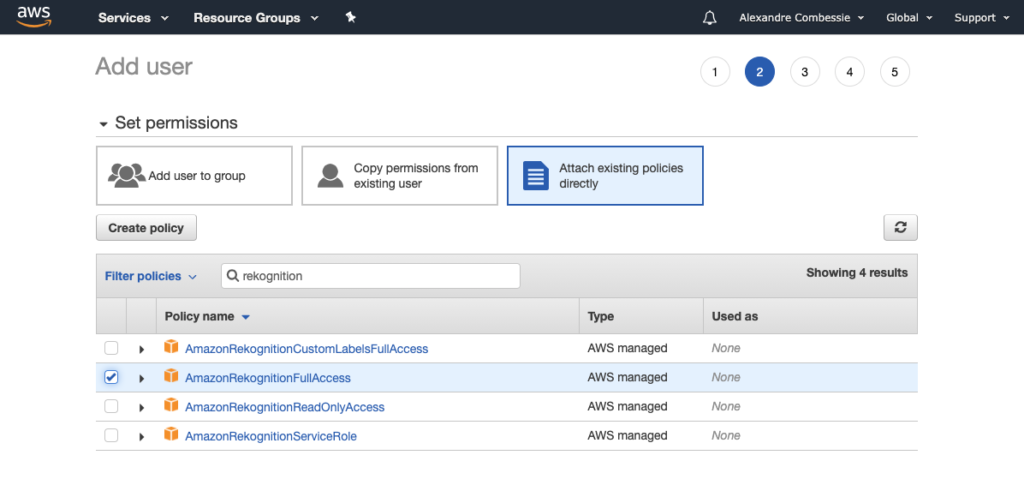
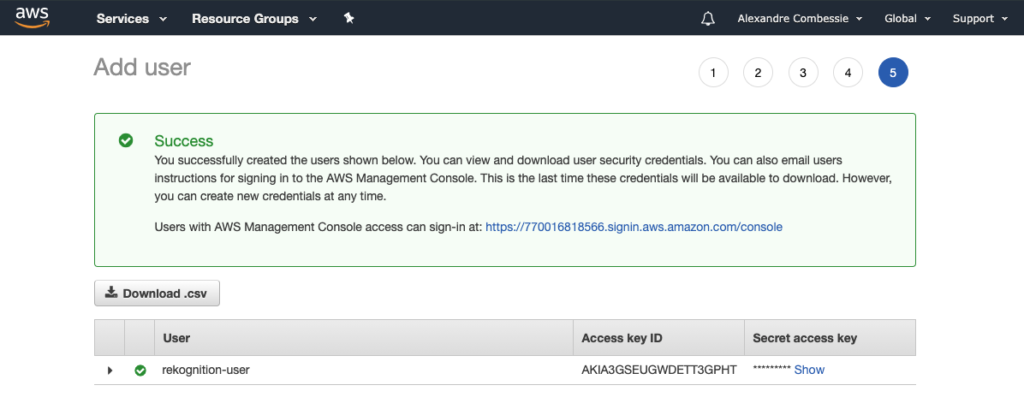
Alternatively, you can create a custom IAM policy to allow “rekognition:*” actions. After completing this step, you will be able to retrieve the user Access key ID and Secret access key.
2. Create an API configuration preset – in Dataiku DSS
In Dataiku DSS, navigate to the Plugin page > Settings > API configuration and create your first preset.
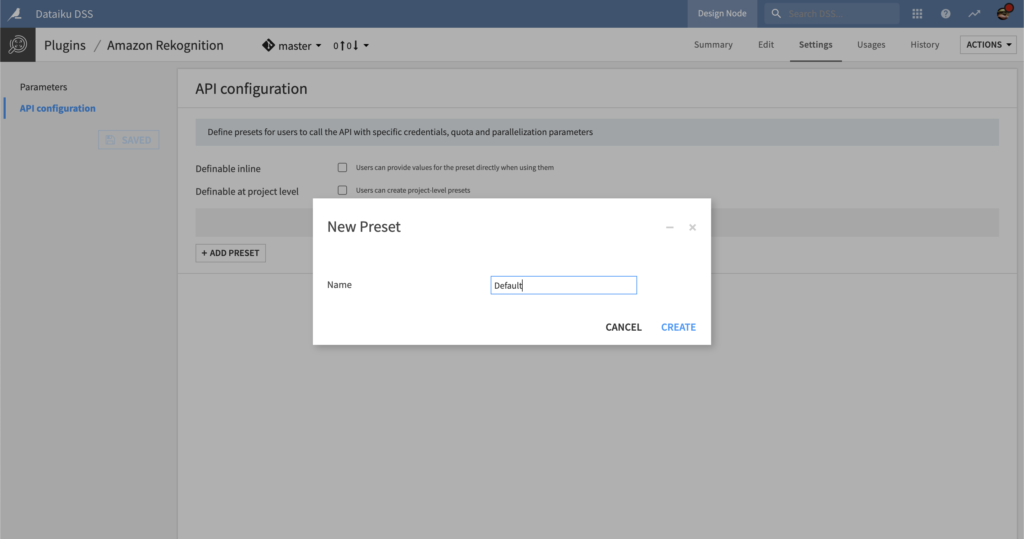
3. Configure the preset – in Dataiku DSS
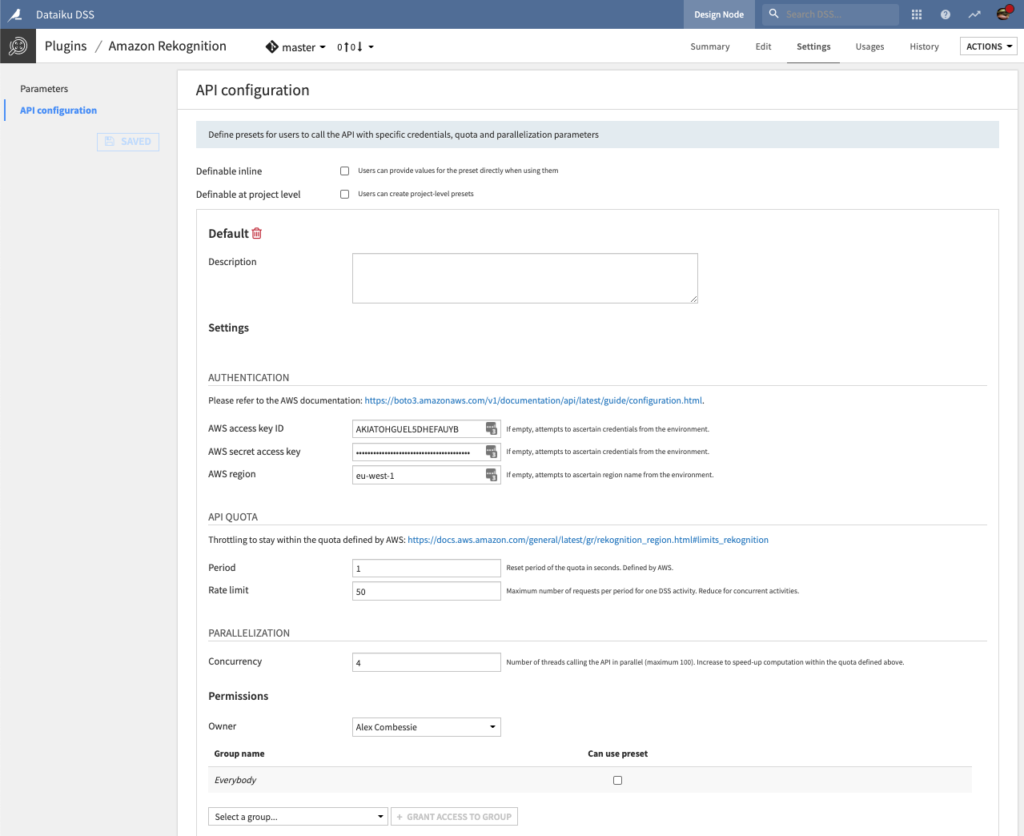
- Fill the AUTHENTIFICATION settings
- Copy-paste your Access key ID and Secret access key from Step 1 in the corresponding fields.
- The AWS region parameter needs to be specified within this list.
- Alternatively, you may leave the fields empty so that the credentials are ascertained from the server environment. If you choose this option, please follow this documentation on the server hosting DSS.
- (Optional) Review the API QUOTA settings
- The default API Quota settings ensure that one recipe calling the API will be throttled at 50 requests (Rate limit parameter) per second (Period parameter). In other words, after sending 50 requests, it will wait for 1 second, then send another 50, etc.
- This default quota is defined by Amazon. You can request a quota increase, as documented on this page.
- If your quota is at its maximum and if you envision that multiple recipes will run concurrently to call the API, you may need to decrease the Rate limit parameter. For instance, if you want to allow 5 concurrent DSS activities, you can set this parameter at 50/5 = 10 requests per second.
- (Optional) Review the PARALLELIZATION settings
- Set the Permissions of your preset.
- You can declare yourself as Owner of this preset and make it available to everybody, or to a specific group of users.
- Any user belonging to one of these groups on your Dataiku DSS instance will be able to see and use this preset.
Voilà! Your preset is ready to be used.
Later, you (or another Dataiku admin) will be able to add more presets. This can be useful to segment plugin usage by user group. For instance, you can create a “Default” preset for everyone and a “High performance” one for your Marketing team, with separate billing for each team.
How to use
Let’s assume that you have a Dataiku DSS project with a folder containing JPG and PNG images. As an example, we will use a sample of the COCO dataset. You can follow the same steps with your own images.
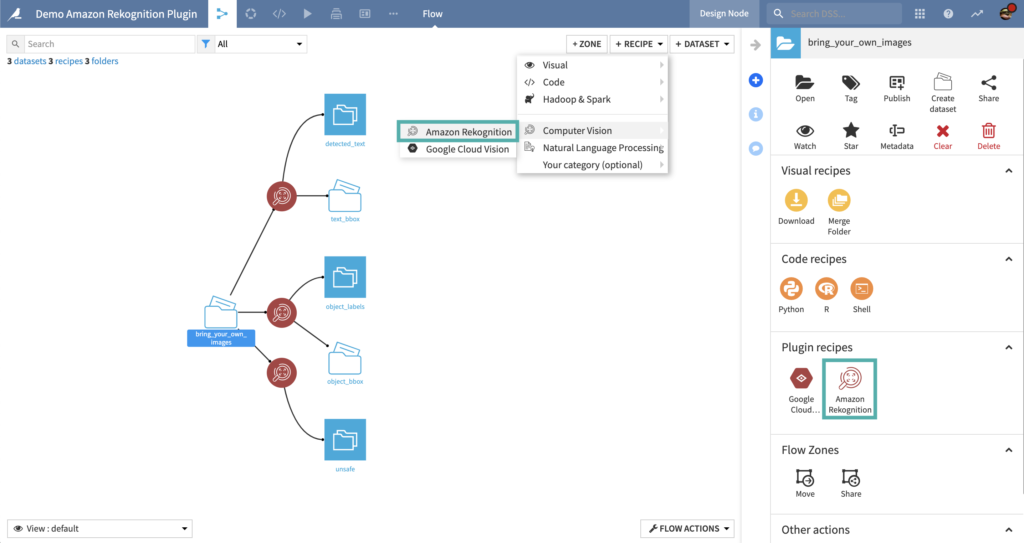
First, create an Amazon Rekognition recipe from the + RECIPE button or from the right panel if your folder is selected.
Object Detection & Labeling
Input
- Folder with JPG/PNG images
Output
- Dataset with object labels for each image
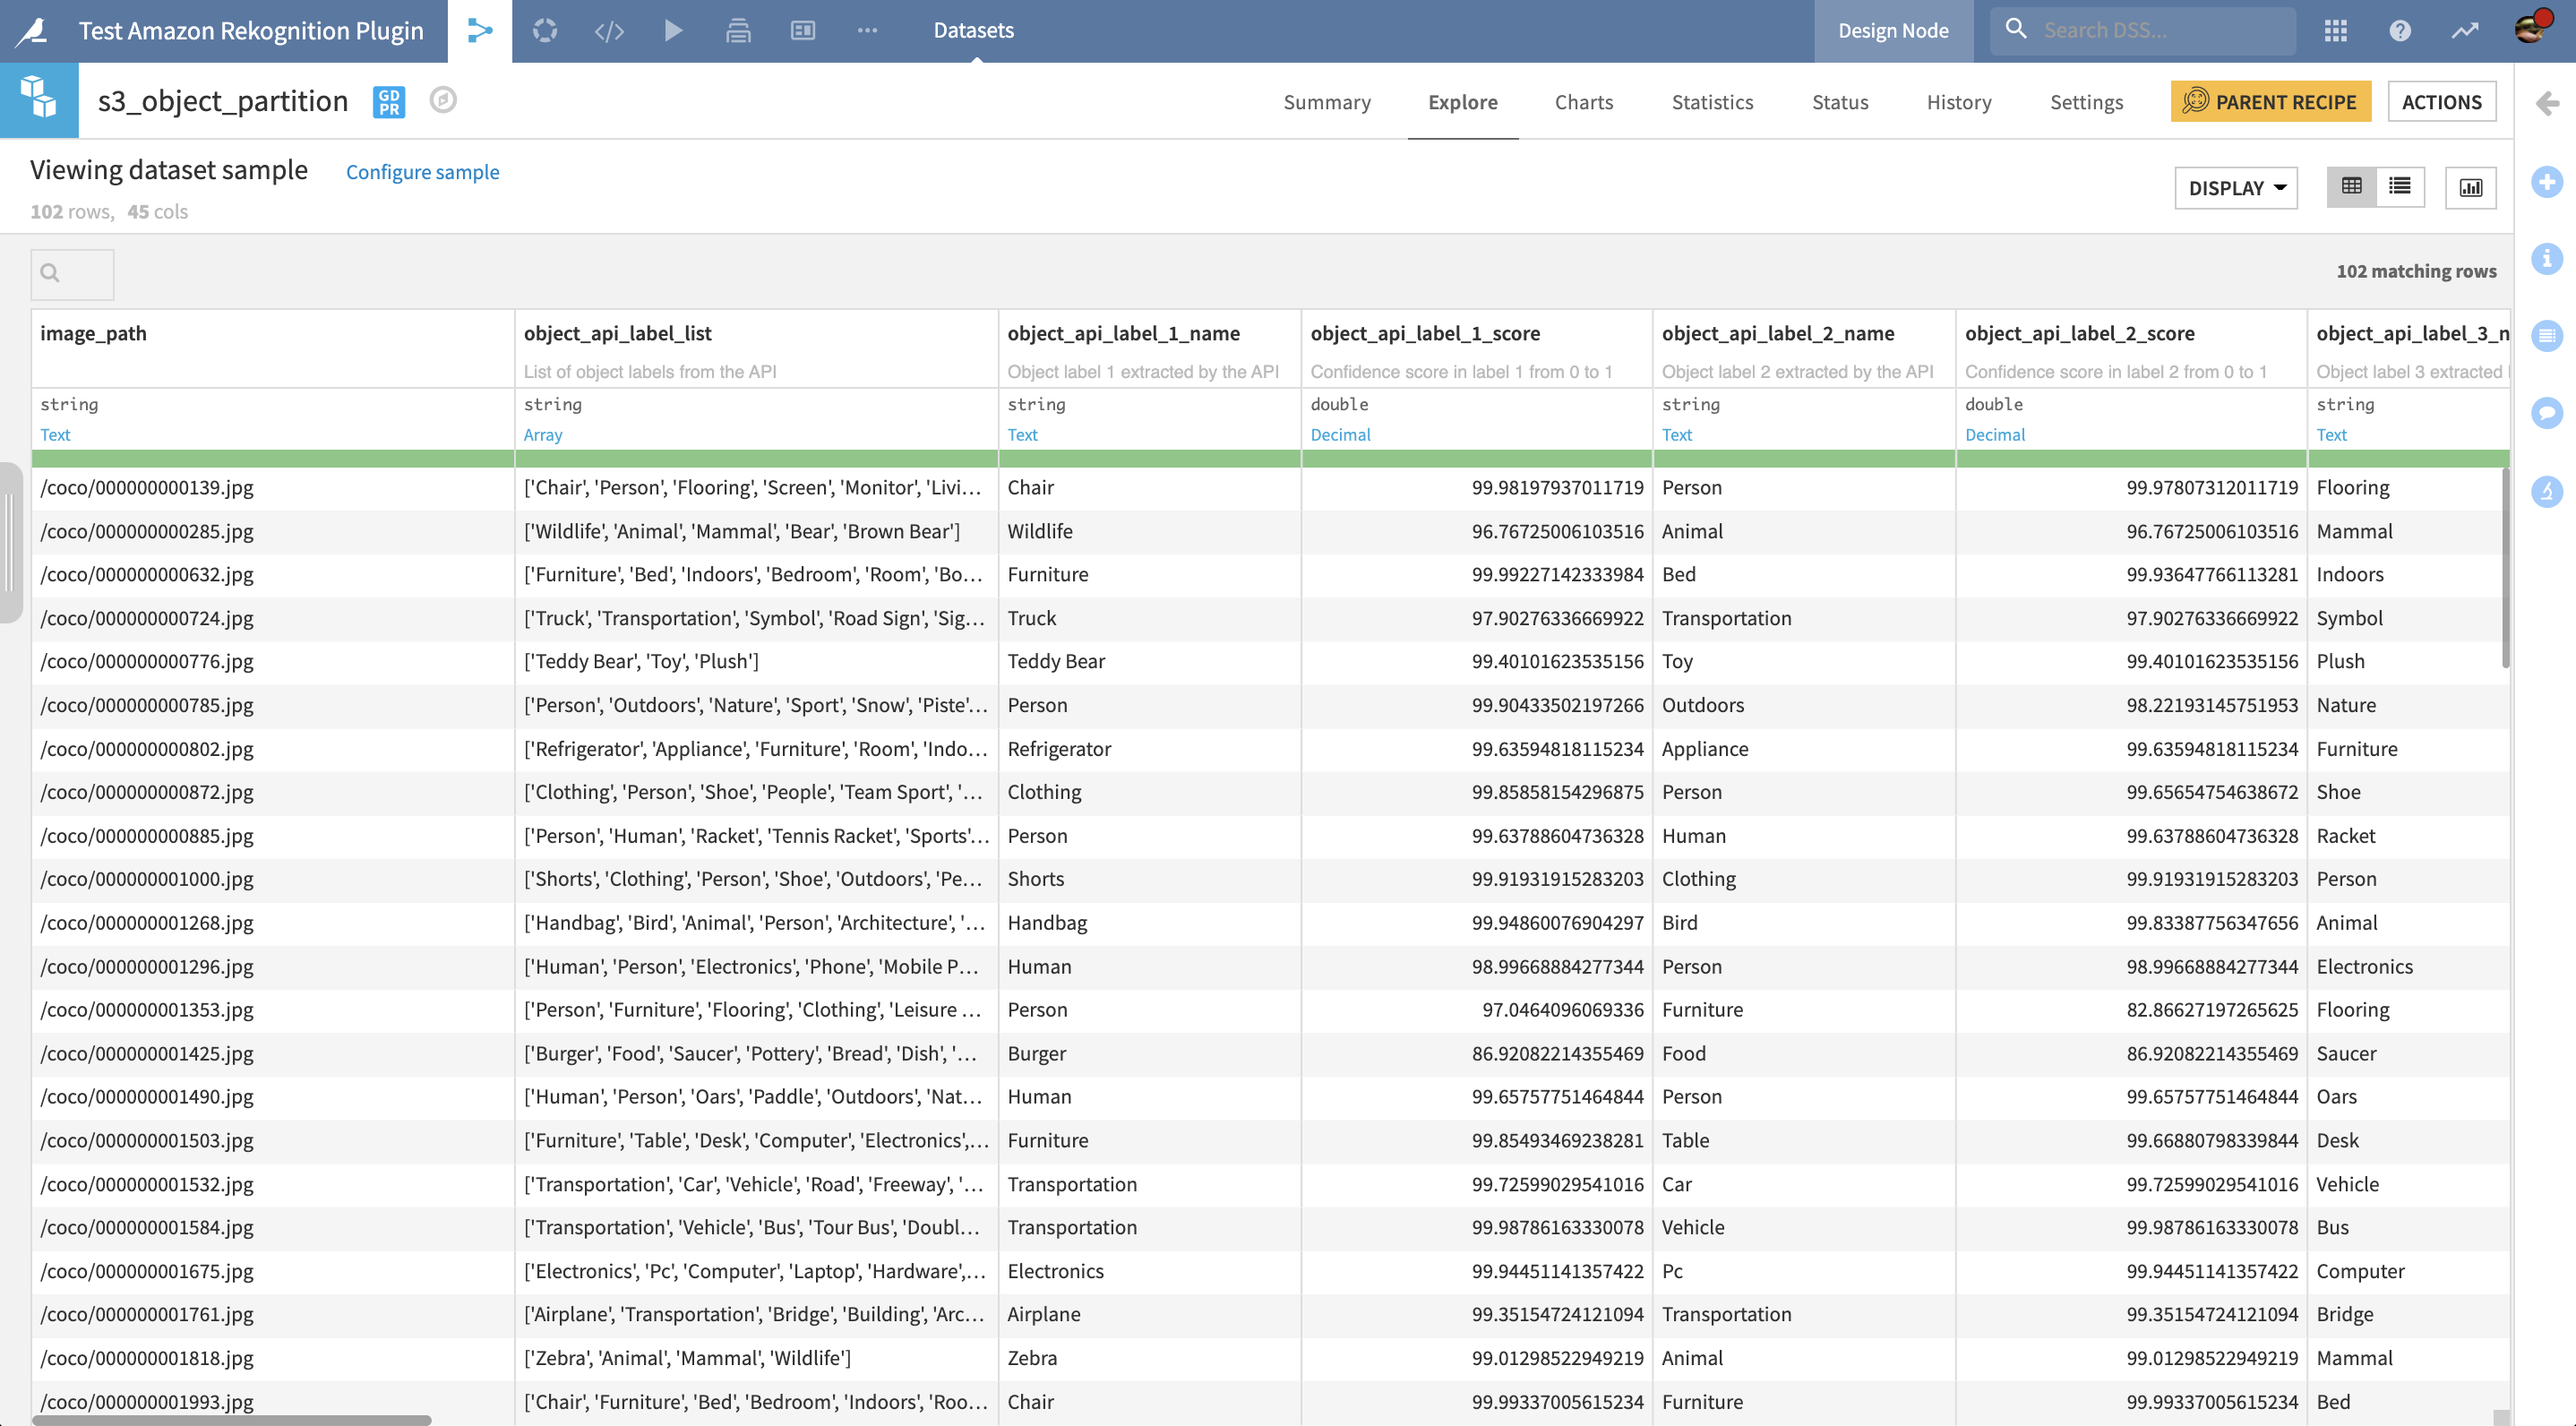
- (Optional) Folder with object bounding boxes drawn on each image
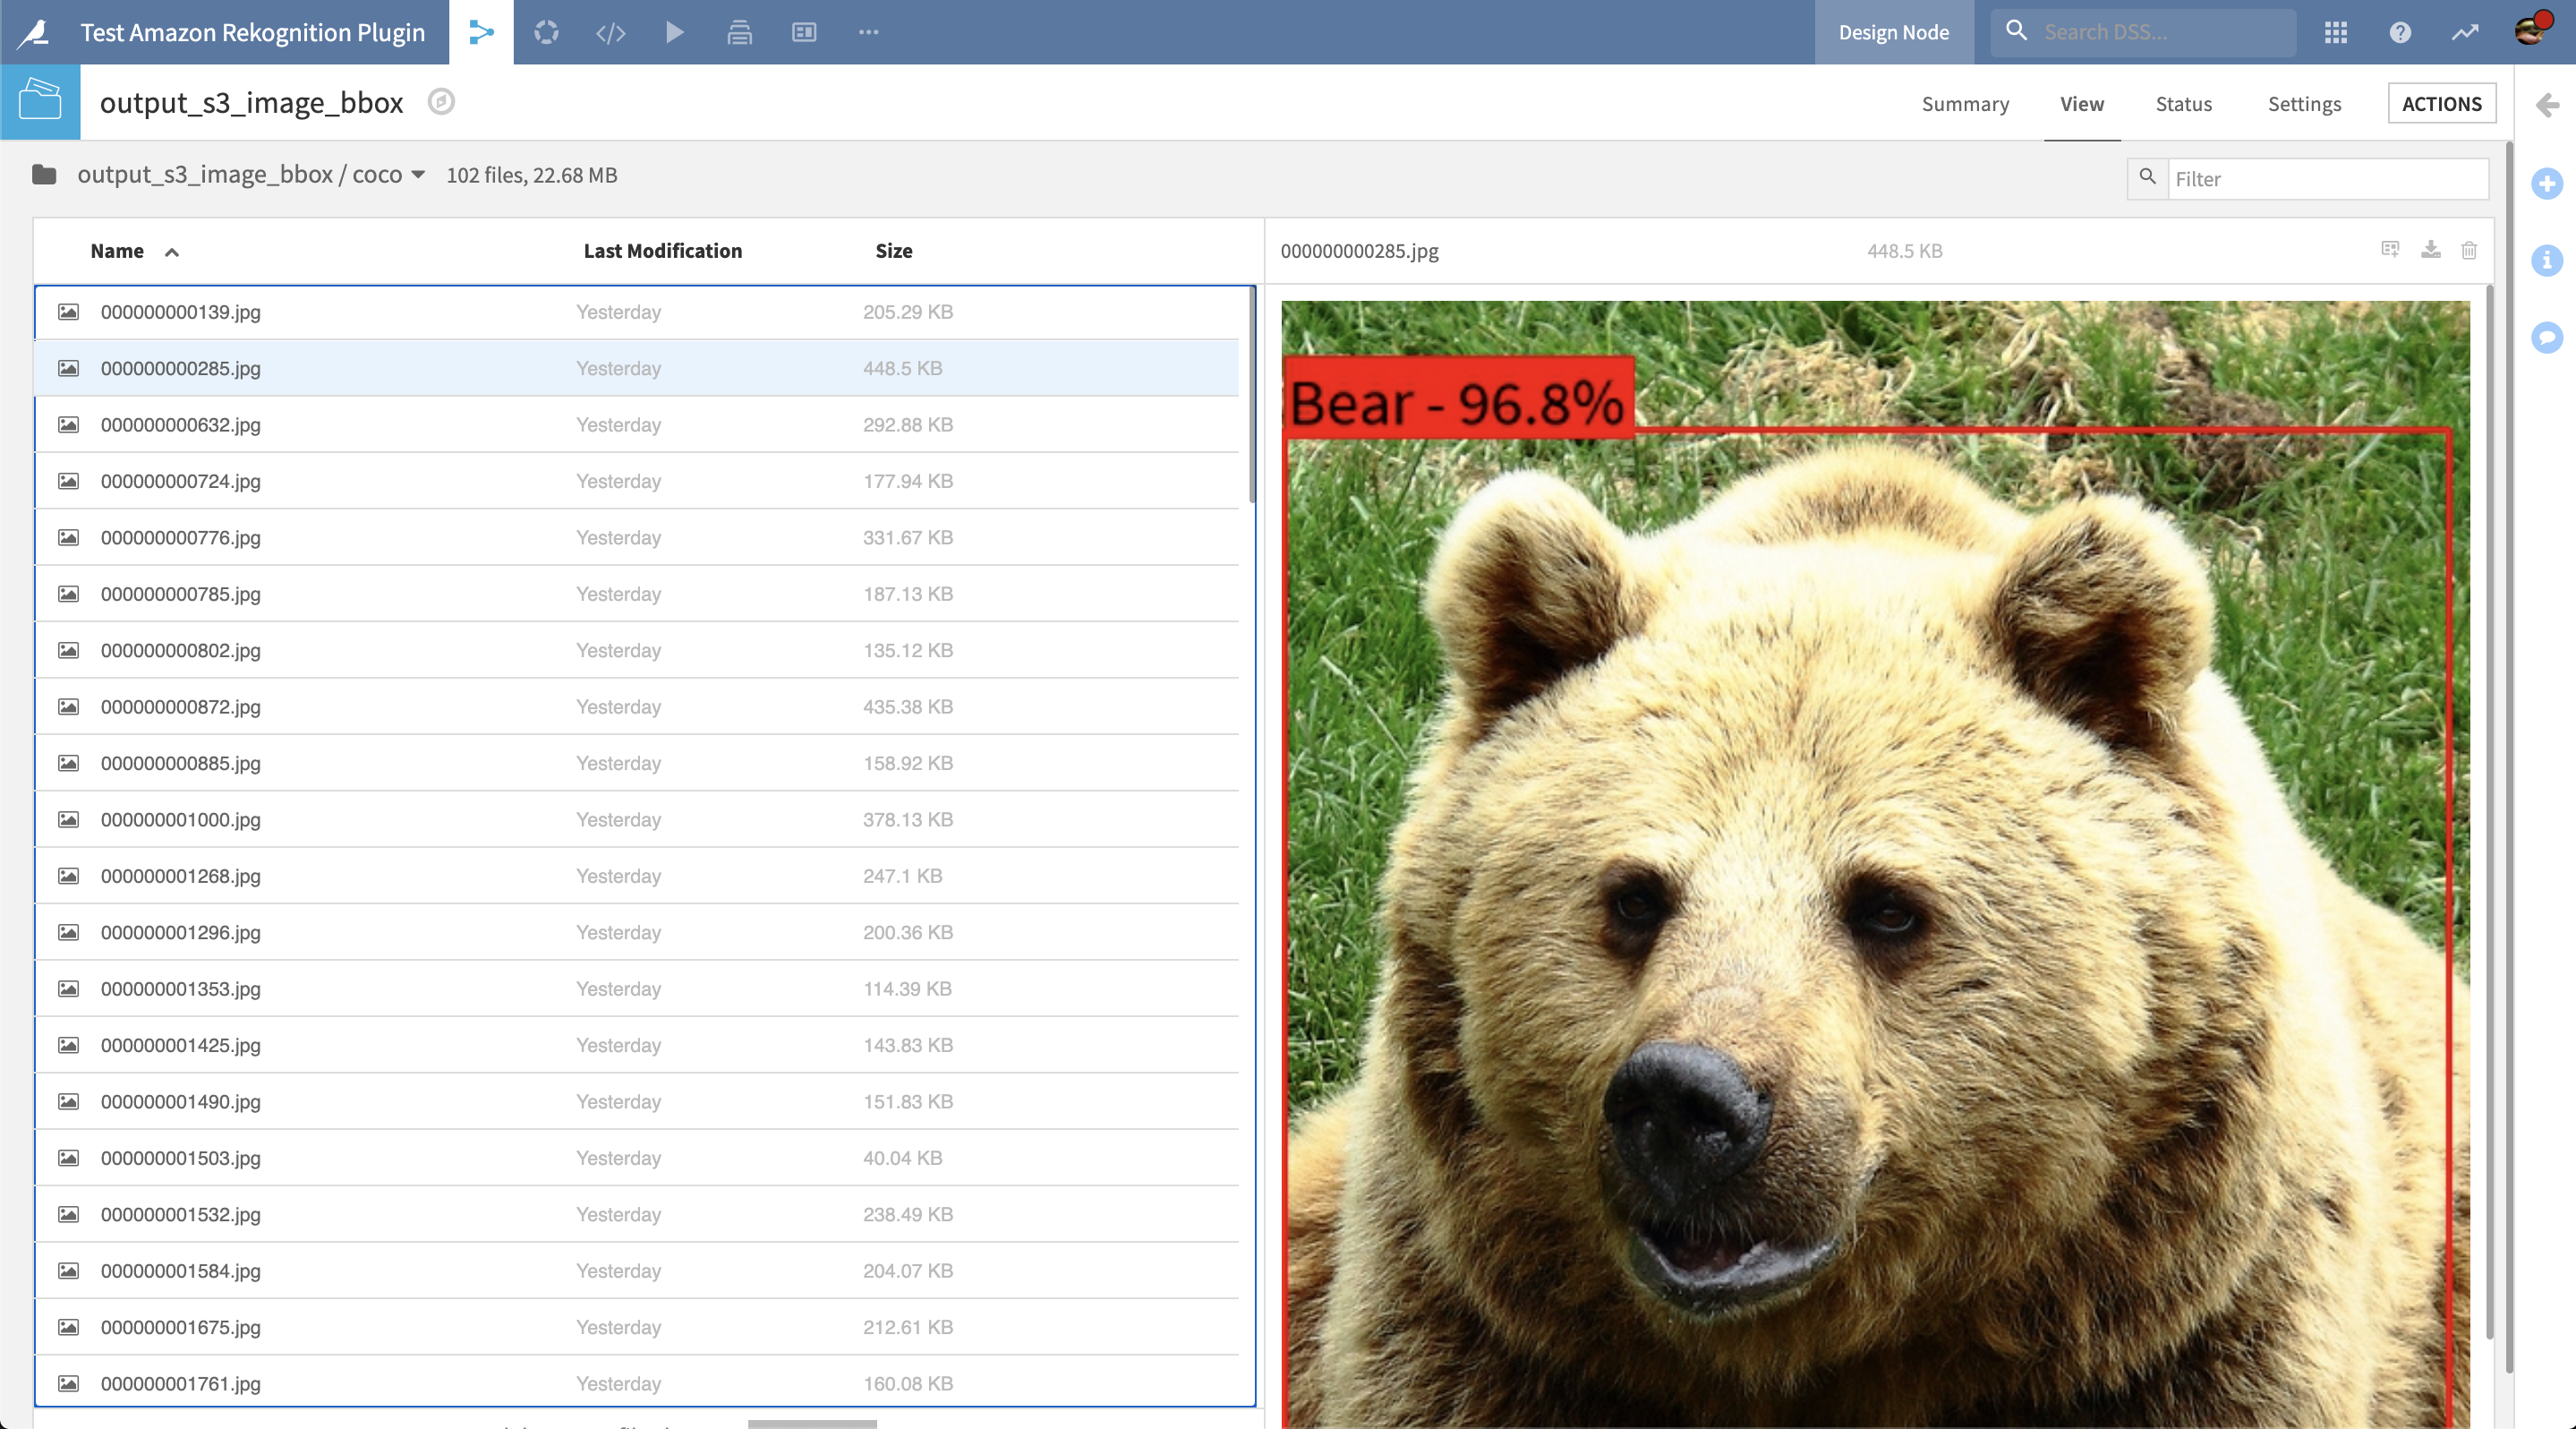
Note that including this folder will increase the recipe runtime, as each image needs to be re-downloaded to draw the bounding boxes after the API calls.
Settings
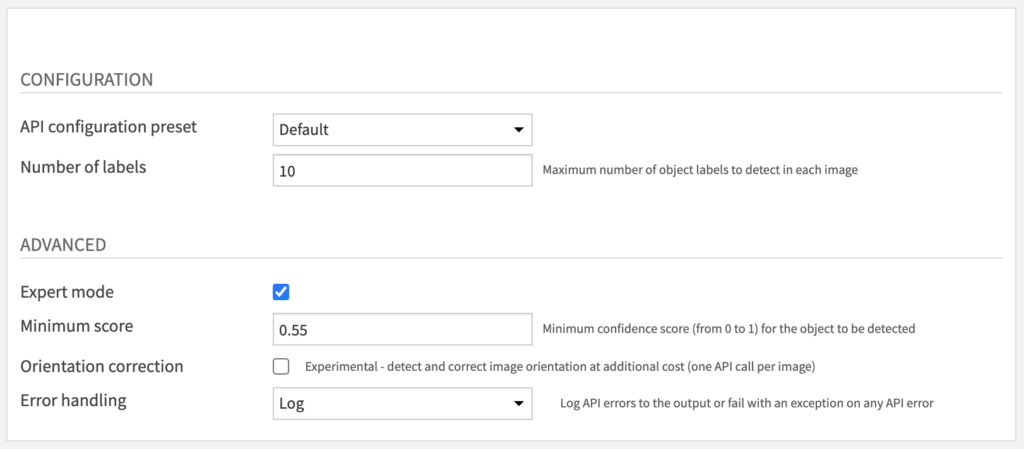
- Review CONFIGURATION parameters
- The API configuration preset parameter is automatically filled by the default one made available by your Dataiku admin. You may select another one if multiple presets have been created.
- The Number of labels parameter limits the number of object labels returned by the API for each image.
- (Optional) Review ADVANCED parameters
- You can activate the Expert mode to access advanced parameters.
- The Minimum score parameter allows you to filter out results with a low confidence score from the model. Default is 0.55 which is the AWS default value.
- The Orientation correction parameter let you detect and correct the orientation in case some of your images are wrongfully rotated. Note that it incurs an additional cost of one API call per image.
- The Error handling parameter determines how the recipe will behave if the API returns an error:
- In “Log” error handling, this error will be logged to the output but it will not cause the recipe to fail.
- We do not recommend to change this parameter to “Fail” mode unless this is the desired behaviour.
- You can activate the Expert mode to access advanced parameters.
Text detection
Input
- Folder with JPG/PNG images
Output
- Dataset with detected text for each image
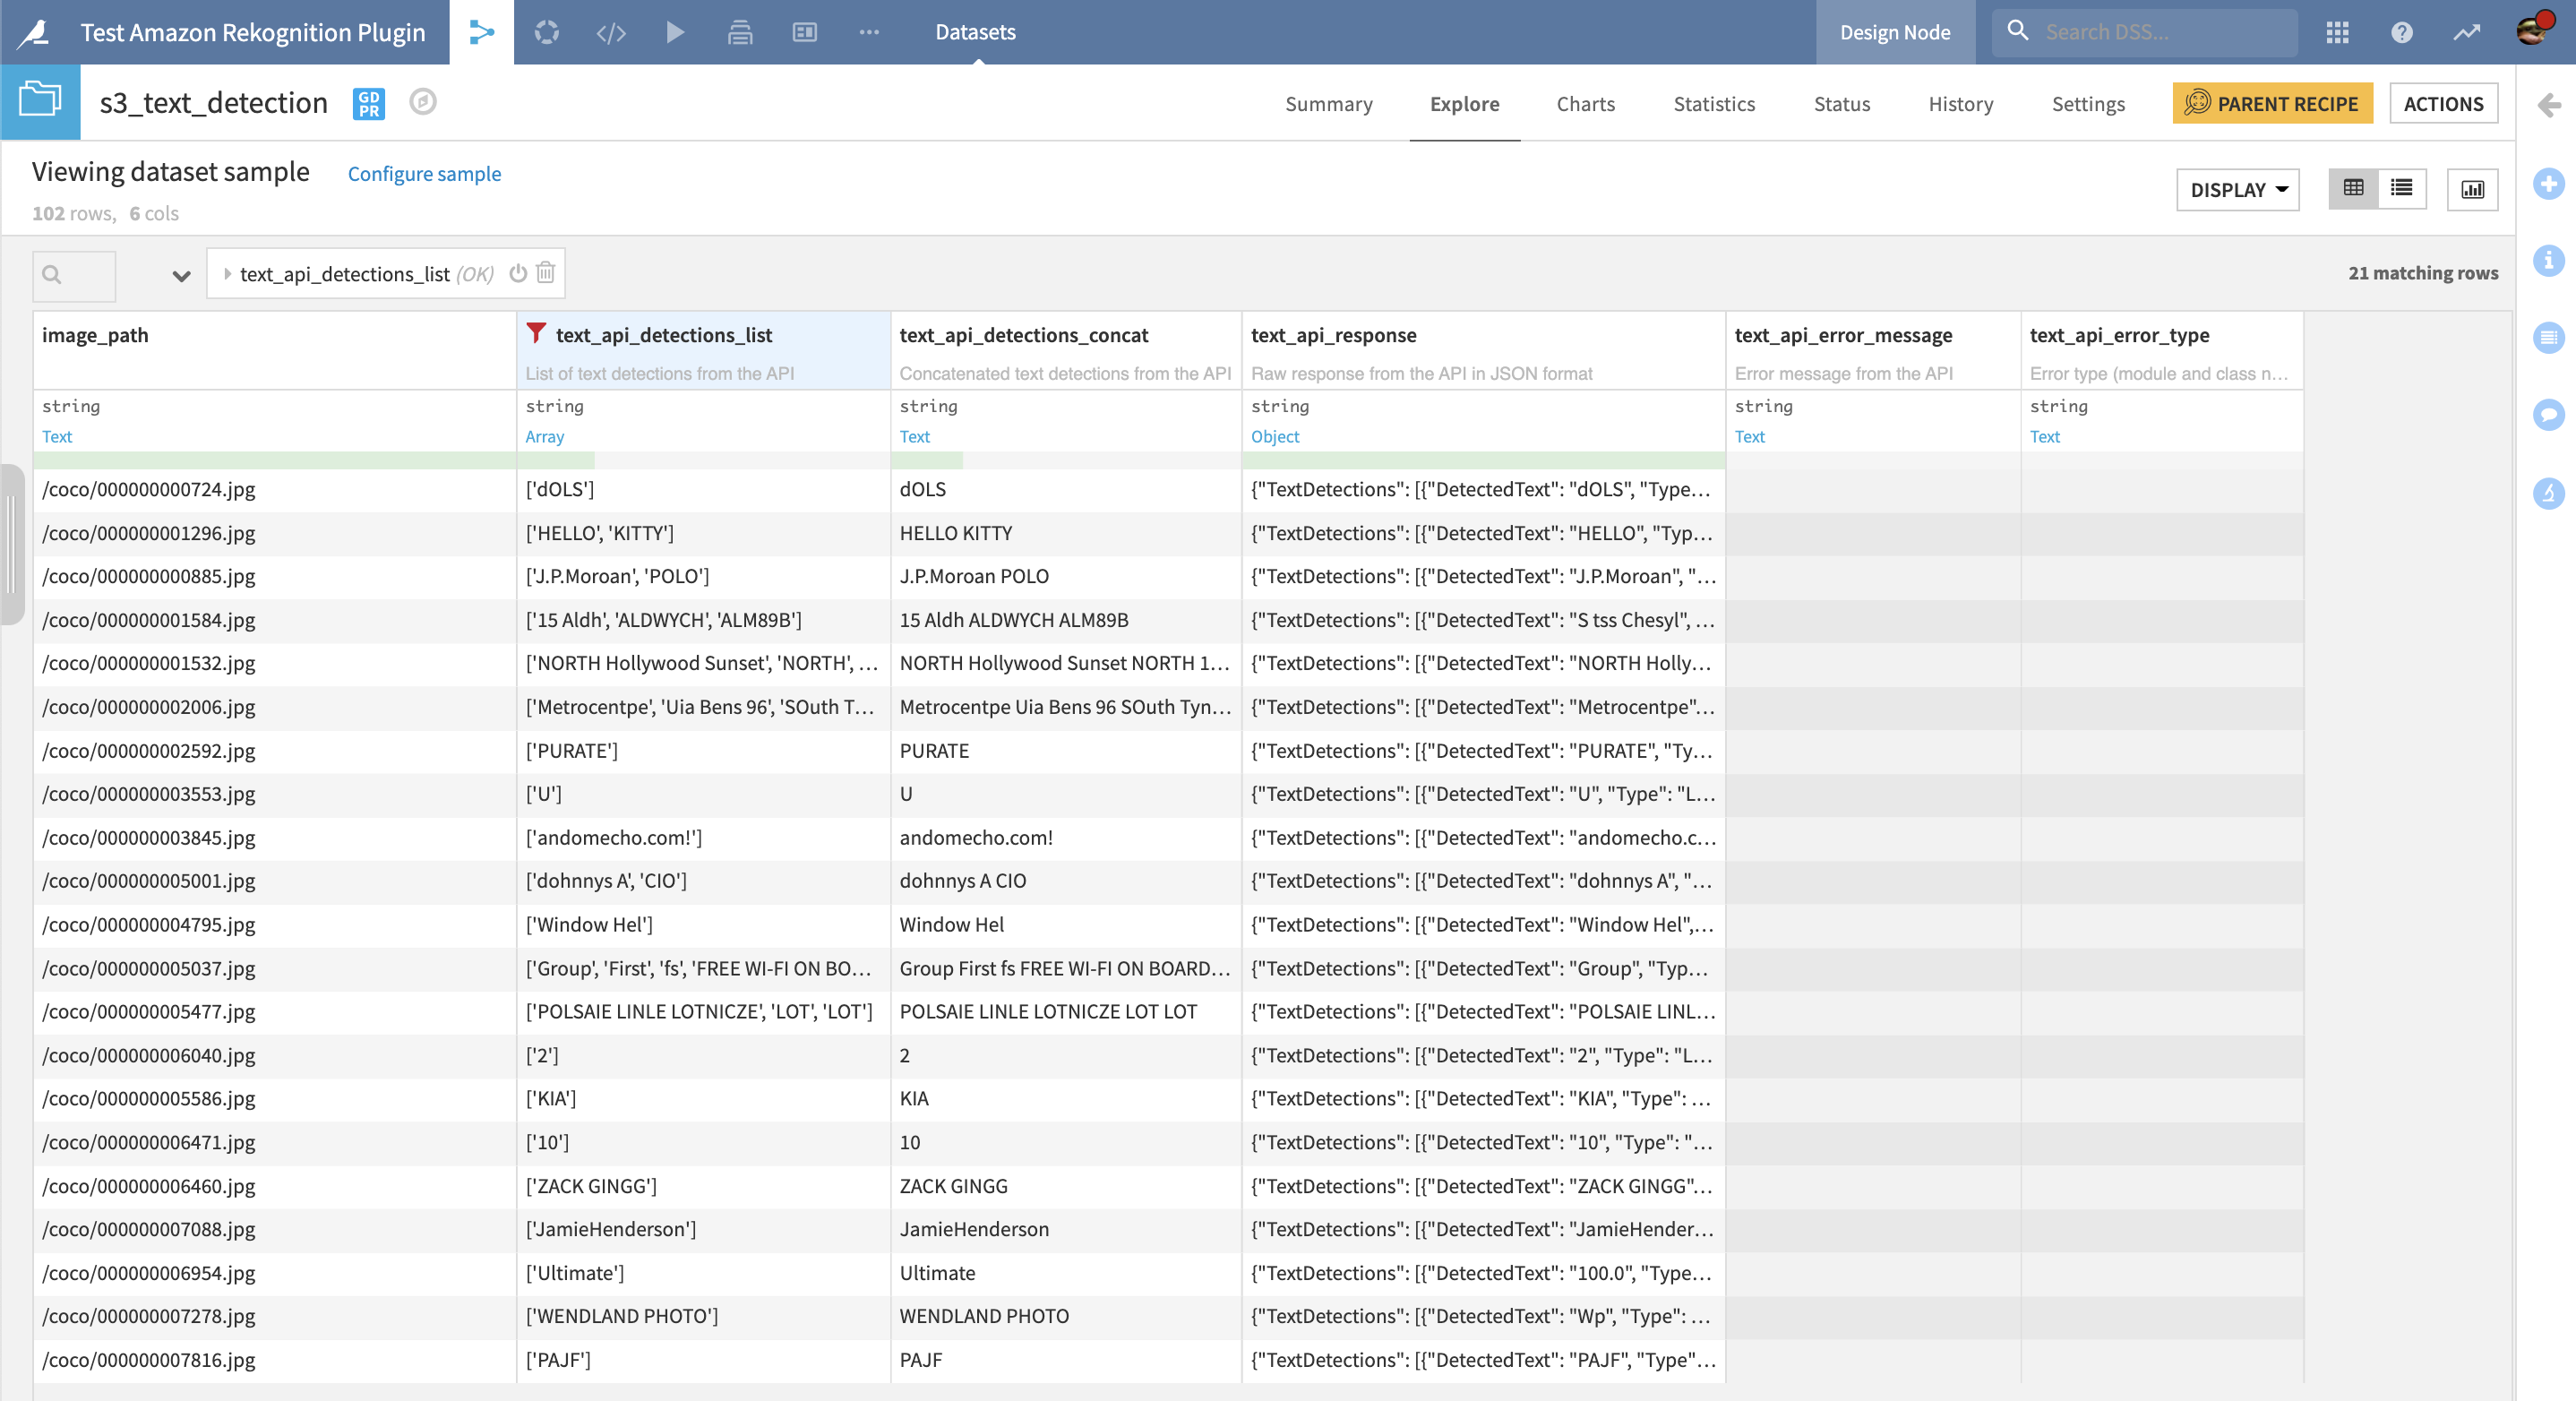
- (Optional) Folder with text bounding boxes drawn on each image
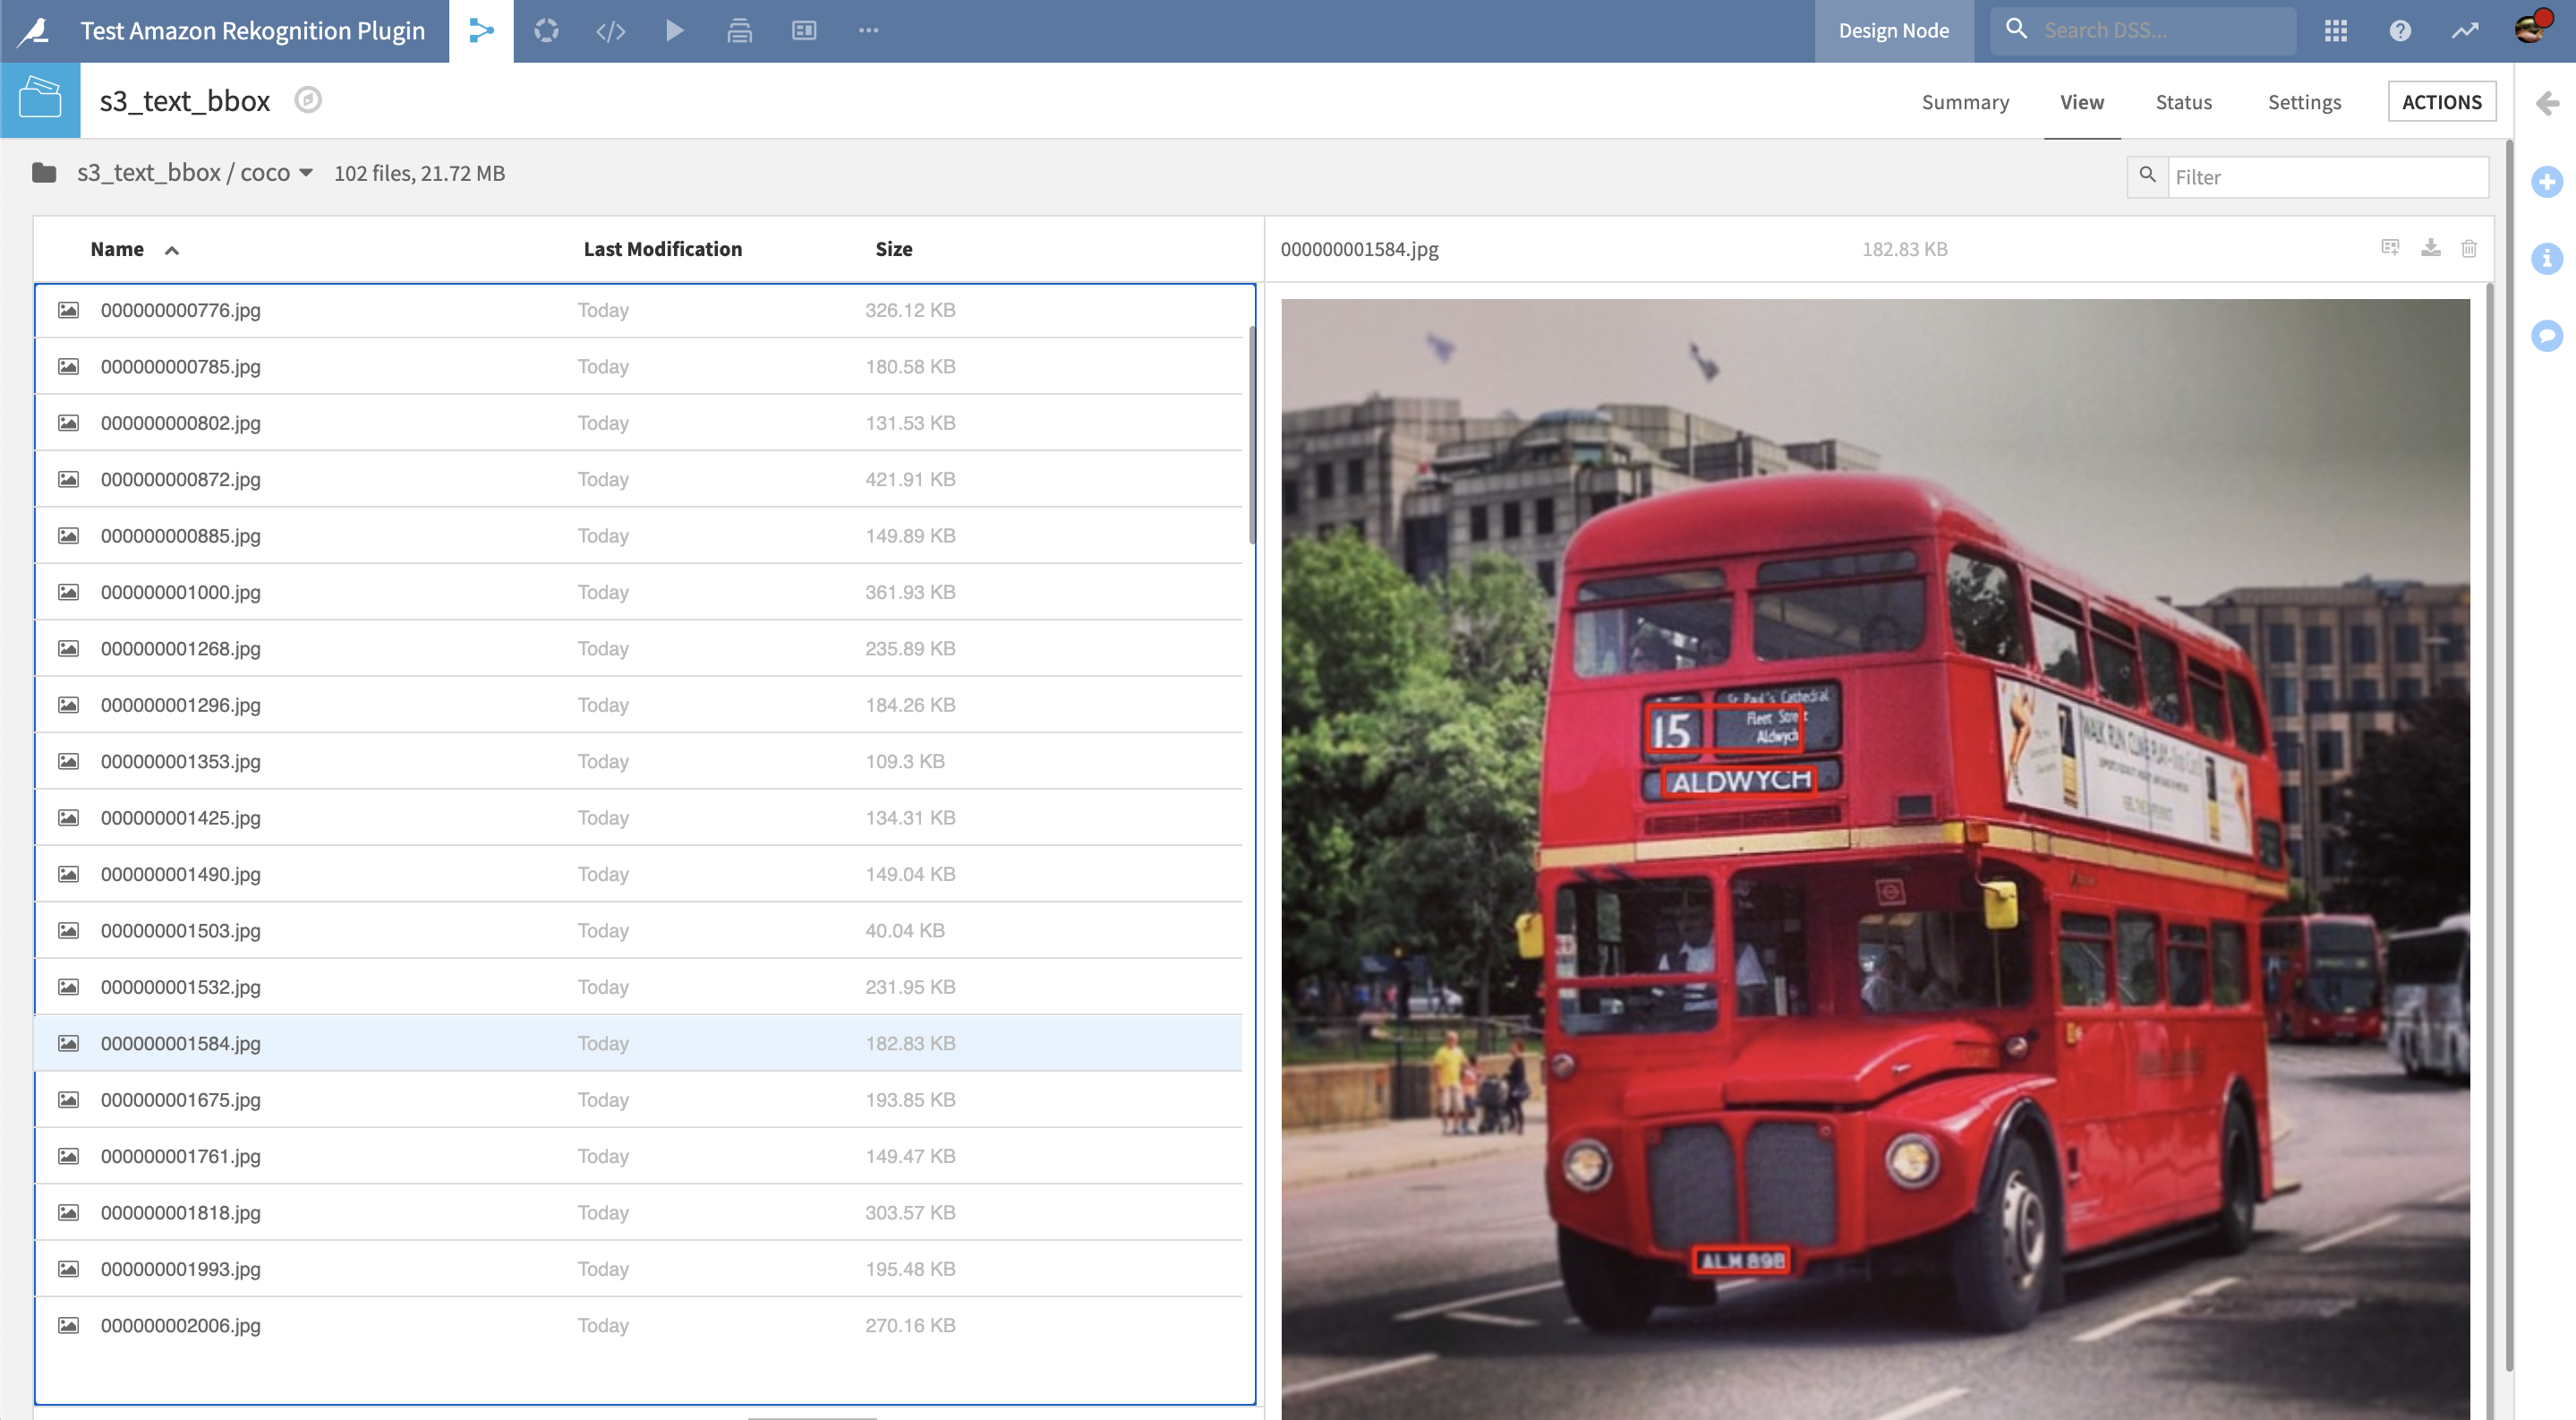
Note that including this folder will increase the recipe runtime, as each image needs to be re-downloaded to draw the bounding boxes after the API calls.
Settings
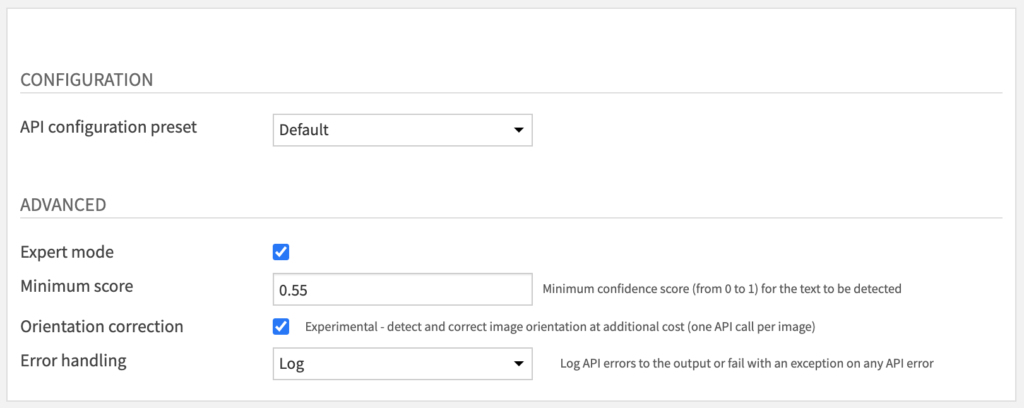
The parameters are almost exactly the same as the Object Detection & Labeling recipe (see above).
The only change is that there is no Number of labels parameter. This API will detect up to 50 words in Latin script (see documentation here). Hence, it is not applicable to images with a lot of text or non-Latin characters.
Unsafe Content Moderation
Input
- Folder with JPG/PNG images
Output
- Dataset with moderation labels for each image
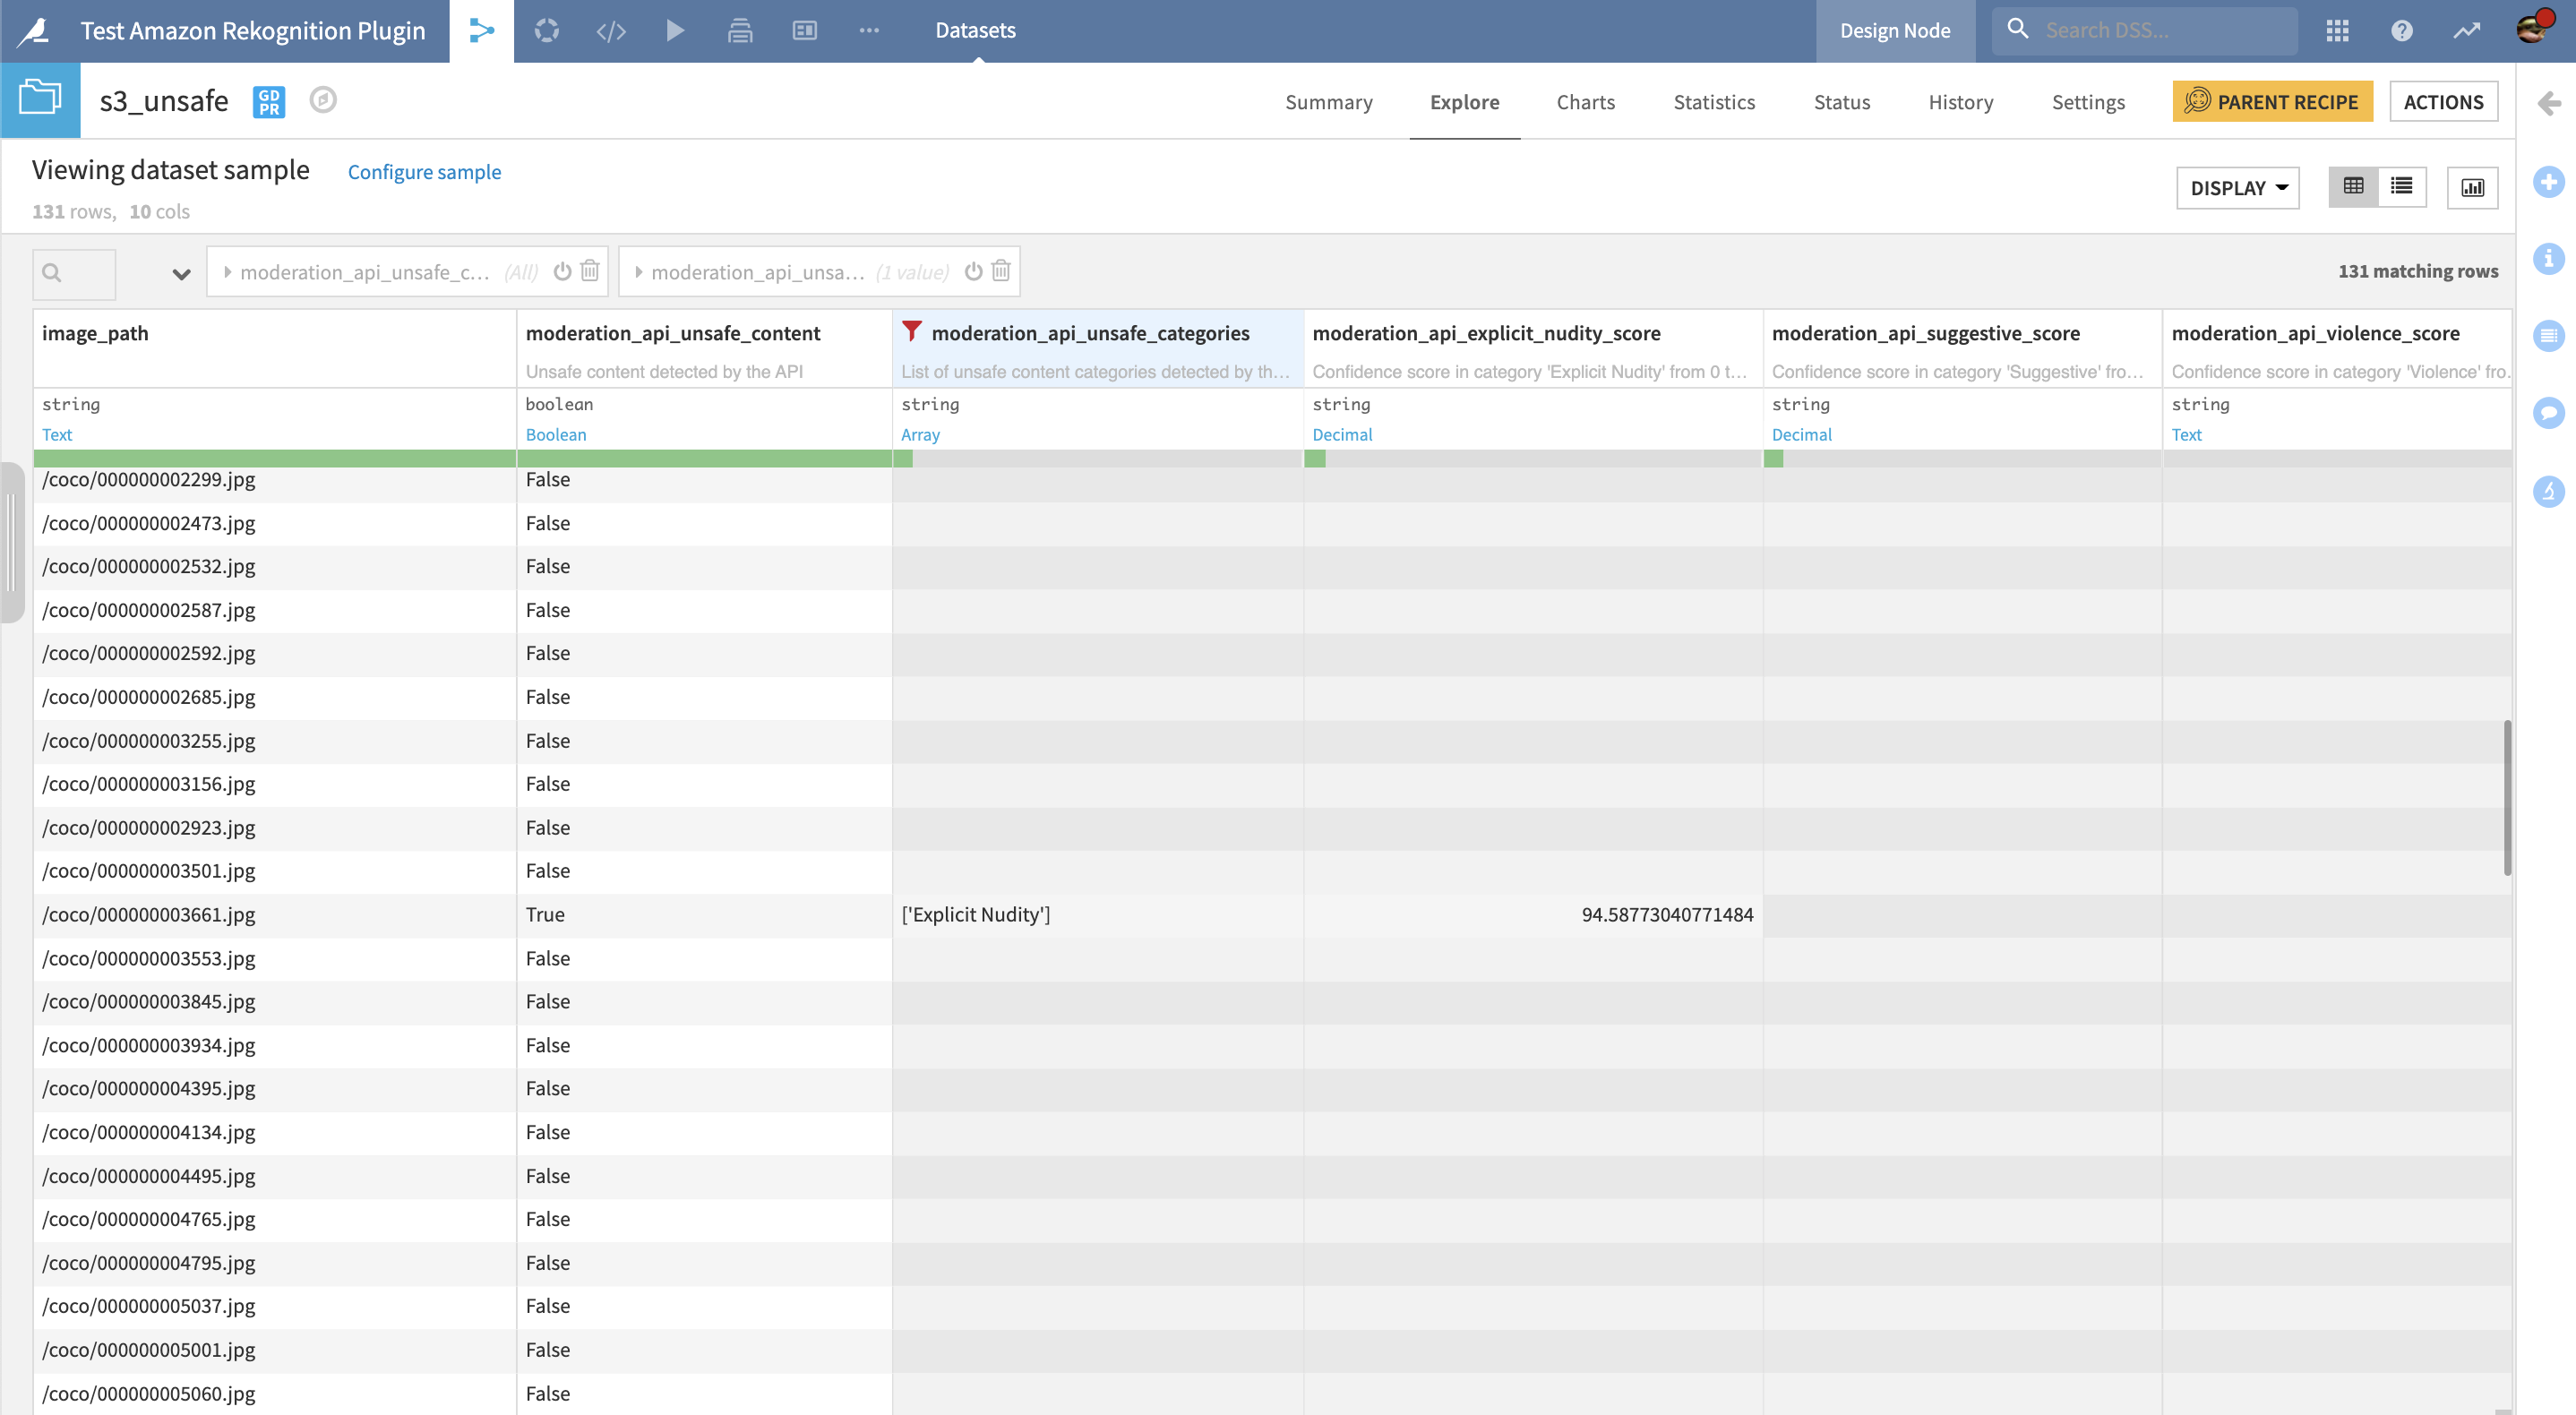
Settings
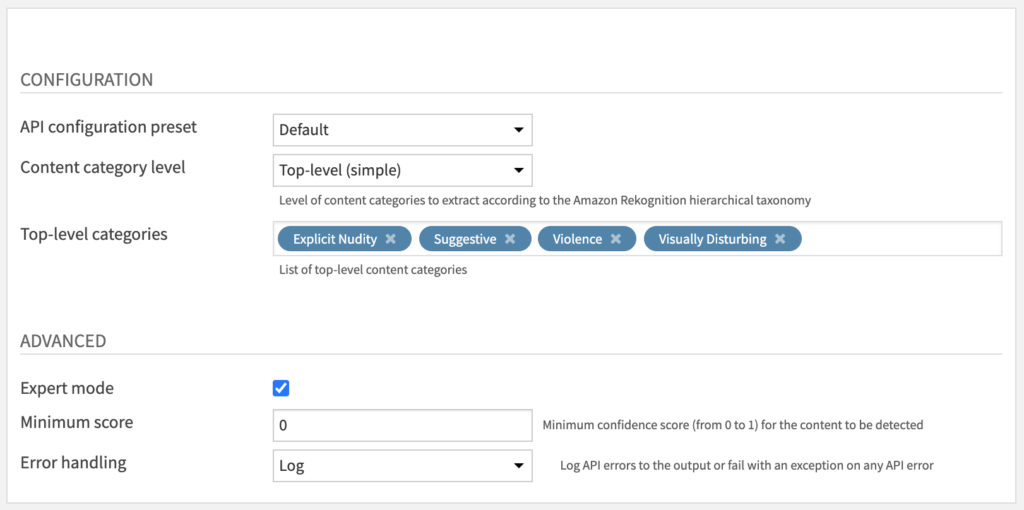
The parameters are almost exactly the same as the Object Detection & Labeling recipe (see above). The only change is the addition of Content category parameters:
- The Content category level parameter lets you choose which level of the Amazon Rekognition hierarchical taxonomy you want to use.
- If you choose “Top-level (simple)”, the Top-level categories parameter lets you select which type of unsafe content you need to detect among 4 categories.
- If you choose “Second-level (detailed)”, the Second-level categories parameter lets you select which type of unsafe content you need to detect among 18 detailed categories.
