


Plugin information
| Version | 1.0.1 |
|---|---|
| Author | Dataiku (Marc Helleboid) |
| Released | 2020-05-15 |
| Last updated | 2020-05-25 |
| License | Apache Software License |
| Source code | Github |
| Reporting issues | Github |
Description
This plugin lets you read data stored in the Warp10 database as well as execute WarpScript recipes, either in-database or by running a local engine.
How to set up
In DSS, go to Plugins -> Installed -> Warp10 -> Settings -> Warp10 Connection -> + Add preset. There, set the base URL for your Warp10 instance, including the port number, as well as read and write tokens for that instance.
How to use
Usage scenario
The different components allow for multiple use cases:
- Import data from your Warp10 databases and use it in your Dataiku DSS projects.
- Run WarpScript in-database (Warp10).
- Use a WarpScript language recipe in your DSS flows on any input data.
Components
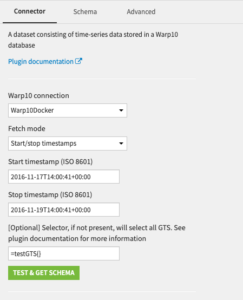
The Warp10 connector
Explore Warp10 data as a DSS dataset and use it as input for your data projects. Warp10 data will be displayed in long format.
- In your DSS project flow, select Dataset -> Warp10 -> Warp10
- Pick the correct Warp10 connection preset of your Warp10 instance
- For more information about the following fetch method and selector, please refer to the Warp10 fetch documentation
- Choose the fetch method and enter either the start and stop timestamps, or the now timestamp and timespan
- Enter an optional selector to only fetch data from one or several GeoTimeSeries (GTS)
- Verify that data can be read successfully with the Test & get schema button and then Create the dataset
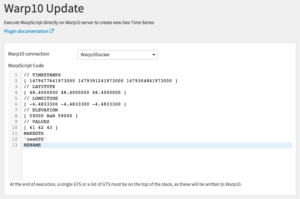
The WarpScript recipe (Warp10-engine)
Execute WarpScript in-database (on Warp10) to create and write new GeoTimeSeries in Warp10.
- In your DSS project flow, select Recipe -> Warp10 -> Warp10 Update
- Select an output folder. Only information about the status of an execution of the recipe will be stored in the folder
- Pick the correct Warp10 connection preset of your Warp10 instance
- Enter the WarpScript you would like to execute on the Warp10 instance
- At the end of execution, a single GTS or a list of GTS must be on the top of the stack
- The recipe will then automatically add the
UPDATEWarpScript function to push these GTS to the Warp10 instance
- Click Run to execute the WarpScript and update the Warp10 instance
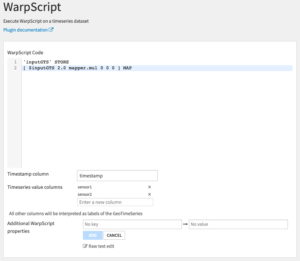
The WarpScript recipe (DSS-engine)
Execute WarpScript directly in-DSS. This mode embarks the engine to run WarpScript and doesn’t need the input data to be stored in Warp10.
- In your DSS project flow, select Recipe -> Warp10 -> WarpScript
- Select an input and output dataset
- The input dataset must have one column containing the timestamps, and one or more columns containing the values of the time series
- Enter the WarpScript to execute
- When the recipe is executed, the input dataset will be converted to a single, or list of, GTS and be placed as the top and only element on the WarpScript stack
- At the end of execution, a single, or list of, GTS must be the only item on the WarpScript stack. This will be written to the output dataset
- Select the name of the column containing the timestamps
- Select the name(s) of the column(s) the values for the timeseries
- A GTS will be created for each of these columns
- Click Run to execute the WarpScript, the output dataset will be ready when execution is complete
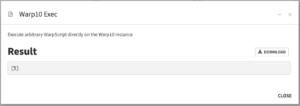
The WarpScript macro
Execute arbitrary WarpScript on Warp10.
- In your DSS project, select Macros -> Warp10 Exec
- Pick the correct Warp10 connection preset of your Warp10 instance
- Enter the WarpScript you would like to execute on the Warp10 instance, and click Run Macro

- The resulting WarpScript stack at the end of execution will be displayed