
Plugin information
| Version | 2.3.3 |
|---|---|
| Author | Dataiku |
| Released | 2020-06 |
| Last updated | 2024-04 |
| License | Apache Software License |
| Source code | Github |
| Reporting issues | Github |
How to set up
If you are a Dataiku admin user, you need to follow the instructions on the README.md file of the plugin GitHub page in order to install the required packages on the DSS instance machine.
If you are not an admin, you can forward this to your admin and/or scroll down to the How to use section.
Warning: You must first install Tesseract on your machine in order to use the tesseract OCR engine !
How to use
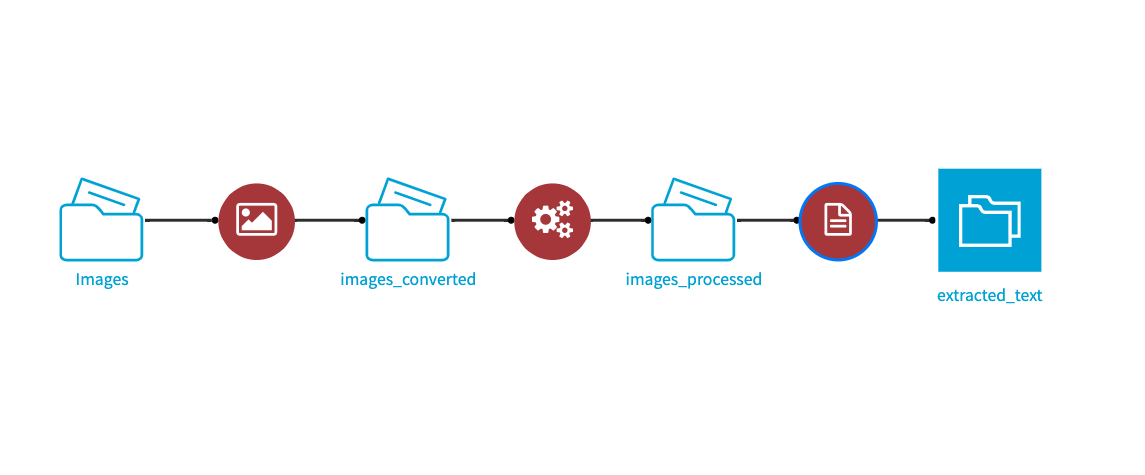
This plugin has multiple components: OCR recipe, Text extraction recipe, Image conversion recipe, Image processing recipe and a notebook template.
For instance, some of these multiple components can be used together in a single flow to first convert PDFs into images, then process these images and finally extract text from them using OCR.
Text extraction recipe
The Text extraction recipe takes as input a folder of various file types (pdf, docx, html, etc) and outputs a dataset with three columns: filename, extracted text and error messages when it failed to extract any text.
For some input formats, it is possible to extract text in chunks, with an extra metadata column containing section info. This will output one row by unit of document. A unit can be a page in a PDF file or a section in a DOCX, HTML, Markdown, etc. These metadata can either be in plain text or JSON format.
OCR recipe
The OCR recipe takes as input a folder of PDF/JPG/JPEG/PNG/TIFF files and outputs a dataset with two columns: filename and extracted text from OCR.
The recipe has multiple parameters:
- Recombine multiple-page PDF together: Extracted text from multiple-page PDFs and images with name pattern $FILENAME_pdf_page_XXXXX (images created from the same multiple-page PDF in the Image conversion recipe) are concatenated.
- OCR Engine: Both the Tesseract and EasyOCR engines are available. The Default option will select an installed OCR engine (if Tesseract is not installed on the instance, then EasyOCR will be the default engine).
- Specify language: Specify the language to be used by the OCR engine by entering its code name depending on the selected OCR engine (Tesseract languages must be installed beforehand, ask your admin). By default, if no language is specified, it will use English.
Image conversion recipe
Because the Text extraction recipe only works on greyscale JPG images, you may have to use the Image conversion recipe first.
The Image conversion recipe takes as input a folder of images (JPG/JPEG/PNG/TIFF) and PDFs. It converts them into greyscale JPG images. If a PDF has multiple page, it creates a subfolder with one image per page.
You can also set some advanced parameters in the image conversion:
- DPI (Dot Per Inch): set the DPI of images extracted from PDFs only.
- Quality: set the quality of images according to the PIL package parameter.
Notebook template
You may want to process images before extracting text from images in order to get better results.
There is a notebook template where you can explore the effect of different image processing techniques.
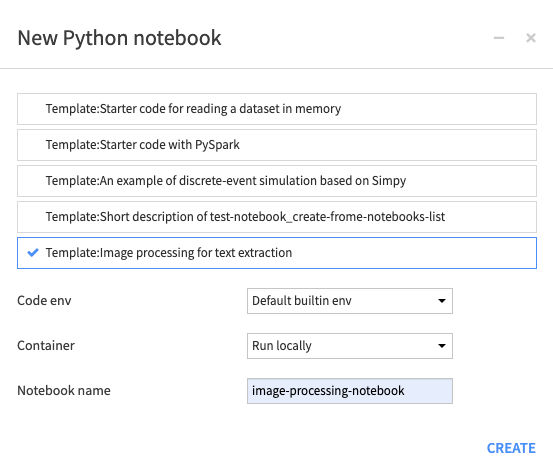
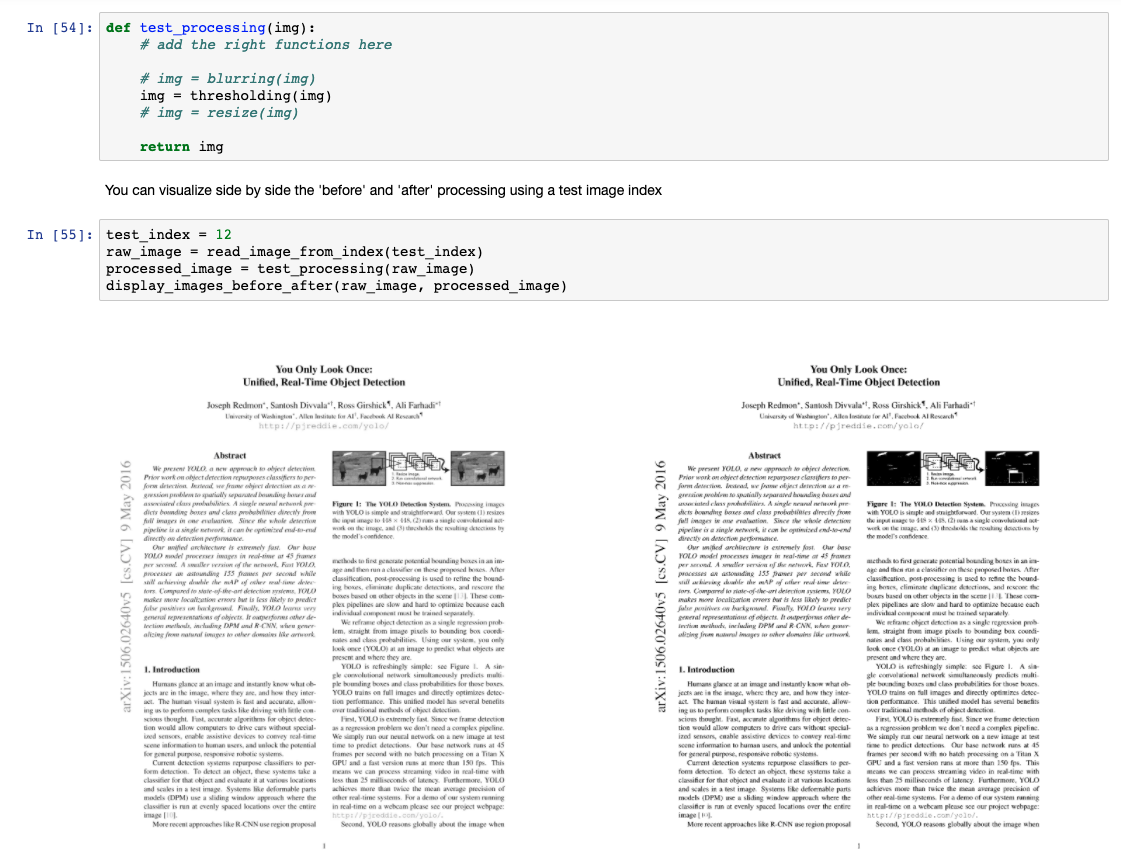
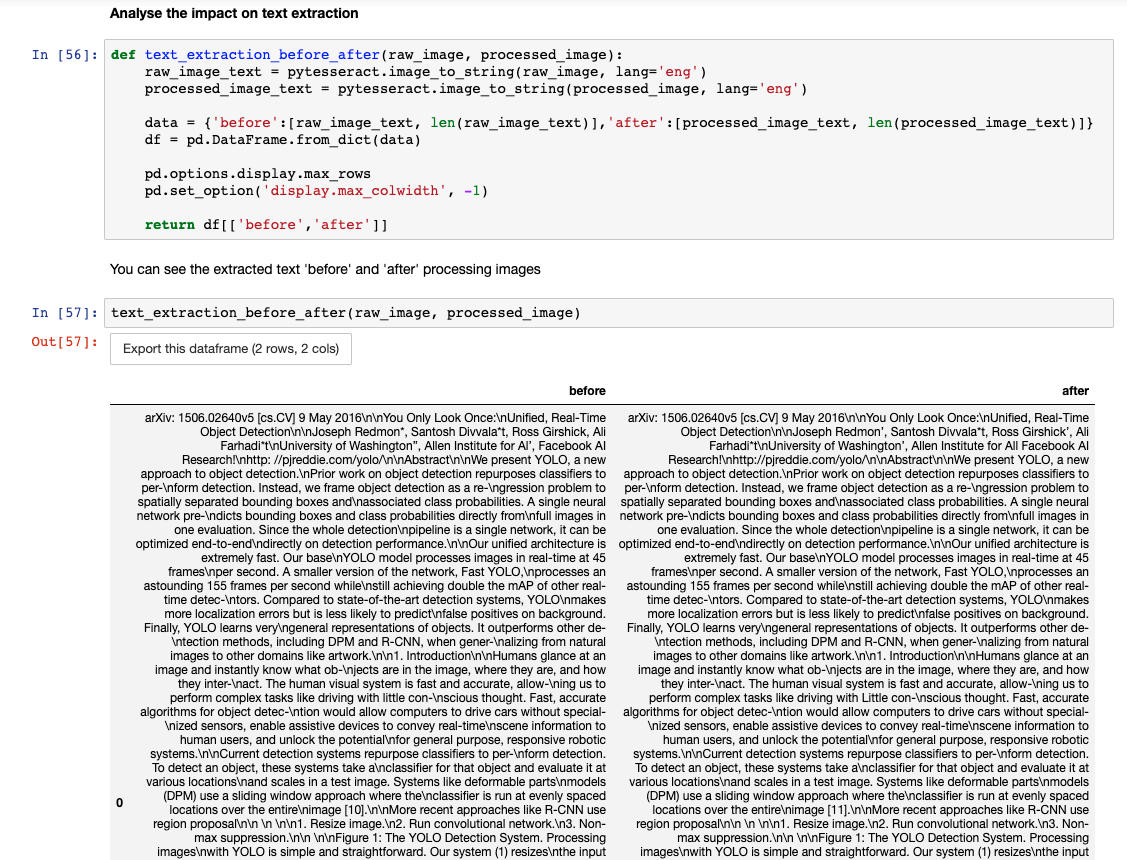
Image processing recipe
This recipe will process each greyscale JPG images of the input folder using the functions defined by the user in the recipe parameter’s form. Both input and output of these functions are numpy array image.