


Plugin information
| Version | 1.1.3 |
|---|---|
| Author | Dataiku (Alexandre VIGNY, Frederic TERRAZZONI) |
| Released | 2023-03 |
| Last updated | 2023-07 |
| License | Apache Software License |
Description
This plugin includes 4 recipes allowing you to leverage OpenAI GPT API in a visual way (no code) in Dataiku.
The plugin features one generic recipe, “Text Generation,” which allows you to describe any task, along with three specific recipes designed for Classification, Question Answering and Summarisation.
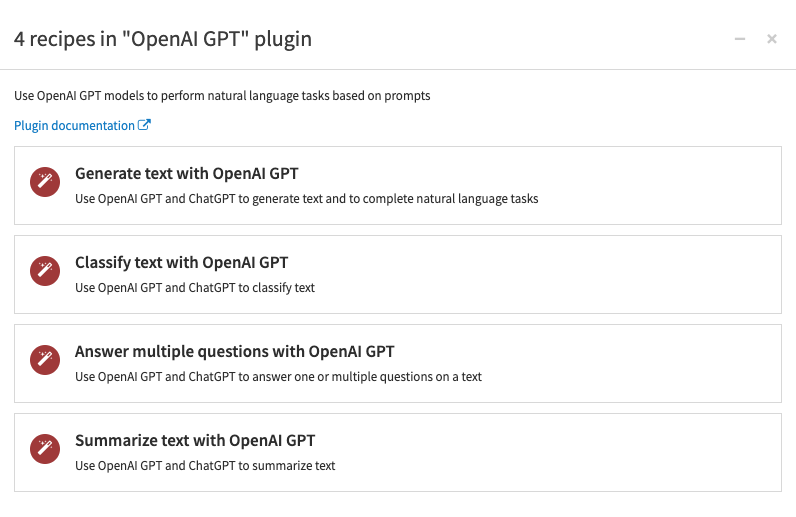
Table of contents
How to set up
If you are a Dataiku admin user, follow these configuration steps right after you install the plugin. If you are not an admin, you can forward this to your admin and scroll down to the How to use section.
OpenAI
1. Create an OpenAI account & get your OpenAI API Key
In order to use this plugin you need to setup an account on OpenAI’s website and request API access. You will need the API Key in Dataiku DSS.
2. Create an API configuration preset – in Dataiku DSS
In Dataiku DSS, navigate to the Plugin page > Settings > API configuration and create your first preset.
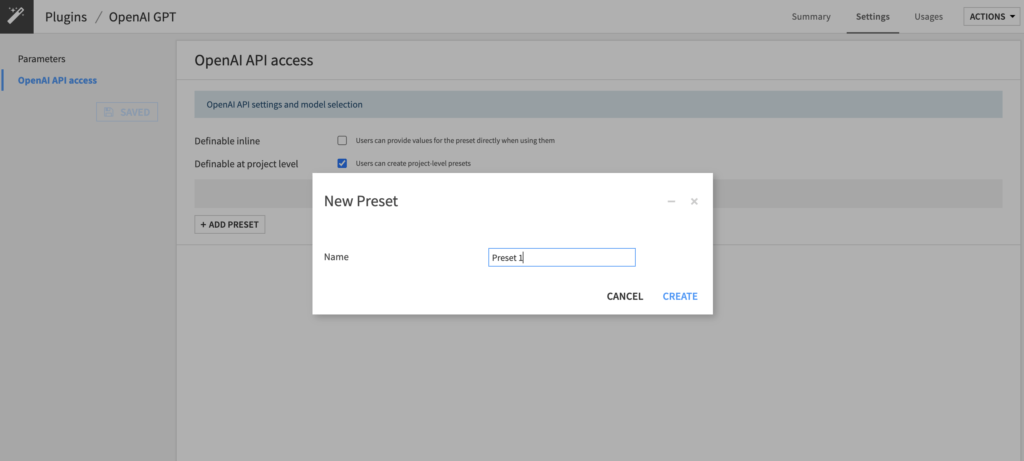
3. Configure the preset – in Dataiku DSS
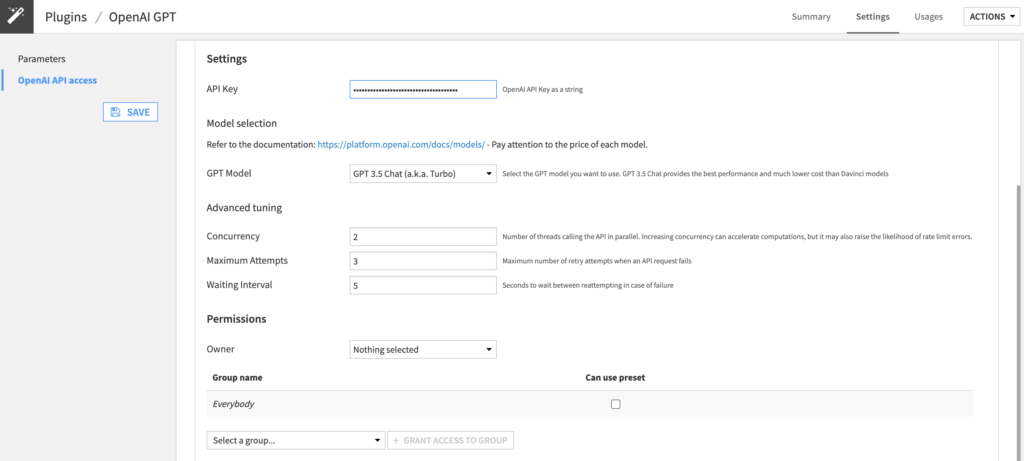
- Copy-paste your OpenAI API key in the corresponding field.
- Review the settings.
- Set the Permissions of your preset. You can declare yourself as the Owner of this preset and make it available to everybody, or to a specific group of users. Any user belonging to one of those groups on your Dataiku DSS instance will be able to see and use this preset.
- Save the settings.
Voilà! Your preset is ready to be used.
Azure OpenAI
1. Create a resource and deploy a model
In order to use this plugin you need an Azure subscription and access to Azure OpenAI.
Deploy a model (chat models like gpt-35-turbo and gpt-4 are recommended).
Please refer to Azure documentation.
2. Create an API configuration preset – in Dataiku DSS
In Dataiku DSS, navigate to the Plugin page > Settings > API configuration and create your first preset.
3. Configure the preset – in Dataiku DSS
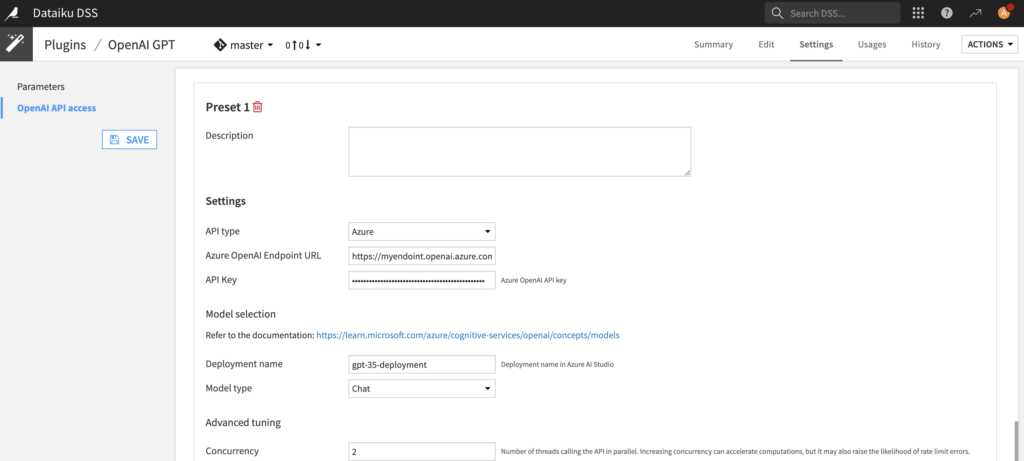
- Fill the Azure OpenAI ressource Endpoint URL.
- Copy-paste your Azure OpenAI ressource API key.
- Enter the Deployment name and the corresponding Model type.
- Review the settings.
- Set the Permissions of your preset. You can declare yourself as the Owner of this preset and make it available to everybody, or to a specific group of users. Any user belonging to one of those groups on your Dataiku DSS instance will be able to see and use this preset.
- Save the settings.
Voilà! Your preset is ready to be used.
How to use
Text Generation
The “Generate text with OpenAI GPT“ can be used to perform tasks with or without an input dataset.
In the following example, we’ll show this by starting without an input text to create a dataset filled with city names. Then, we’ll use the results of this task as our input dataset for the next task: writing detailed descriptions of these cities.
1. Generate without input rows
To start using the text generation recipe without an input dataset, navigate to the Flow, click on the + RECIPE button and access the Open AI GPT menu.
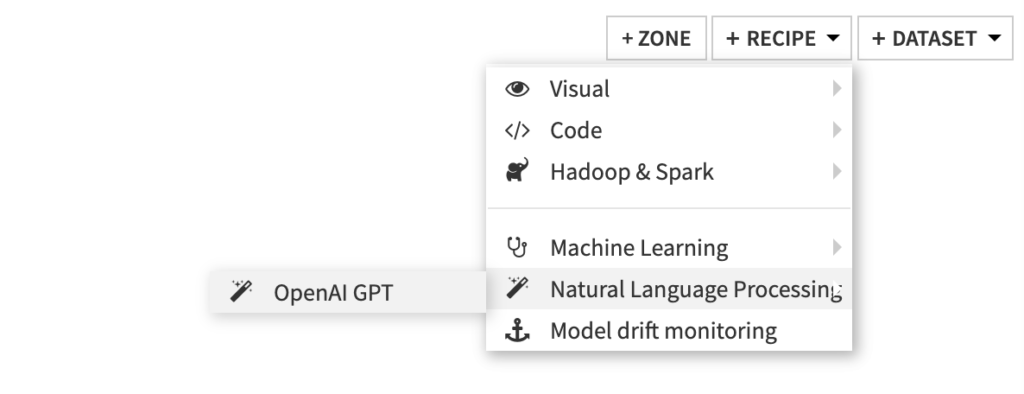
In the modal, select the first recipe “Generate text with OpenAI GPT“.

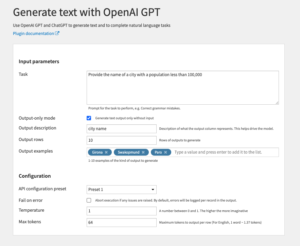
Settings
Output
Dataset with generated text
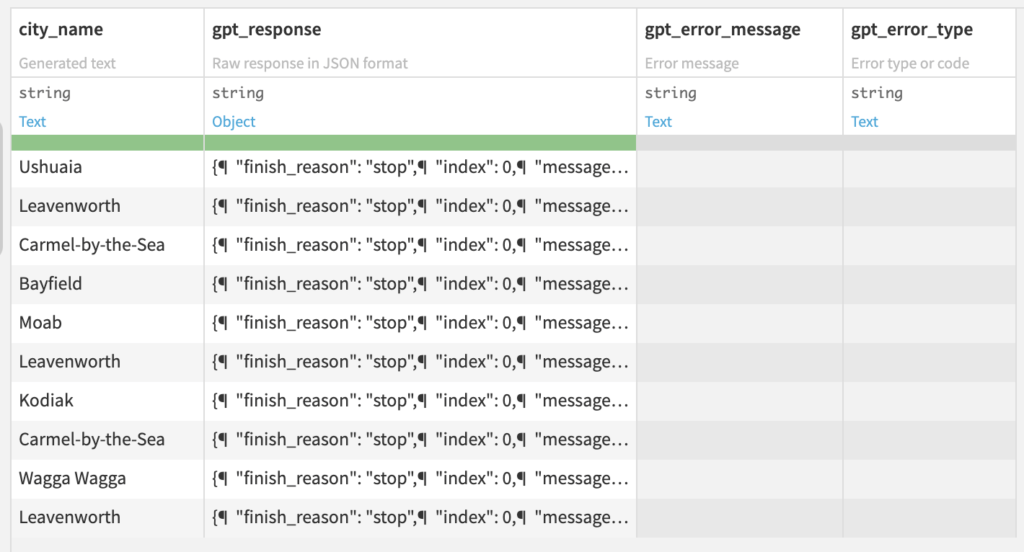
The output dataset contains the generated text:
- A column named after the “output description” contains the GPT-generated data
- The “gpt_response” contains the raw API response
- The “gpt_error_message” and “gpt_error_type” columns contain errors, if any
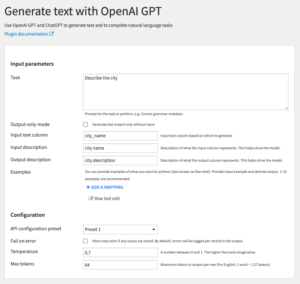
2. Generate with input rows
Generating based on input rows requires an input dataset with text data. This example uses the output dataset from the generating without input section and its city column, to generate a description of the city.
To start using the text generation recipe with an input dataset:
- Navigate to the Flow, click on the + RECIPE button, access the Open AI GPT menu and and select the “Generate text with OpenAI GPT recipe“
- Alternatively, you can select the input dataset in your flow, click on the Open AI GPT plugin recipe icon in the right panel, and then select the “Generate text with OpenAI GPT recipe“

Settings
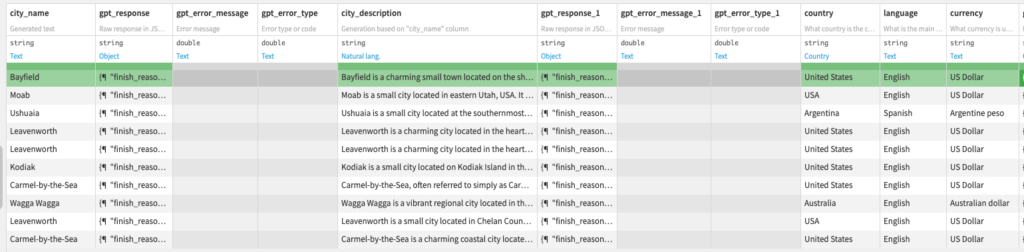
Output
Dataset with generated text based on an input column
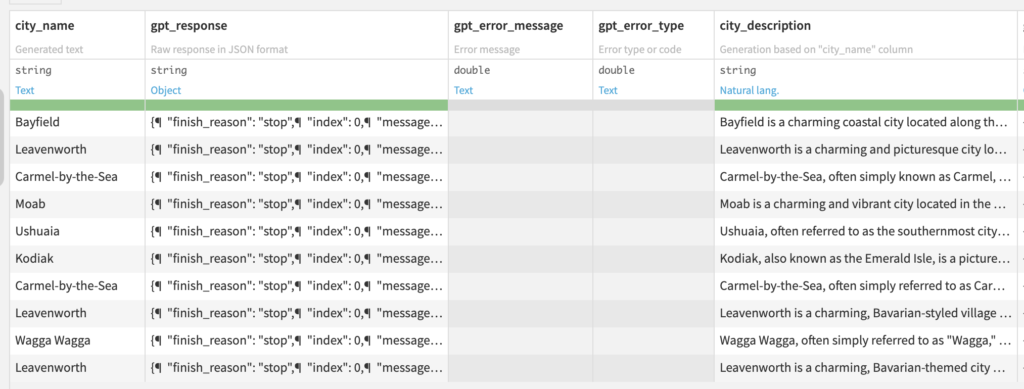
Refer to the generating without input section for an explanation of the output columns.
Question Answering
If you need to ask several questions about the same piece of input text, using the text generation feature isn’t the best choice. When you include several questions in the prompt, all the responses are grouped together in a single column. This can make it more difficult when you want to use the answers for further analysis. It’s also less efficient to use the Text Generation feature one after another. The input text would need to be sent multiple times, which not only slows down the whole process but also costs more due to higher usage of the Open AI API.
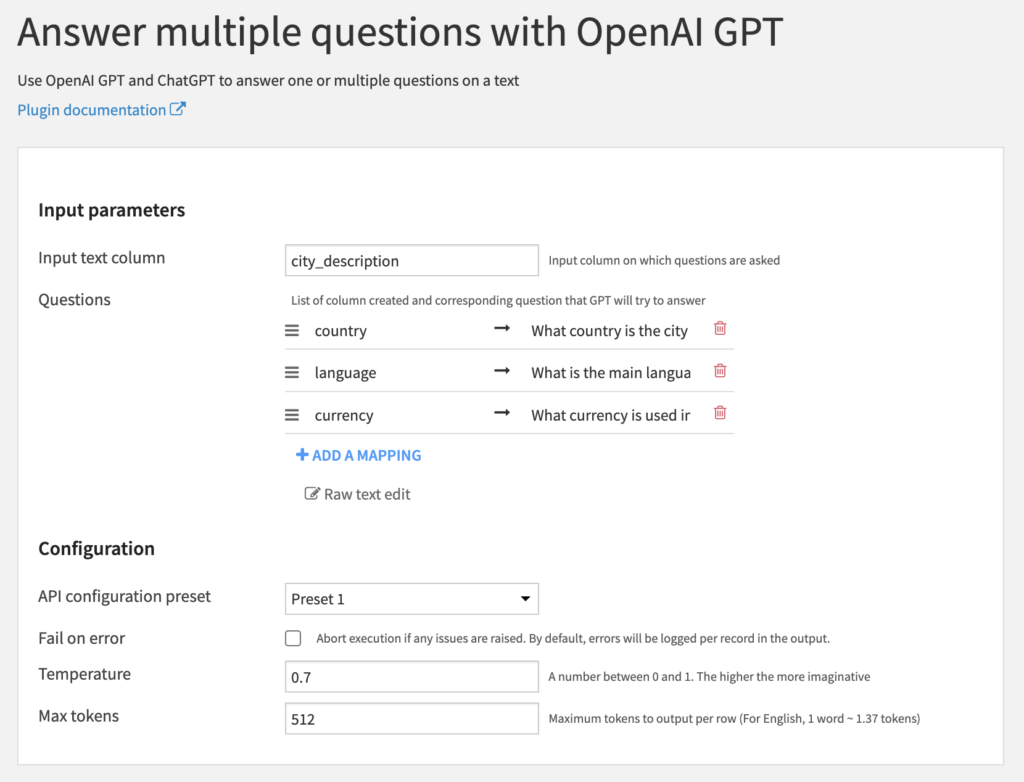
With the “Answer questions with OpenAI GPT” recipe, you can ask as many questions as you like about the same text. Each question will get its own column for answers, simplifying the process of later analysis.
The following example uses the output dataset from the text generation sections and the city column to ask questions about the cities.
To start using the Question Answering recipe:
- Navigate to the Flow, click on the + RECIPE button, access the Open AI GPT menu and and select the “Answer multiple questions with OpenAI GPT“
- Alternatively, you can select the input dataset in your flow, click on the Open AI GPT plugin recipe icon in the right panel, and then select the “Answer multiple questions with OpenAI GPT“.

Settings
Output
Dataset with answer(s) to question(s)
Summarization
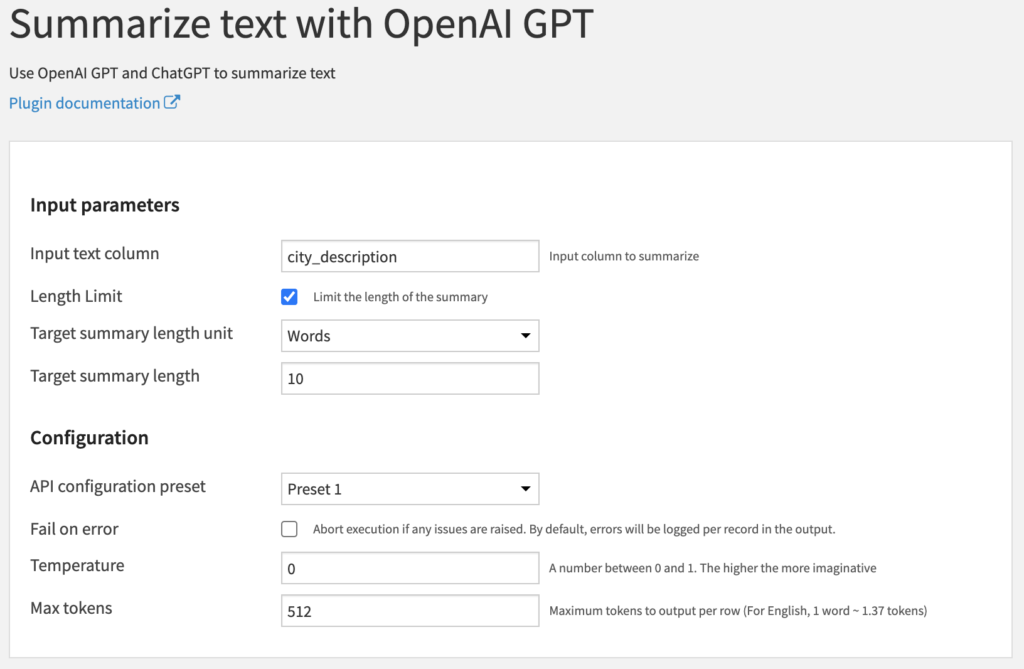
The “Summarize text with OpenAI GPT“ recipe can be used to summarize text into short summaries.
This can be a particularly useful feature for applications like extracting key points from customer feedback, summarizing news articles, or condensing large text documents.
The following example uses the output dataset from the text generation sections to generate summaries of the cities descriptions.
To start using the summarization recipe:
- Navigate to the Flow, click on the + RECIPE button, access the Open AI GPT menu and and select the “Summarize text with OpenAI GPT“
- Alternatively, you can select the input dataset in your flow, click on the Open AI GPT plugin recipe icon in the right panel, and then select the “Summarize text with OpenAI GPT“.

Settings
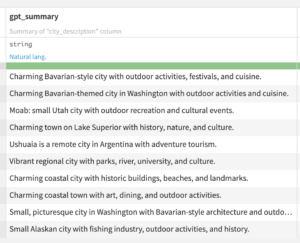
Output
Dataset with the generated “gpt_summary’ column summary
Classification (Zero and Few shots)
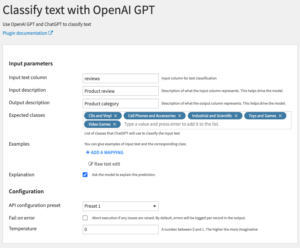
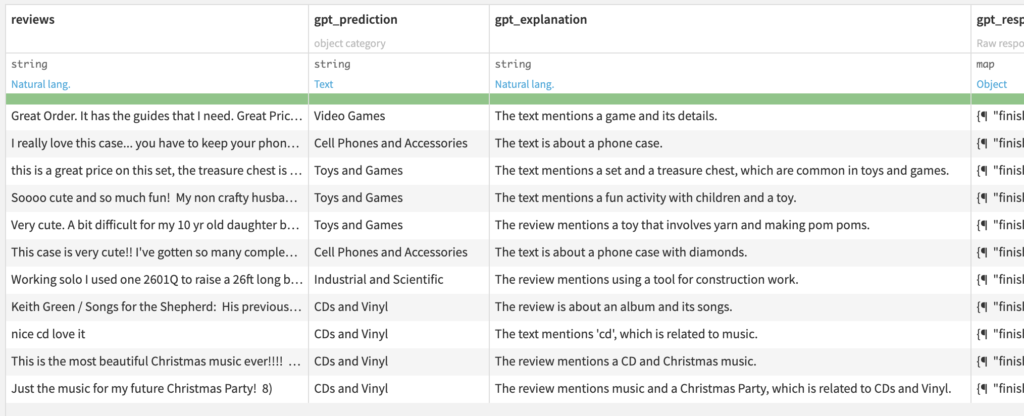
The “Classify text with OpenAI GPT“ recipe can be used to classify text into your custom classes, with or without examples, often referred to as zero-shot or few-shot classification. Additionally, it’s possible to request explanations for the classifications made.
The following example uses the input dataset from product text reviews and the product description column to classify the products into categories.
To start using the zero/few shots classification recipe:
- Navigate to the Flow, click on the + RECIPE button, access the Open AI GPT menu and and select the “Classify text with OpenAI GPT“
- Alternatively, you can select the input dataset in your flow, click on the Open AI GPT plugin recipe icon in the right panel, and then select the “Classify text with OpenAI GPT“

Settings
Output
Dataset with the generated predictions and explanations
Advanced usage and settings
Advanced options at preset level
- The Maximum Attempts means that if an API request fails it will be reattempted (default 3 reattempts). Regardless of whether the request fails because of e.g. an access error with your OpenAI account or a throttling exception due to too many concurrent requests, it will be tried again.
- The Waiting Interval specifies how long to wait before retrying a failed attempt (default 5 seconds). In case of a throttling exception due to too many requests increasing the Waiting Interval may help, however, we recommend first decreasing the Concurrency setting.
Advanced options at recipe level
- The Temperature parameter controls the imagination of the model. It can be between 0 and 1. Try a lower value for factual generations or a higher one for more creative outputs.
- The Max tokens parameter determines the maximum tokens the model will generate per row. As OpenAI charges based on the number of tokens, lowering this value can help control costs.
See the OpenAI Documentation for more details
Happy natural language processing!