


Plugin information
| Version | 1.1.0 |
|---|---|
| Author | Dataiku (Niklas MUENNIGHOFF, Mehdi HAMOUMI) |
| Released | 2021-08-06 |
| Last updated | 2023-05-02 |
| License | Apache Software License |
| Source code | Github |
| Reporting issues | Github |
This plugin lets you translate text to another language using the Azure Translator.
Note that the Azure Translation API is a paid service, check their API pricing page for more information.
How to set up
If you are a Dataiku and Microsoft Azure admin user, follow these configuration steps right after you install the plugin. If you are not an admin, you can forward this to your admin and scroll down to the How to use section.
1. Create an Azure Translator Resource
In order to use the Azure Translation API, you need an Azure account. If you don’t have one yet, you can sign up for a free account here.
Next you will have to create an Azure Translator resource. Follow the official instructions here to create an Azure Translator resource.
Once created, navigate to the Translator resource and under “Keys and Endpoint” find your API Key(s) and Location:
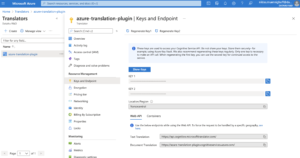
Next we will need to provide DSS with one of the API Keys and your location.
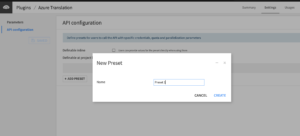
2. Create an API configuration preset – in Dataiku DSS
In Dataiku DSS, navigate to Plugin page > Settings > API configuration and create your first preset.
3. Configure the preset – in Dataiku DSS
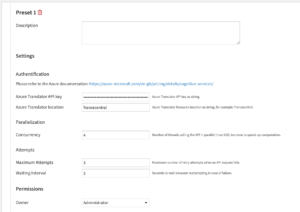
- Fill the AUTHENTICATION settings
- Enter your Azure Translator API key in the corresponding fields and the region specified in your translator resource.
- (Optional) Review the PARALLELIZATION and ATTEMPTS settings
- The default Concurrency parameter means that 4 threads will call the API in parallel.
- We do not recommend changing this default parameter unless your server has a much higher number of CPU cores.
- The default Maximum Attempts means that if an API request fails, it will be tried another 3 times.
- Regardless of why the request fails (e.g. an access error with your Azure account or a throttling exception due to too many concurrent requests), it will be tried again.
- Note that Azure may charge you depending on the nature of the error, for each additional attempt.
- The default Waiting Interval specifies how long to wait before retrying a failed attempt.
- In case of a throttling exception due to too many requests increasing the Waiting Interval may help, however, we recommend first decreasing the Concurrency setting.
- The default Concurrency parameter means that 4 threads will call the API in parallel.
- Set the Permissions of your preset
- You can declare yourself as the Owner of this preset and make it available to everybody, or to a specific group of users.
- Any user belonging to one of these groups on your Dataiku DSS instance will be able to see and use this preset.
Voilà! Your preset is ready to be used.
Configuring additional presets can be useful to segment plugin usage by user group. For instance, you can create a “Default” preset for everyone and a “High performance” one for your Marketing team, with separate billing for each team.
How to use
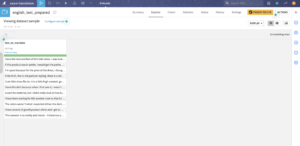
Let’s assume that you have installed this plugin and that you have a Dataiku DSS project with a dataset containing a column of text to translate.
Input
- Dataset with a text column to translate
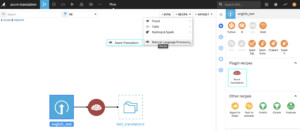
Azure Translation recipe
To create your first recipe, navigate to the Flow, click on the + RECIPE button and access the Natural Language Processing menu. If your dataset is selected, you can directly find the plugin in the right panel.
Settings
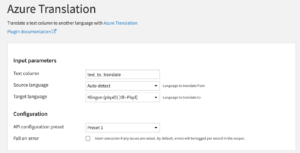
- Review INPUT parameters
- The Text column parameter is the column in the input dataset that you wish to translate.
- The Source language parameter is the original language of the Text column . If you would like the translation api to infer the original language, you can select the Auto-detect option.
- The Target language parameter is the language you would like to translate to.
- Review CONFIGURATION parameters
- The Preset parameter is automatically filled by the default one made available by your Dataiku admin. You may select another one if multiple presets have been created.
- The Fail on error parameter lets you choose if the recipe should abort execution if any issues are raised. If unchecked, any errors will be logged in two additional columns in the output.
Output
- Dataset with text translated to another language
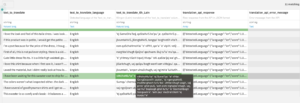
The columns of the output dataset are as follows:
- [Input dataset columns]
- All columns from the input dataset will be preserved
- [selected column]_language
- The detected language of the selected column
- Only present if Auto-detect has been selected as the source language
- [selected column]_{target iso code}
- The selected column in its translated version
- translation_api_response
- Raw API response in JSON form
- translation_api_error_message
- The error message in case an error occurred
- Only present if Fail on error is not selected during configuration
- translation_api_error_type
- The error type in case an error occurred
- Only present if Fail on error is not selected during configuration
Happy natural language processing!