

Plugin information
| Version | 0.0.2 |
|---|---|
| Author | Natif.ai |
| Released | 2021-06 |
| Last updated | 2021-06 |
| License | Apache Software License |
Natif.ai Intelligent Document Processing Plugin will help you process documents (PDF, Tiff, Jpeg) into structured data and extract the content. The technology behind is a combination of computer vision / deep-learning algorithms and NLP. The plugin will automatically pre-process the documents, read the data and then extract it.
How to set up
Setting up the code environment
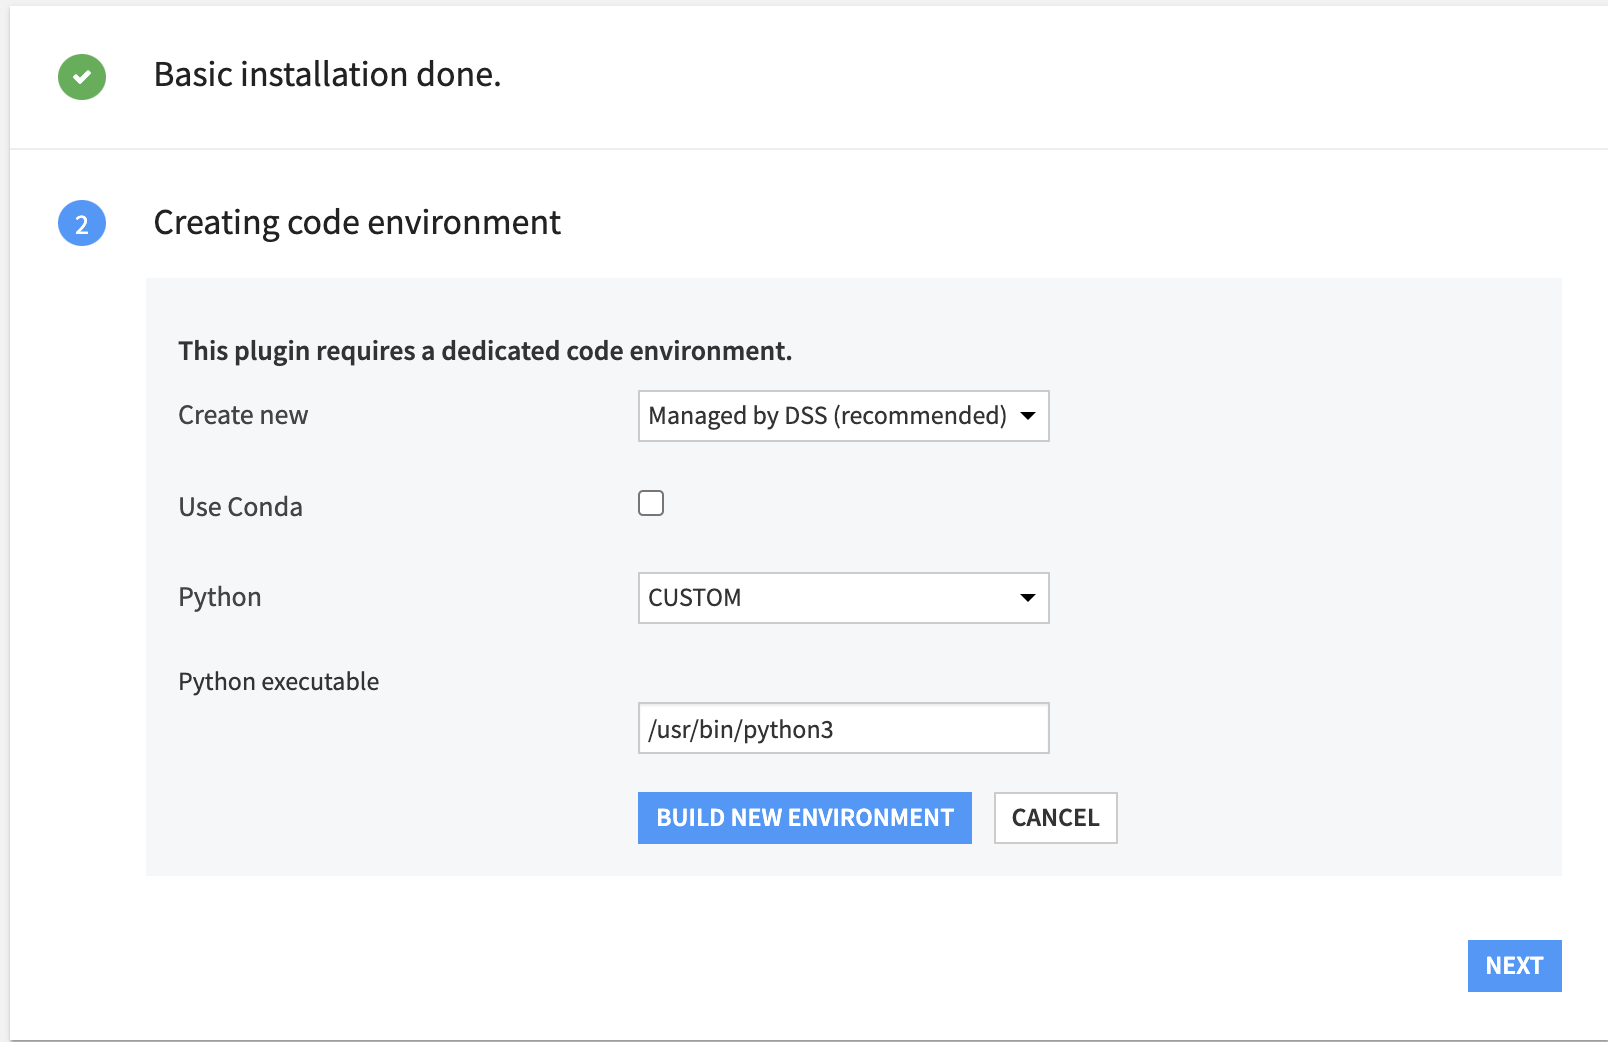
This plugin requires a code environment setup at the time of plugin installation.
Credentials creation
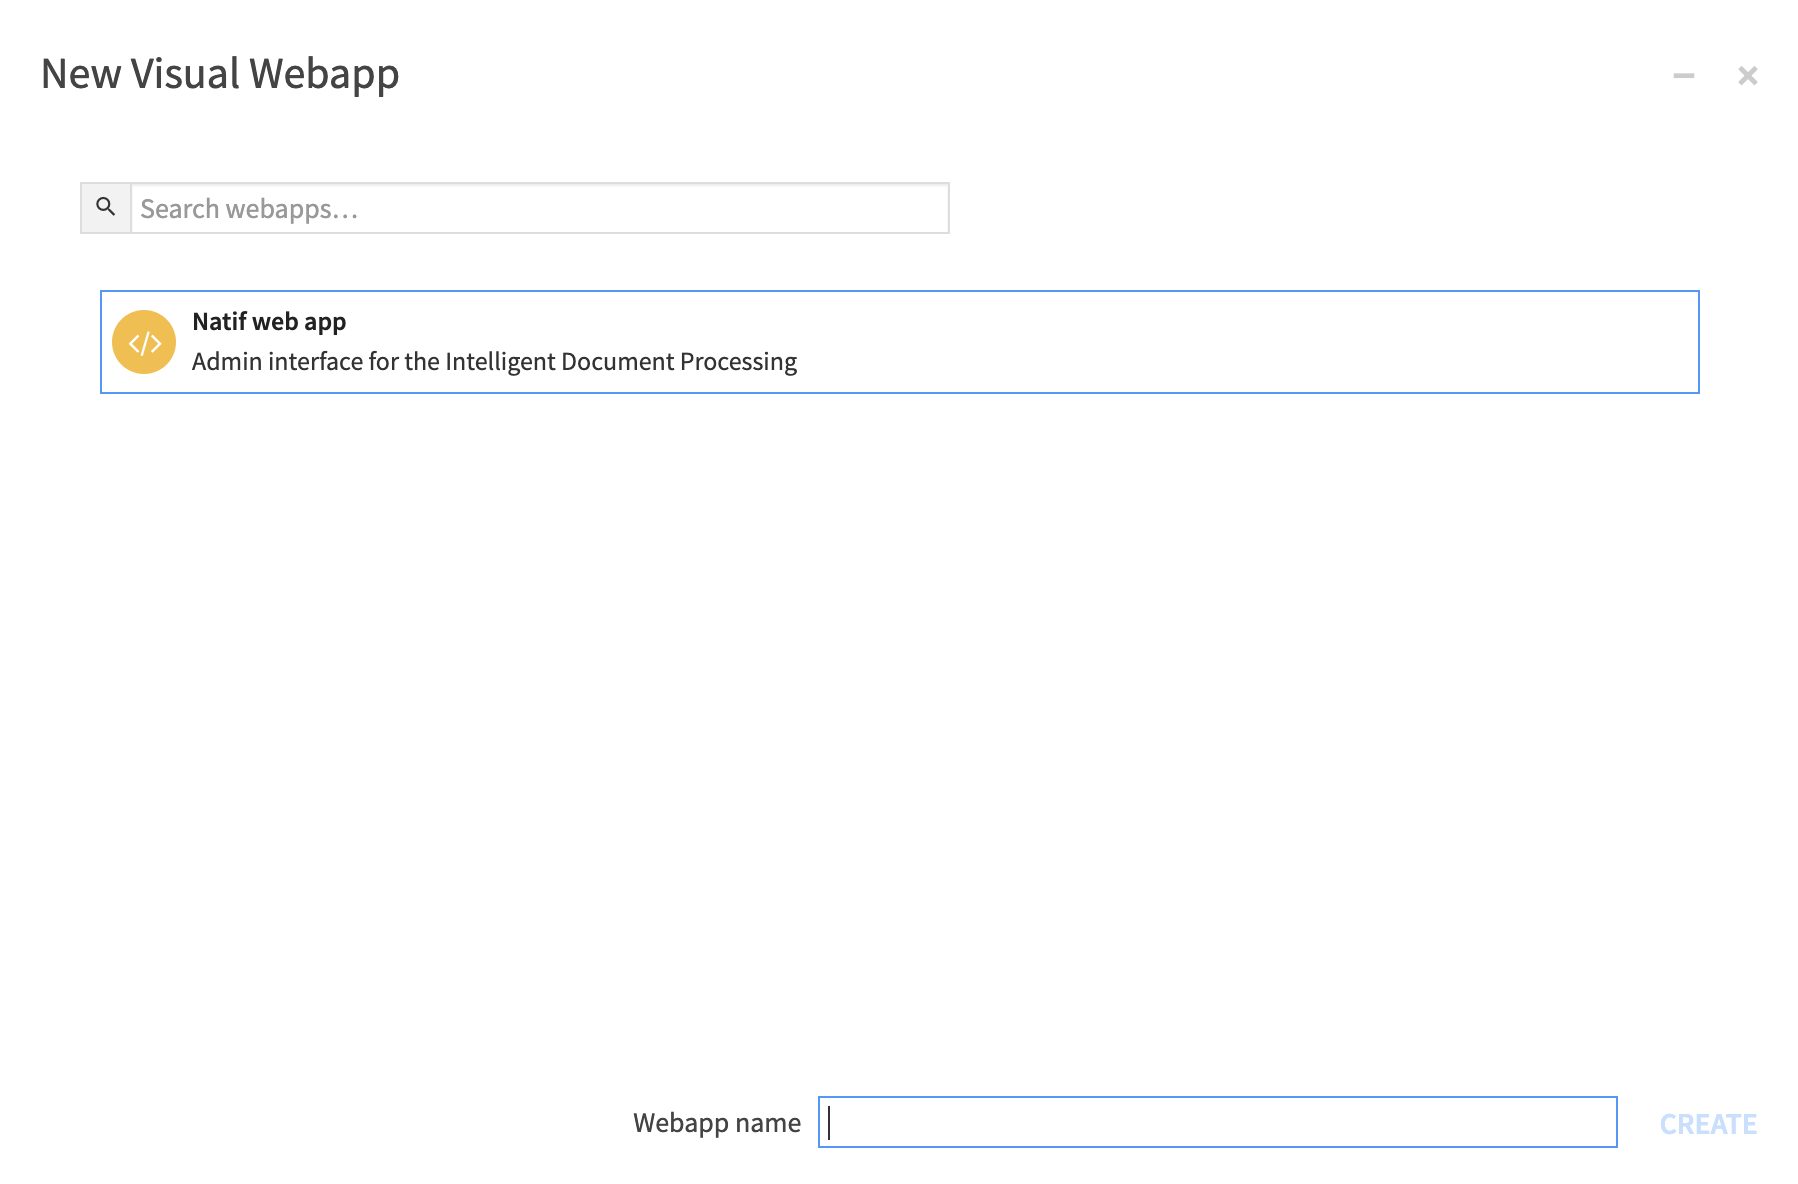
After the plugin installation, create a new project. Once the project is created, create a visual web app as follows and name it accordingly.
Once the web app is set up, navigate to the landing page and click on create an account.
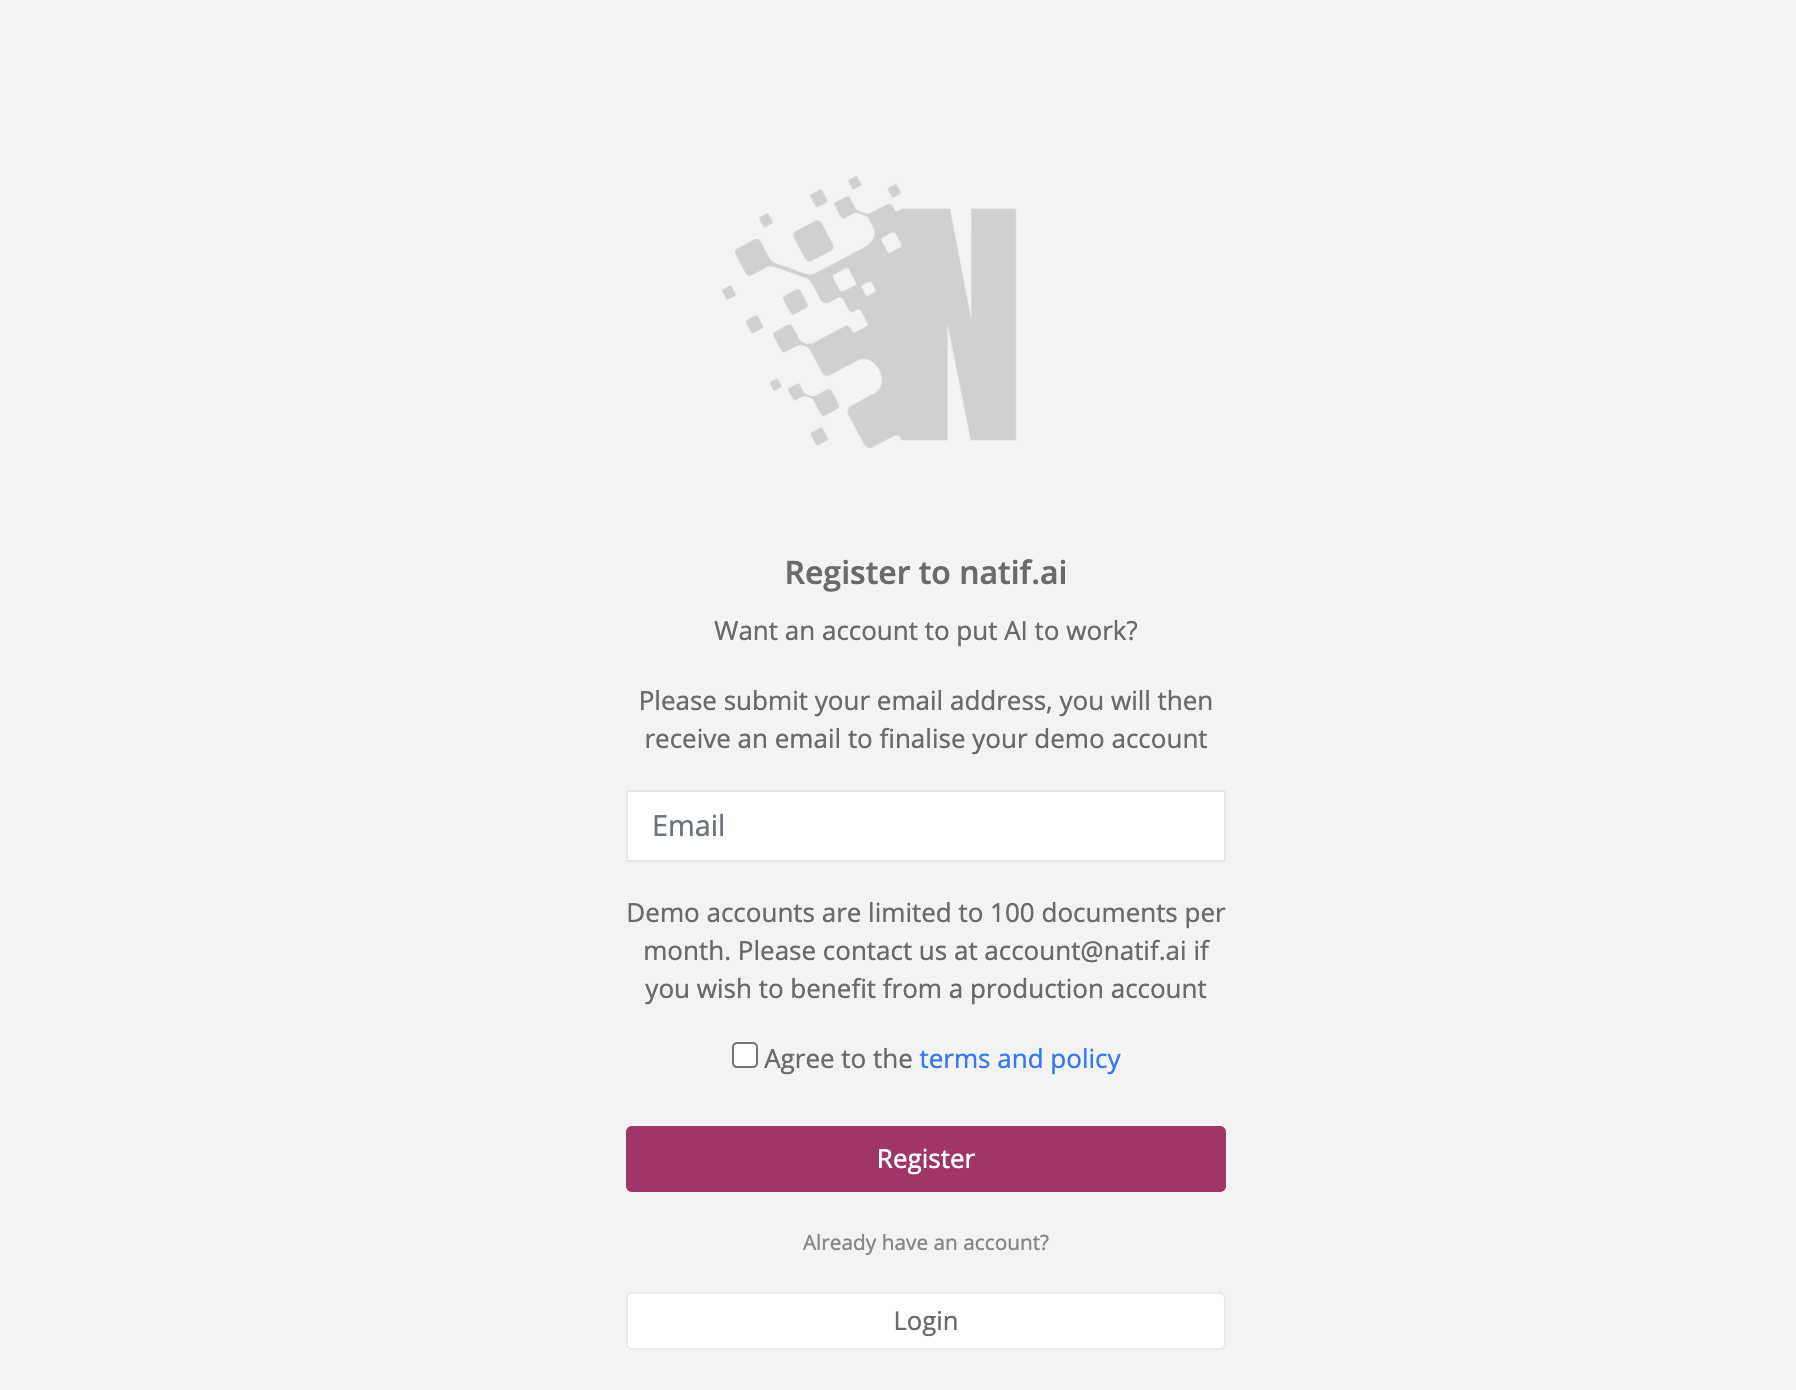
You will receive instructions to your e-mail upon agreeing to the terms and policy and clicking register. Please follow the instructions to setup the username and password to your natif.ai demo account. To verify credentials creation, you can login using the web app.
Configuration of the credentials
Once the credentials are created, they have to be configured for the plugin. It consists of 2 steps:
Step 1 : Create a preset in the plugin settings
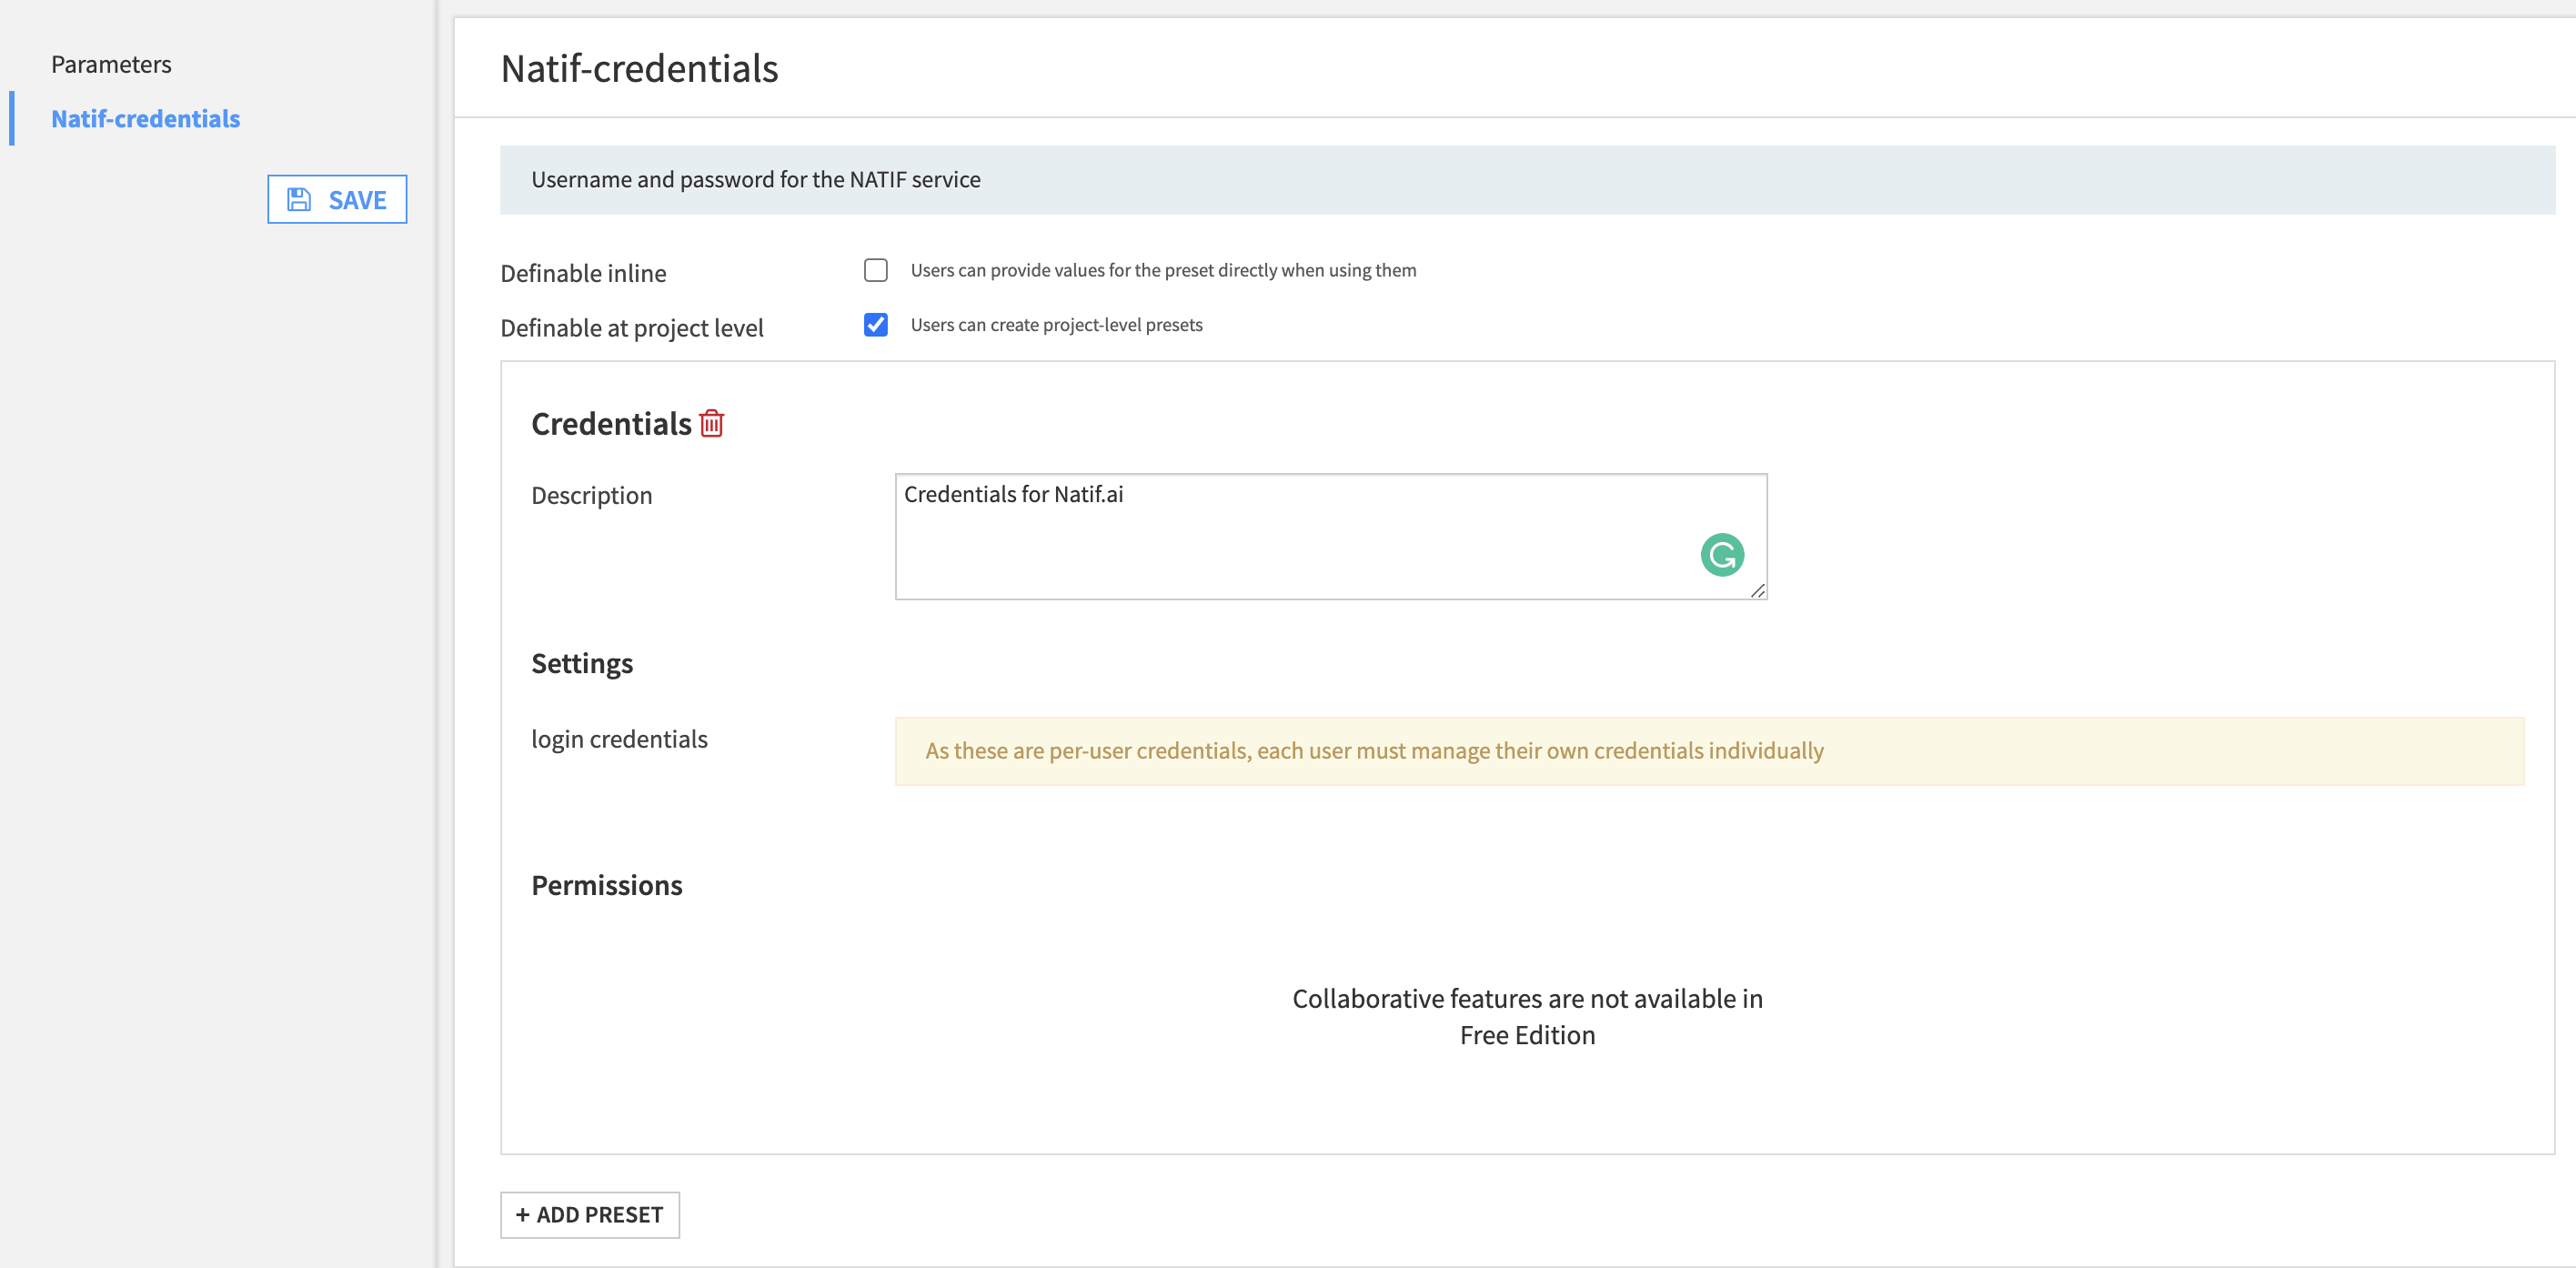
- Navigate to the Settings tab of the plugin
- Add a Preset
- Type a description
- Click save.
Step 2 : Configure Plugin credentials
The configuration can be found under User center > Profile and settings > Credentials > Plugin Credentials

Click on the edit icon to enter the credentials and the use the credentials created from the previous step and click ok. This is a one-time configuration and now that everything is set up, we can start using the plugin.
How to use
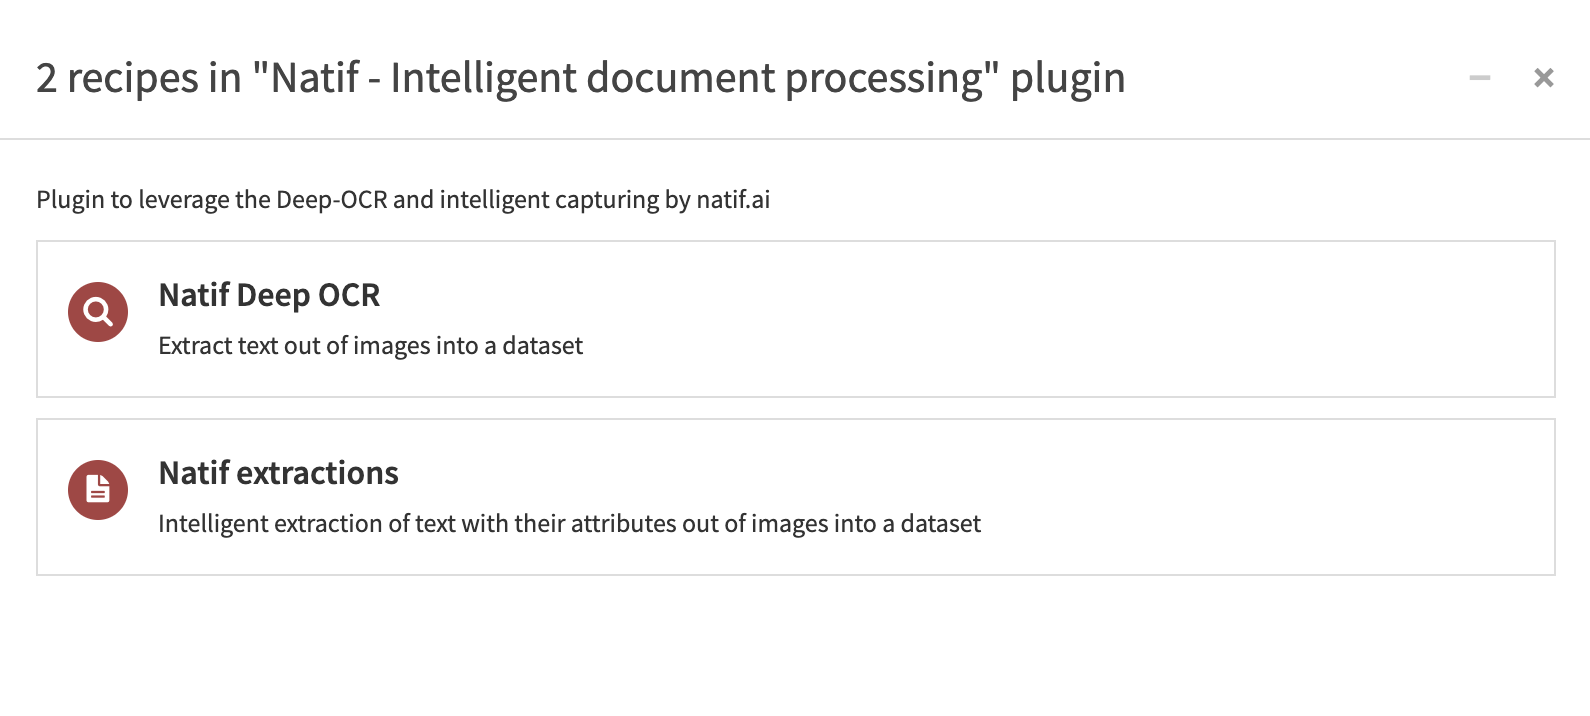
Using the Deep-OCR recipe
This recipe can be added as follows
1. Navigate to the project flow
2. Click on the Recipe dropdown and you should see the Natif plugin.
3. Clicking on the plugin reveals the recipe components
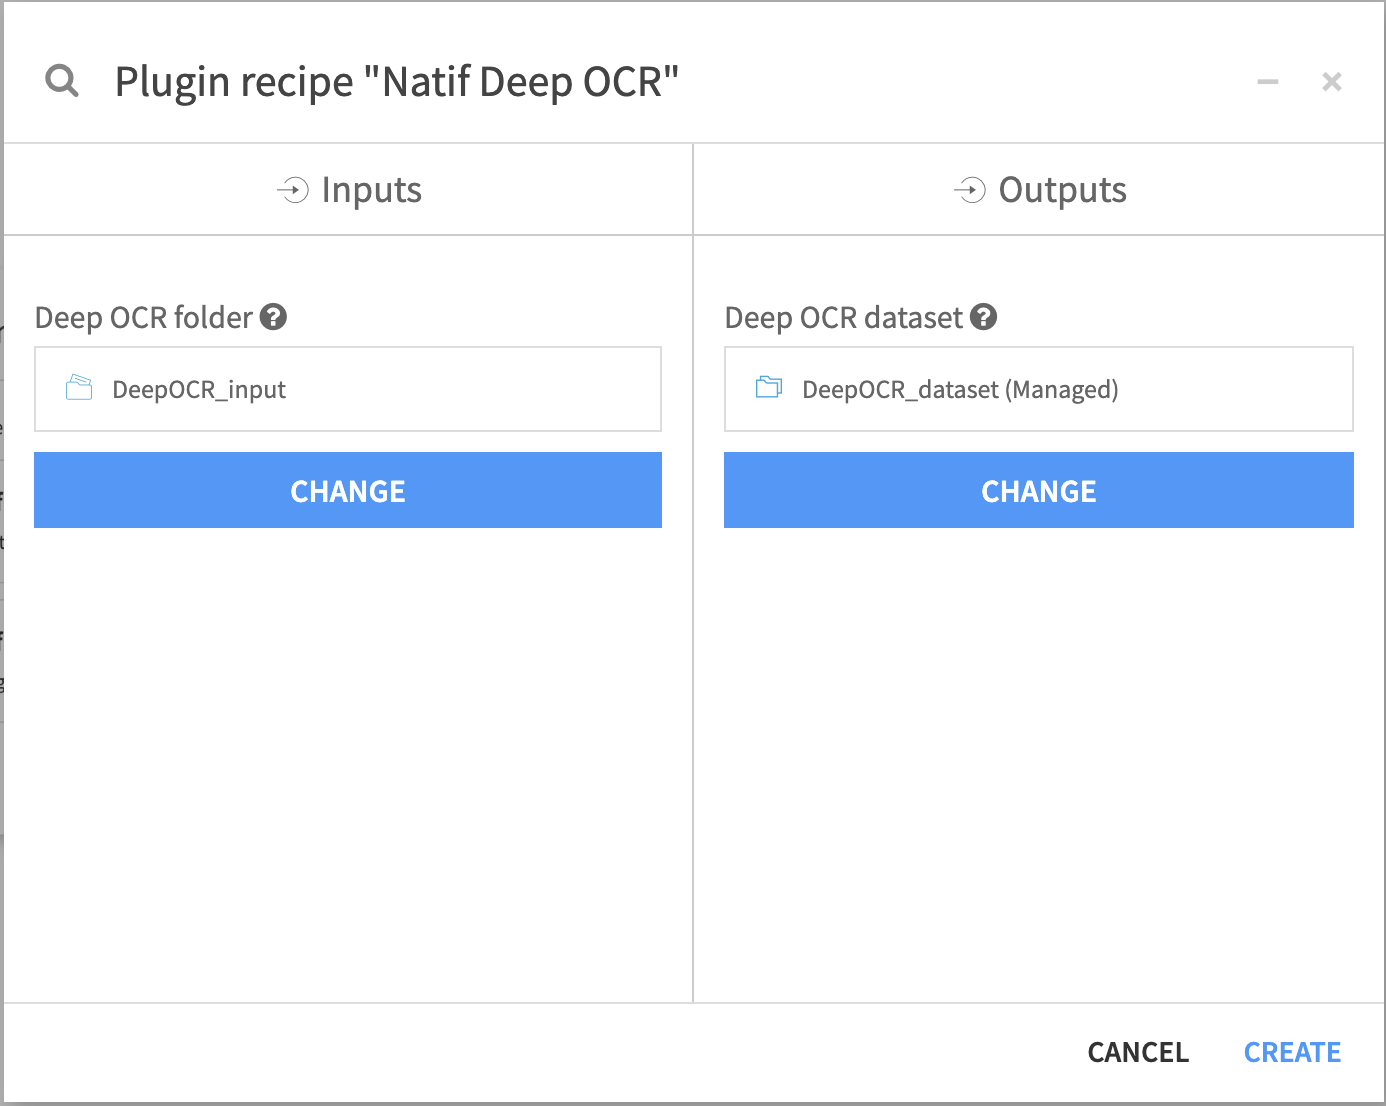
4. Select Natif Deep OCR and define the input(Managed folder) and the output (Managed dataset) and click create.
5. Place the documents you need processed for Deep-ocr in the input folder, navigate to the recipe and select the credentials(for configuration refer the documentation) and hit run.

Using the Extractions recipe
This recipe can be added as follows
1. Navigate to the project flow
2. Click on the Recipe dropdown and you should see the Natif plugin.
3. Clicking on the plugin reveals the recipe components

4.Create a new dataset or use an existing dataset as the output of the recipe.
5. Navigate to the recipe, select the credentials defined in the previous step and select the document type of the documents placed in the input folder (Invoices/Order confirmations/Delivery note) and hit run.
Front-End demonstration
The web-app can be used to view the history of uploaded files and also helps visualise the OCR and extraction modules. Post login, dates can be set to view documents uploaded/processed at a specific time frame. Furthermore, individual documents can be inspected for their underlying OCR /extractions by clicking on the link in the Document ID column for the respective document.