Plugin information
| Version | 1.0.4 |
|---|---|
| Author | Dataiku (Alex COMBESSIE, Joachim ZENTICI) |
| Released | 2020-11 |
| Last updated | 2025-05 |
| License | Apache Software License |
| Source code | Github |
| Reporting issues | Github |
With this plugin, you will be able to:
- Detect content (objects, landmarks, logos, products, web entities) in images
- Detect text (typed or handwritten) in images and PDF/TIFF documents
- Detect unsafe content (nudity, violence, spoof, etc.) in images
- Crop images automatically to a given aspect ratio
Note that the Google Cloud Vision API is a paid service. You can consult the API pricing page to evaluate the future cost.
How to set up
If you are a Dataiku and Google Cloud admin user, follow these configuration steps right after you install the plugin. If you are not an admin, you can forward this to your admin and scroll down to the How to use section.
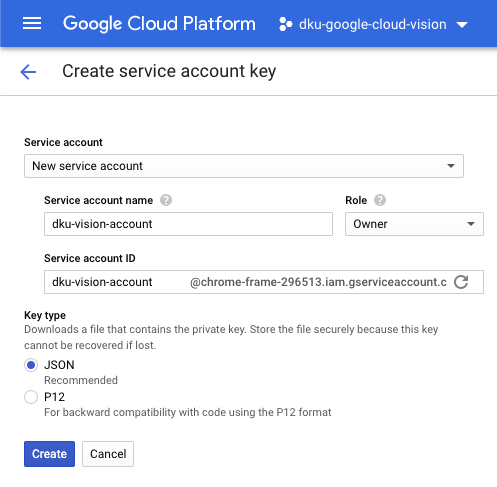
1. Get a service account key for the Vision API – in Google Cloud Console
You can follow the step-by-step instructions on this Google Cloud documentation page. Make sure that billing is activated on your Google Cloud project.
Once you complete the “Create a service account and download the private key file” step, you will receive your service account key as a JSON file.
2. Create an API configuration preset – in Dataiku DSS
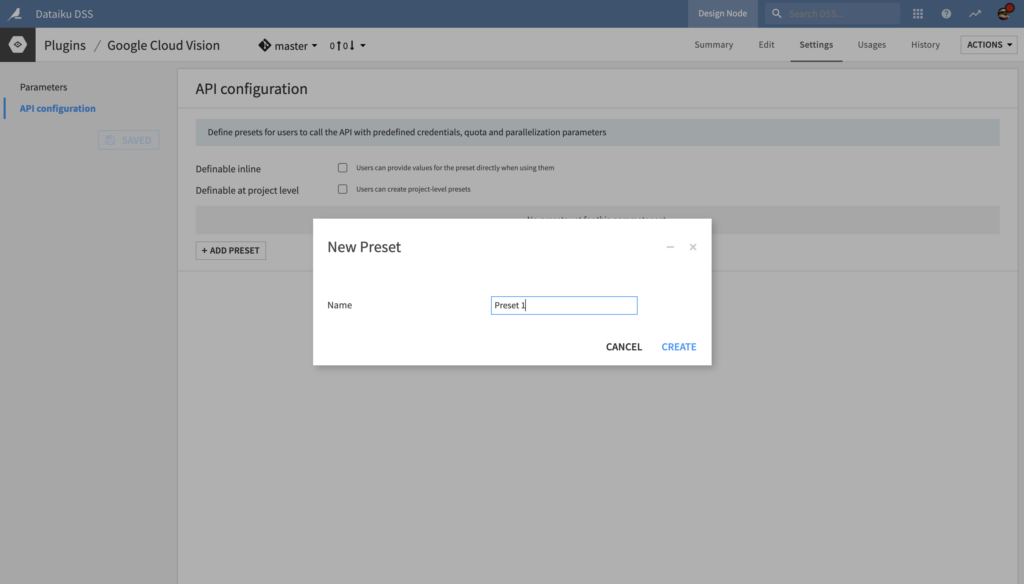
In Dataiku DSS, navigate to the Plugin page > Settings > API configuration and create your first preset.
3. Configure the preset – in Dataiku DSS
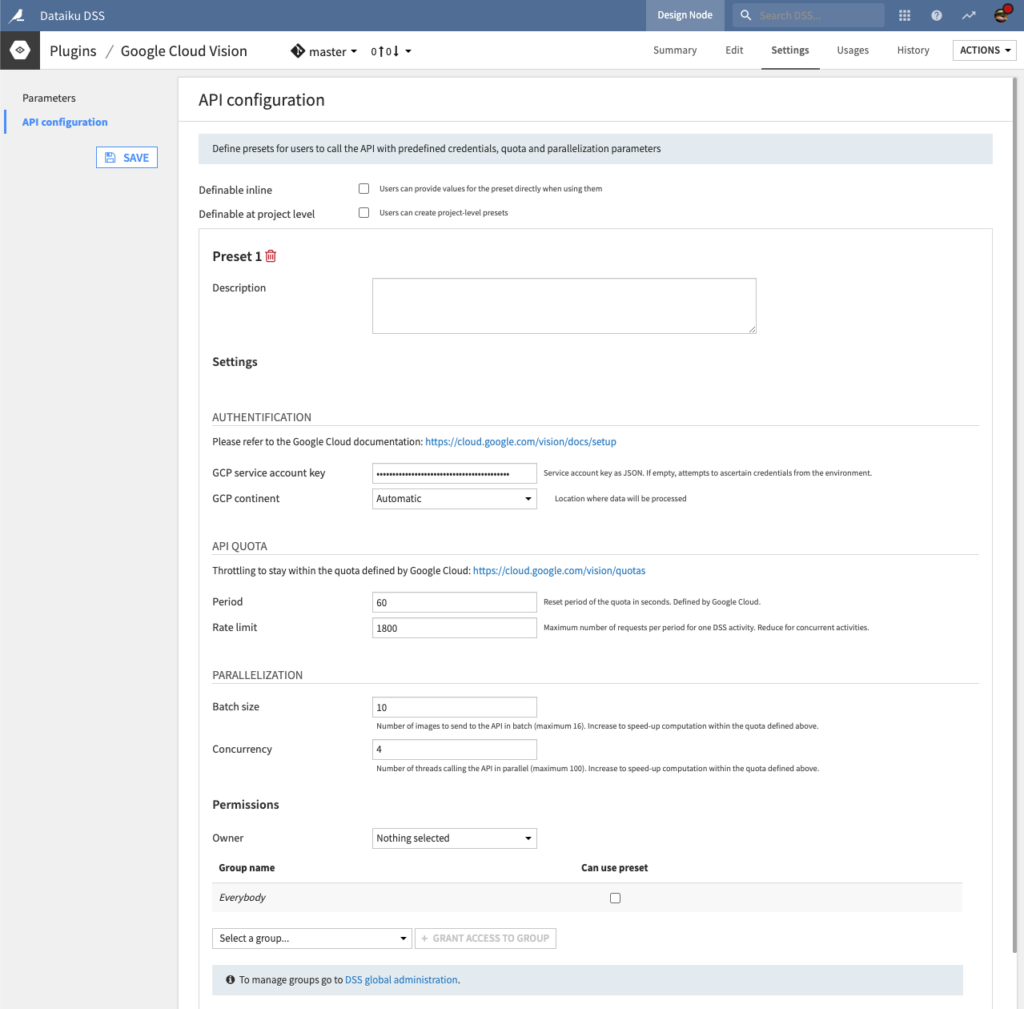
- Fill the AUTHENTIFICATION settings
- Copy-paste the content of your service account key from Step 1 in the GCP service account key field. Make sure the key is valid JSON.
- Alternatively, you may leave the field empty so that the key is ascertained from the server environment. If you choose this option, please follow this documentation.
- Leave the GCP continent field at “Automatic” if you do not need to control where your data will be processed.
- Else, you can choose whether to perform all processing in the European Union or in the United States of America.
- As of November 2020, per-continent processing is only available for the Text Detection API.
- (Optional) Review the API QUOTA and PARALLELIZATION settings
- The default API Quota settings ensure that one recipe calling the API will be throttled at 1800 requests (Rate limit parameter) per minute (Period parameter).
- In other words, after sending 1800 requests, it will wait for 60 seconds, then send another 1800, etc.
- If your files (images/documents) are stored on Google Cloud Storage (GCS), each request to the API will contain a batch of 10 files (Batch size parameter).
- In that case, the Rate limit parameter will be automatically divided by the Batch size to stay within your API quota.
- The Batch size parameter is ignored if your files are not stored on GCS.
- You may need to decrease the Rate limit parameter if you envision that multiple recipes will run concurrently to call the API.
- For instance, if you want to allow 10 concurrent DSS activities, you can set this parameter at 1800/10 = 180 requests per minute.
- The default Concurrency parameter means that 4 threads will call the API in parallel. This parallelization operates within the API Quota settings defined above.
- We do not recommend to change this default parameter unless your server has a much higher number of CPU cores.
- The default API Quota settings ensure that one recipe calling the API will be throttled at 1800 requests (Rate limit parameter) per minute (Period parameter).
- Set the Permissions of your preset
- You can declare yourself as Owner of this preset and make it available to everybody, or to a specific group of users.
- Any user belonging to one of these groups on your Dataiku DSS instance will be able to see and use this preset.
Voilà! Your preset is ready to be used.
Later, you (or another Dataiku admin) will be able to add more presets. This can be useful to segment plugin usage by user group. For instance, you can create a “Default” preset for everyone and a “High performance” one for your Marketing team, with separate billing for each team.
How to use
Let’s assume that you have a Dataiku DSS project with folders containing images (JPG/PNG/GIF/BMP/WEBP/ICO) and documents (PDF/TIFF).
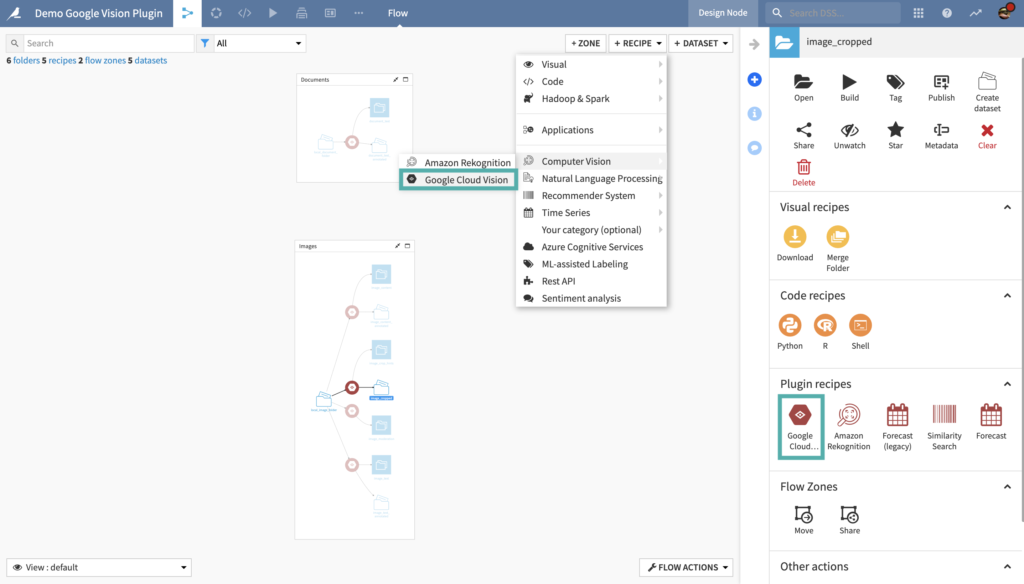
To create your first recipe, navigate to the Flow, click on the + RECIPE button and access the Computer Vision menu. If your folder is selected, you can directly find the plugin on the right panel.
Content Detection & Labeling
Input
- Folder with JPG/PNG/GIF/BMP/WEBP/ICO images
Output
- Dataset with content labels for each image
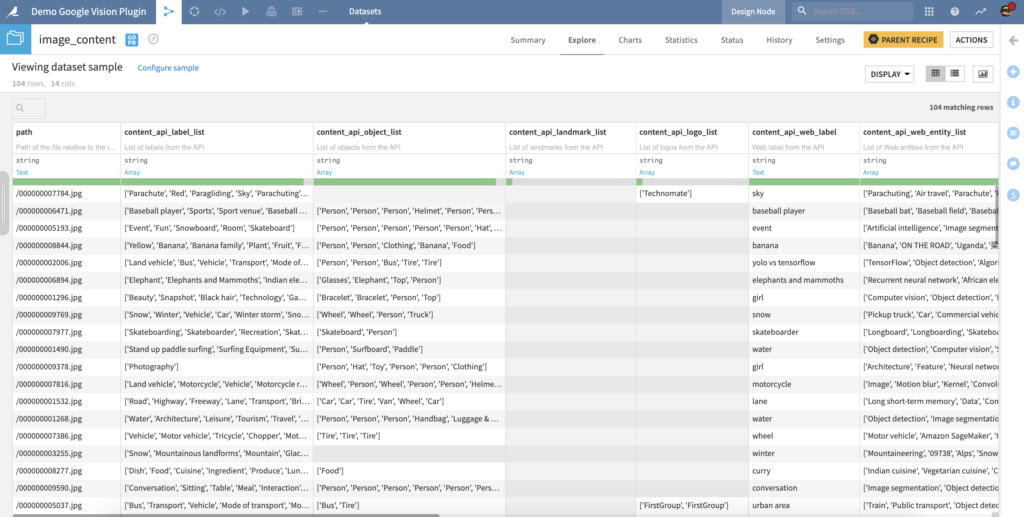
- (Optional) Folder with bounding boxes drawn on each image
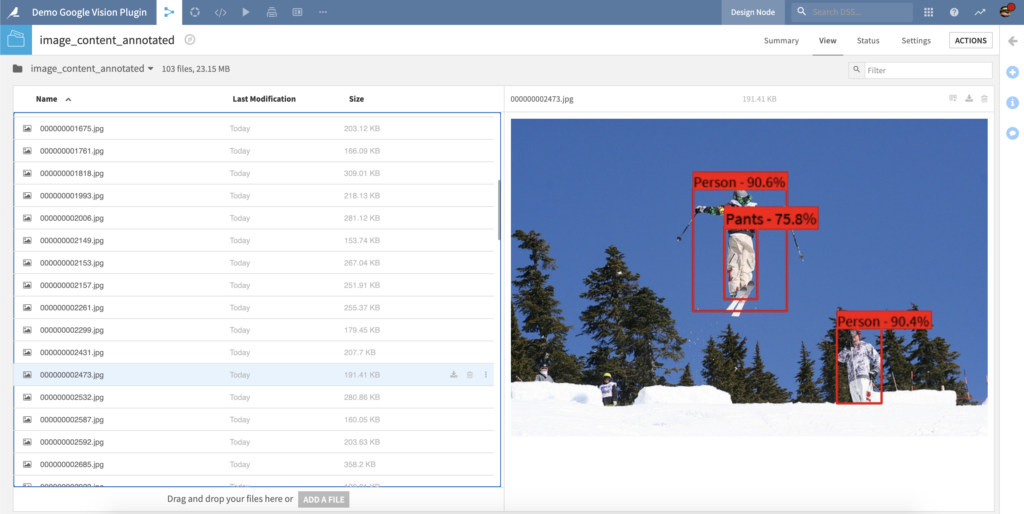
Note that including this folder will significantly increase the recipe runtime, as each image needs to be re-downloaded to draw the bounding boxes after the API calls.
Settings
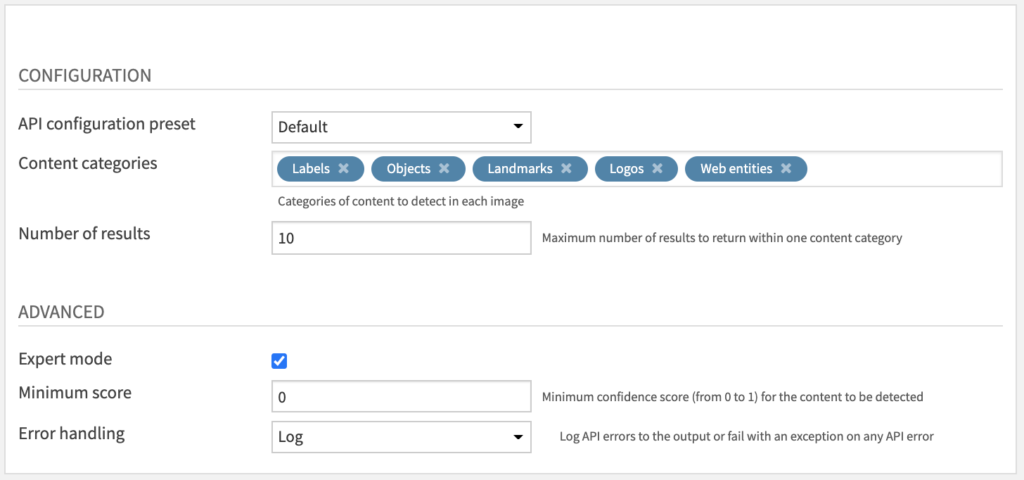
- Review CONFIGURATION parameters
- The API configuration preset parameter is automatically filled by the default one made available by your Dataiku admin. You may select another one if multiple presets have been created.
- The Content categories parameter lets you choose which categories of content to detect in each image. Note that each category incurs its own cost.
- The Number of results parameter limits the number of results within one content category.
- (Optional) Review ADVANCED parameters
- You can activate the Expert mode to access advanced parameters.
- The Minimum score parameter allows you to filter out results with a low confidence score from the model. Default is 0 so that no filtering is applied.
- The Error handling parameter determines how the recipe will behave if the API returns an error:
- In “Log” error handling, this error will be logged to the output but it will not cause the recipe to fail.
- We do not recommend to change this parameter to “Fail” mode unless this is the desired behaviour.
- You can activate the Expert mode to access advanced parameters.
Text detection for images
Input
- Folder with JPG/PNG/GIF/BMP/WEBP/ICO images
Output
- Dataset with detected text for each image
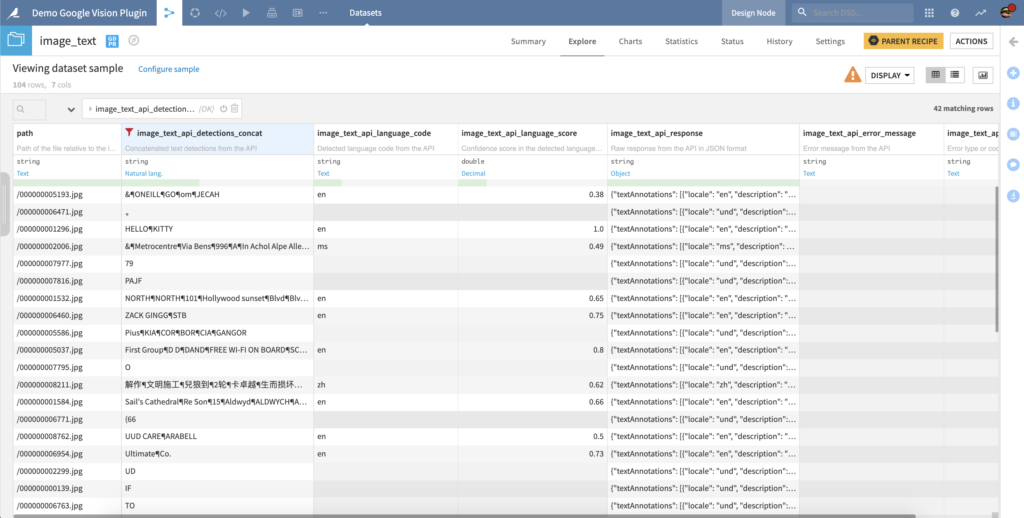
- (Optional) Folder with text bounding boxes drawn on each image
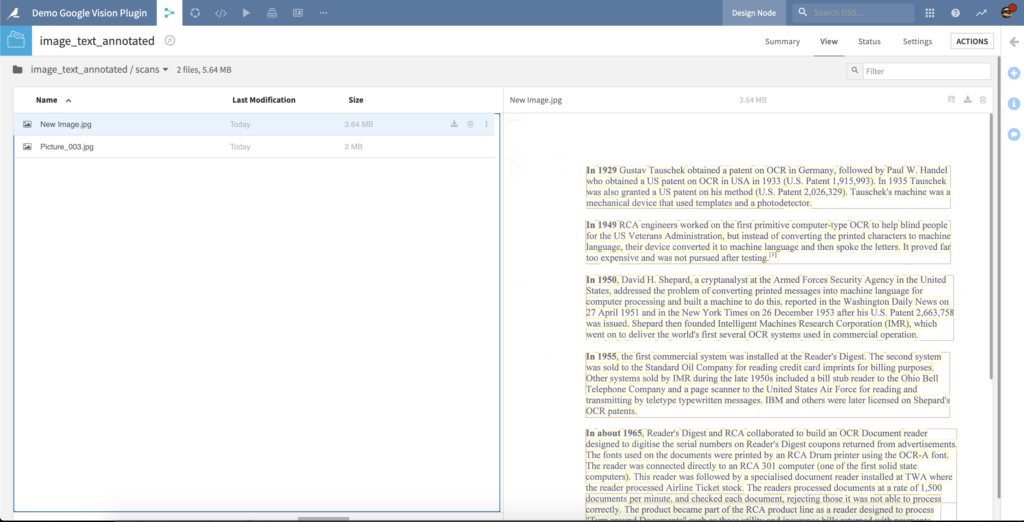
Note that including this folder will significantly increase the recipe runtime, as each image needs to be re-downloaded to draw the bounding boxes after the API calls.
Settings
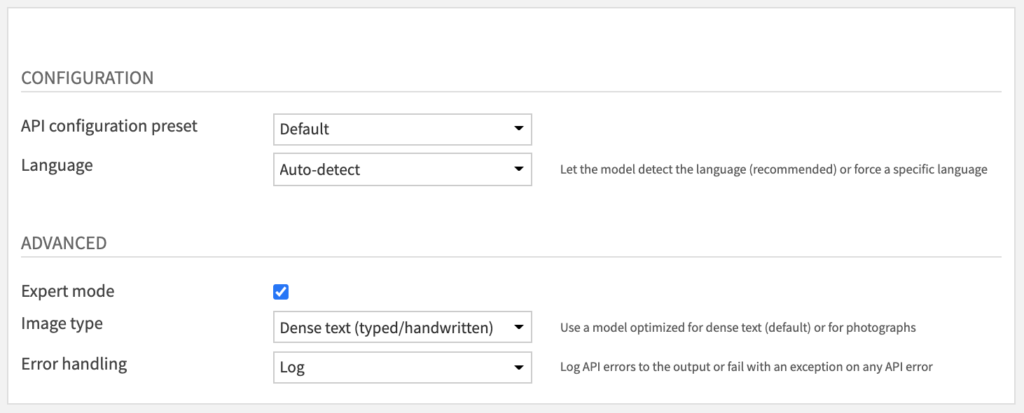
The API configuration preset and Error handling parameters are the same as the Content Detection & Labeling recipe (see above).
Additional parameters are available which are specific to this recipe:
- The Language parameter lets you choose whether to let the model detect the language or to force a specific language among the 58 supported ISO 639-1 languages.
- The Image type parameter under Expert mode lets you choose whether the image contains dense text (typed/handwritten) or is a photograph with typed text.
- Default is dense text, which works well for scans of documents.
Text detection for documents
Input
- Folder with PDF/TIFF documents
Output
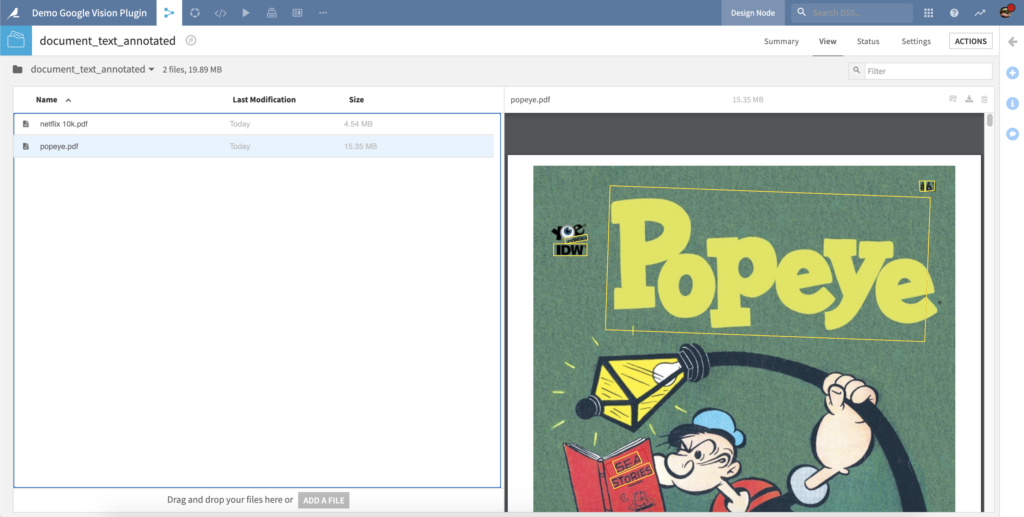
- Dataset with detected text for each document
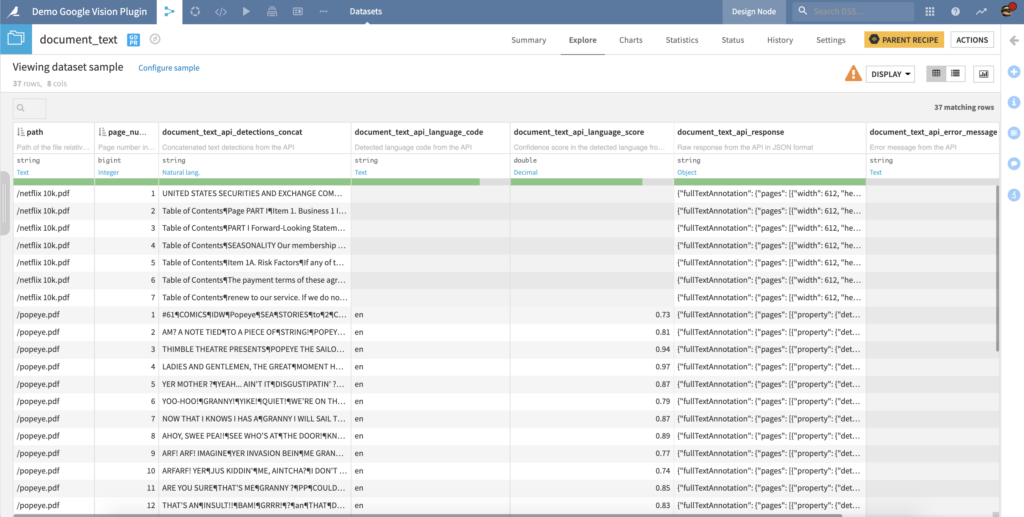
- Folder with text bounding boxes drawn on each document
Settings
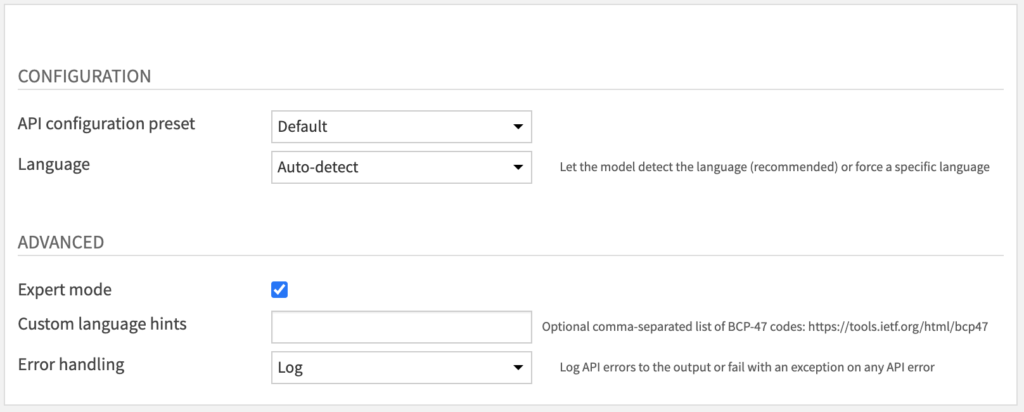
The API configuration preset, Language and Error handling parameters are the same as the Text detection for images recipe (see above).
The optional Custom language hints parameter under Expert mode lets you specify a comma-separated list of BCP-47 codes. For example, the language hint “en-t-i0-handwrit” specifies English language (en), transform extension singleton (t), input method engine transform extension code (i0), and handwriting transform code (handwrit). This can be interpreted as “English transformed from handwriting”.
Unsafe Content Moderation
Input
- Folder with JPG/PNG/GIF/BMP/WEBP/ICO images
Output
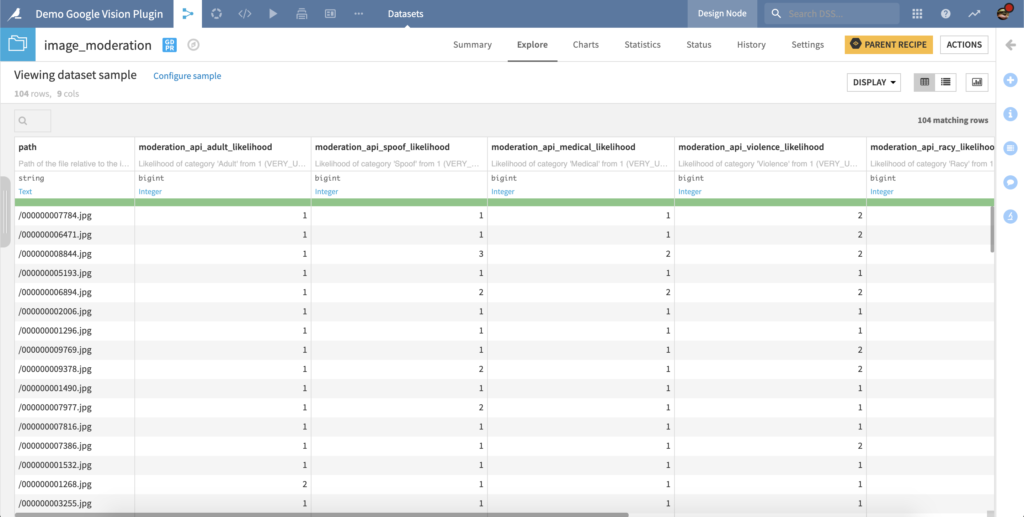
- Dataset with moderation labels for each image
Settings
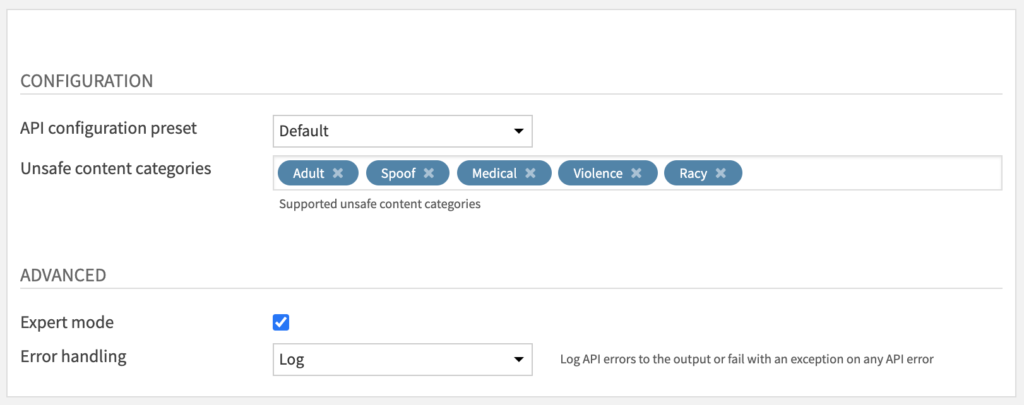
The parameters are almost exactly the same as the Content Detection & Labeling recipe (see above).
The only change is the addition of the Unsafe content categories parameter. This lets you choose which type of unsafe content you need to detect among Google SafeSearch categories.
Automatic Cropping
Input
- Folder with JPG/PNG/GIF/BMP/WEBP/ICO images
Output
- Dataset with crop hints for each image
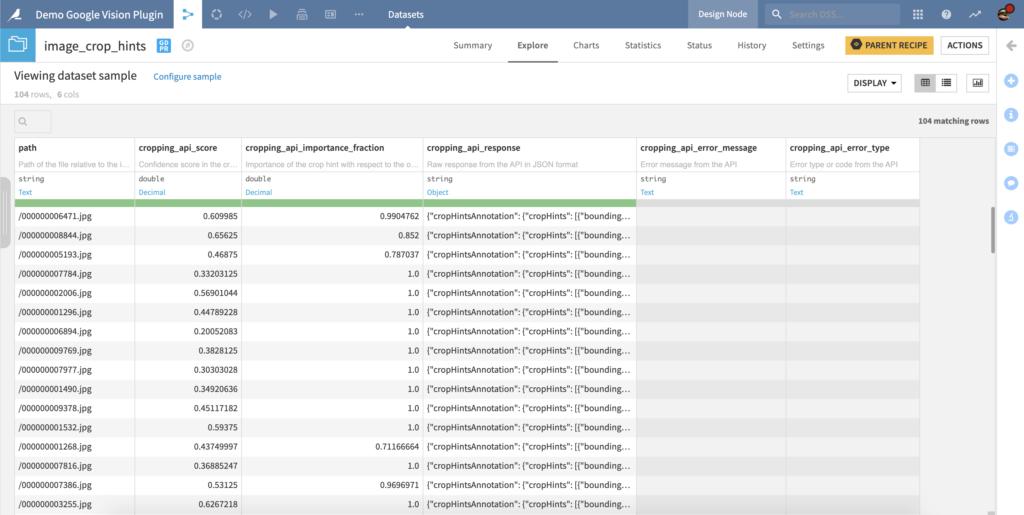
- Folder with cropped images
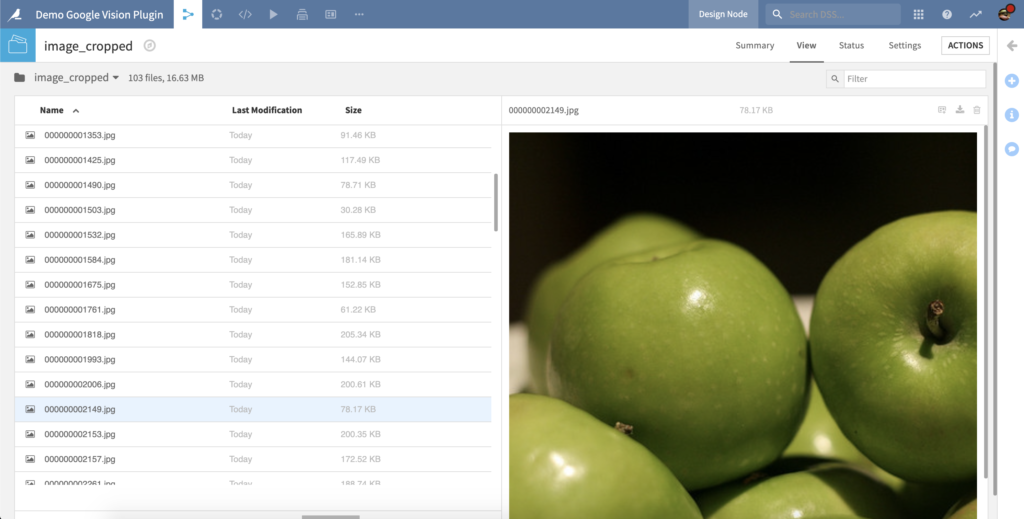
Settings
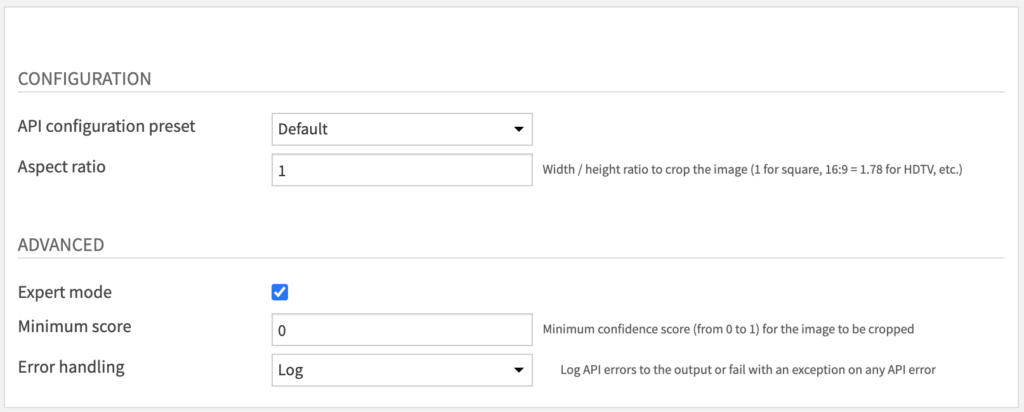
The parameters are almost exactly the same as the Content Detection & Labeling recipe (see above).
The only change is the addition of the Aspect ratio parameter. This lets you choose the ratio of width to height to crop the image. Default is 1 for square, else you can choose 16/9 = 1.78 for a HDTV landscape, 9/16 = 0.56 for a portrait, etc.
