This plugin provides several tools to use images in machine learning applications. You can use a pre trained model to score images and obtain classes, or for feature extraction (obtaining the values taken by a layer for each image). You can also retrain a model to specialize it on a particular set of images, this process is known as transfer learning.

This plugin relies on the Keras library. Keras is an open source neural network library written in Python. We use it to run on top of the TensorFlow library as it enables fast experimentation with deep neural networks.
The plugin provides the following components:
- Download pre-trained models (Macro)
- Classify images (Recipe)
- Extract features from images (Recipe)
- Retrain image classification model (Recipe)
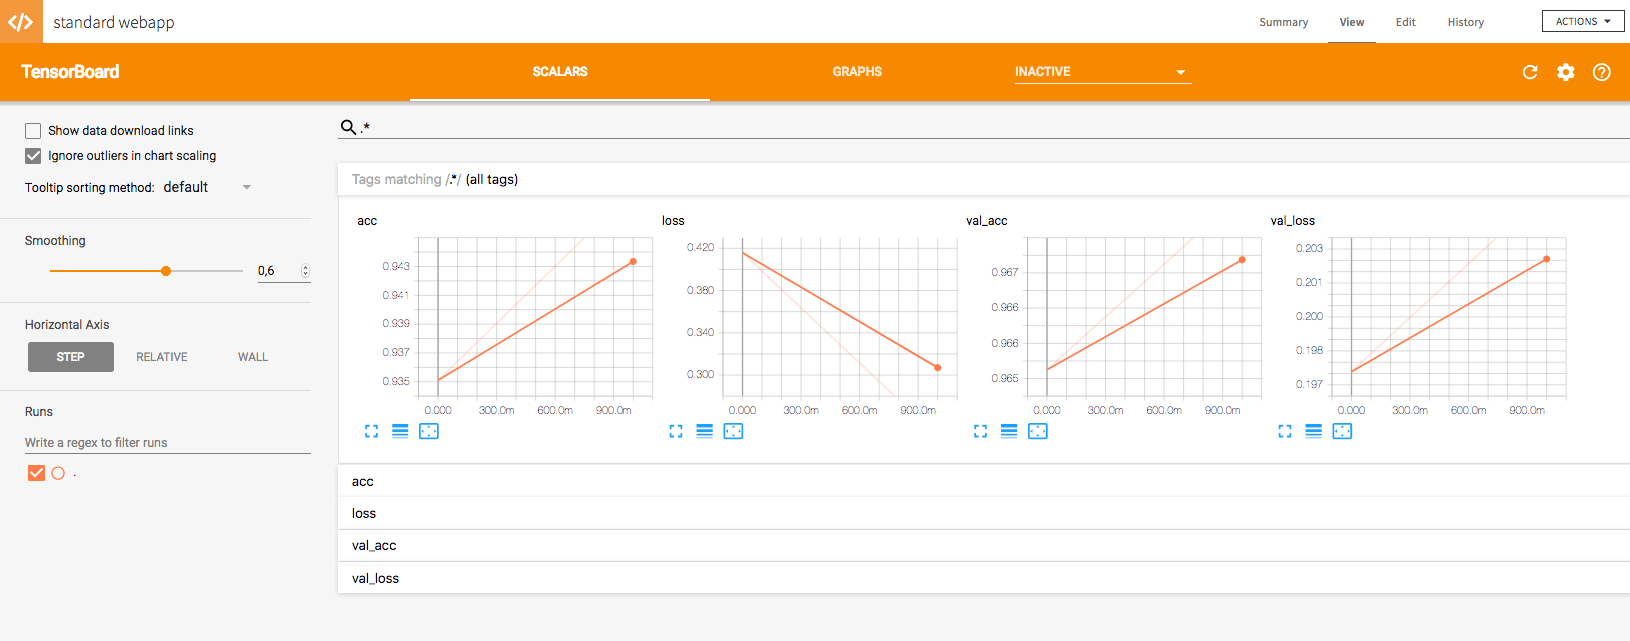
- Monitor the re-training of models with Tensorboard (Webapp template)
Examples in the wild
Our partner phData has published a tutorial covering emotion classification in videos.
Plugin Information
| Version | 0.1.6 |
|---|---|
| Author | Dataiku Labs (Y. Ghazouani, N. Servel et al.) |
| Released | 2018-01-10 |
| Last updated | 2018-02-01 |
| License | Apache Software License |
| Copyright notice | Original work Copyright (c) 2016 François Chollet |
| Source code | Github: CPU version, GPU version |
| Reporting issues | Github |
How To Use
Recipes
Classify images
Use this recipe to score (classify) a set of images contained in a folder. This recipe outputs the predicted class for each image in the input image folder.
Inputs:
Folder containing the images to score.
Folder containing a model in the h5 format. The folder can optionally contain a csv file with the model labels.
Output:
Dataset containing the image path and the predicted class.
Extract features from images
Use this recipe to extract the values taken by one of the layers of the neural network. This process is called feature extraction and can be used for transfer learning (feature extractor). It is recommended to use the neural network’s latest dense layers, usually the one before the classification layer (penultimate).
Inputs:
Folder containing the images to apply the feature extraction.
Folder containing a model in the h5 format.
Output:
Dataset containing the image path and a vector column with the output of each neuron in the selected layer.
Retrain image classification model
Use this recipe to warm-start the training of a deep learning model. Select a pre-trained model to use as a starting point to train a specialized deep learning model on your own images.
Also known as transfer learning (with fine-tuning), this method saves a lot of computational resources by not forcing you to retrain convolutional layers entirely. You can choose to keep them unchanged and retrain only the following layers, requiring smaller training sets. You can also choose to retrain the weights of all layers, in that case your image training set should be larger.
You can use this recipe multiple times in a row for fine-tuning use cases.
Inputs:
Folder containing images to use for training.
Folder containing a model in the h5 format.
Dataset containing the image paths and corresponding classes.
Output:
Folder containing a h5 model, configuration files and Keras callbacks (including tensorboard logs).
Macro
Download pre-trained models
The macro is used to download pre-trained models.
You must first choose a name for the output folder where your model will be stored. Then you must select one of the available pretrained models:
- Resnet trained on Imagenet. More info.
- Xception trained on Imagenet. More info.
- Inception V3 trained on Imagenet. More info.
- VGG16 trained on Imagenet. More info.
The output of this macro is a folder containing a pre-trained model. This model and its metadata are managed by the plugin to be used as input of the custom recipes.
Webapp template
Monitor the re-training of models with Tensorboard
Use the Tensorboard webapp template to monitor the retraining of your deep learning models.
This webapp needs to run in a code environment offering the tensorboard python package, see the setup instructions below.
Start by creating a Python code environment with a name like tensorboard-env. Make sure to include the set of mandatory packages, Jupyter support is not required.
Add the following packages to the list of packages to install:
- tensorflow==1.4.0
- flask==0.12.2
Finally, select the code environment you created in the webapp settings.
Make sure to edit the Python file and replace the model_folder with your own.
