


Plugin information
| Version | 1.1.0 |
|---|---|
| Author | Dataiku (Alex COMBESSIE, Joachim ZENTICI) |
| Released | 2020-09 |
| Last updated | 2023-05 |
| License | Apache Software License |
| Source code | Github |
| Reporting issues | Github |
With this plugin, you will be able to:
- Detect the dominant language of a text (recommended first step)
- Analyze the sentiment polarity (positive, negative, neutral, mixed) of a text
- Recognize “real-world objects” (people names, dates, places, etc.) in a text
- Extract key phrases (1-4 words each) in a text to identify the main points
Note that the Azure Cognitive Services Text Analytics API is a paid service. You can consult the API pricing page to evaluate the future cost.
How to set up
If you are a Dataiku and Azure admin user, follow these configuration steps right after you install the plugin. If you are not an admin, you can forward this to your admin and scroll down to the How to use section.
1. Create a new Azure Cognitive Services resource – in Microsoft Azure
Let’s assume that your Azure subscription has already been created. If not, please follow this guide.
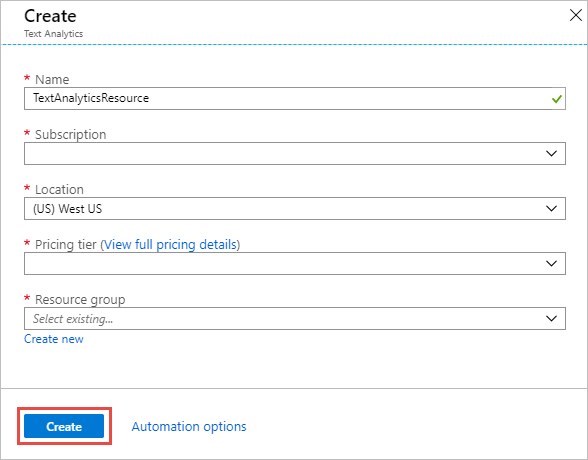
To create the resource, you will need to follow this Azure documentation. You have the choice between creating a multi-service or single-service resource. The multi-service resource enables access to all the Cognitive Services APIs, including Text Analytics. If you choose single-service, you will have to explicitly select the Text Analytics API.
On the Resource creation page, you will be able to specify several elements, including the Azure location and the pricing tier. You can note down the chosen location, as this information will be needed later.
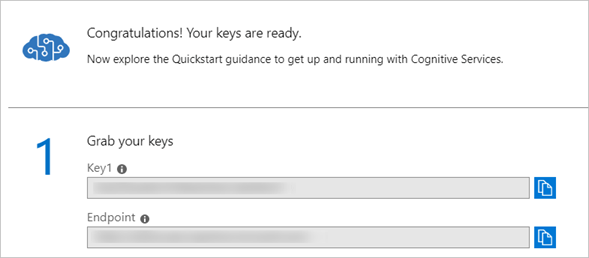
After your resource is successfully deployed, retrieve your API key by following these steps.
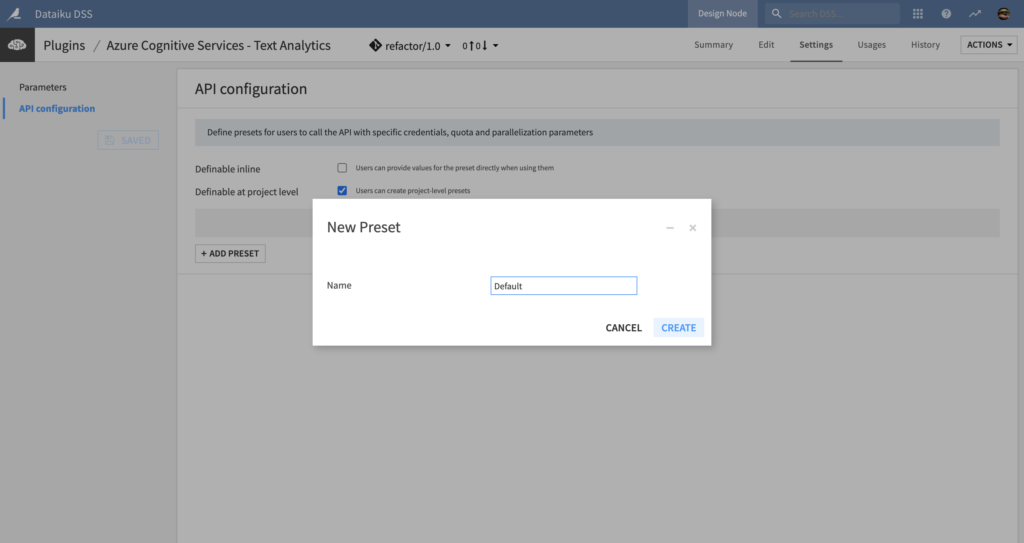
2. Create an API configuration preset – in Dataiku DSS
In Dataiku DSS, navigate to the Plugin page > Settings > API configuration and create your first preset.
3. Configure the preset – in Dataiku DSS
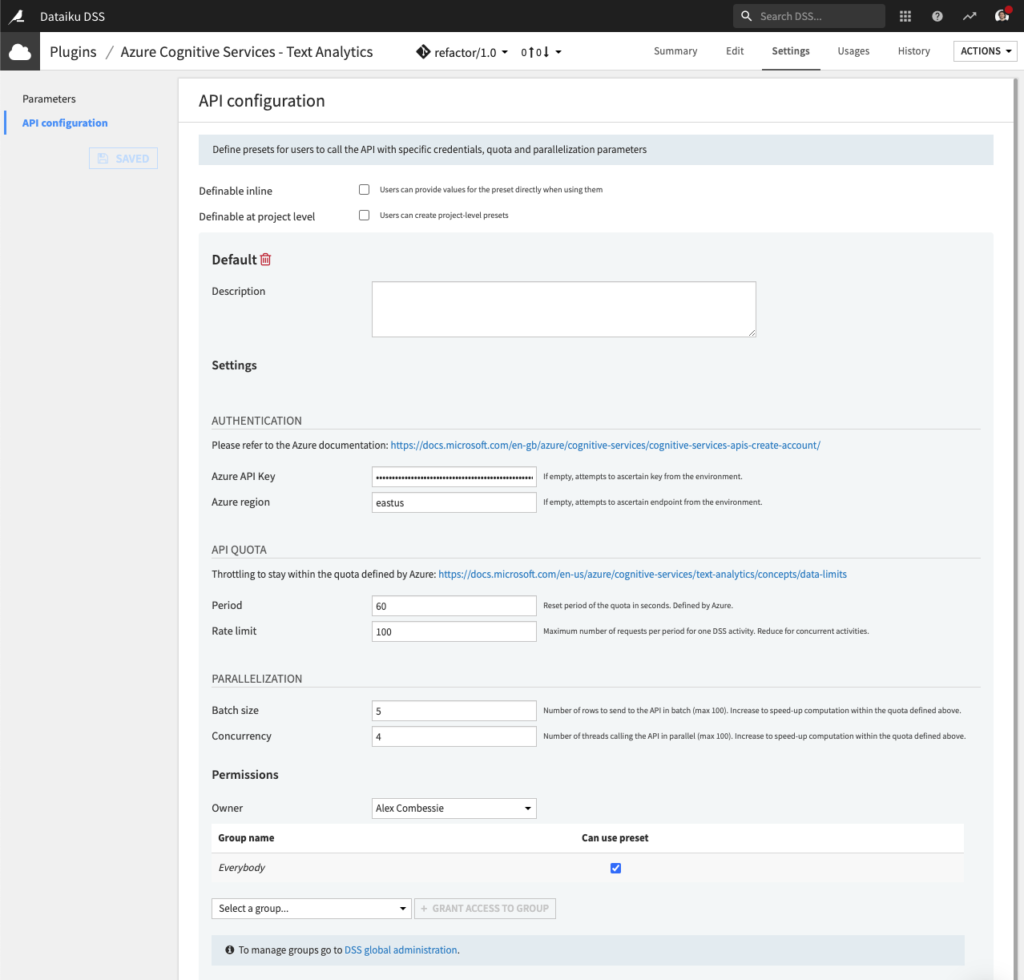
- Fill the AUTHENTIFICATION settings
- Copy-paste your Azure API key and location from Step 1 in the corresponding fields.
- The format for the Azure location parameter must be its short name. You can find the mapping between the full and short name of your Azure location by running this command.
- Alternatively, you may leave the fields empty so that the credentials are ascertained from the server environment.
- If you choose this option, please set the AZURE_TEXT_ANALYTICS_KEY and AZURE_TEXT_ANALYTICS_ENDPOINT environment variables on the server hosting DSS.
- (Optional) Review the API QUOTA and PARALLELIZATION settings
- The default API Quota settings ensure that one recipe calling the API will be throttled at 300 requests (Rate limit parameter) per minute (Period parameter). In other words, after sending 300 requests, it will wait for 60 seconds, then send another 300, etc.
- By default, each request to the API contains a batch of 5 documents (Batch size parameter). Combined with the previous settings, it means that it will send 300 * 5 = 1500 rows to the API every minute.
- These default quota parameters correspond to the minimum pricing tier of Azure. You can check or change your pricing tier on the Azure resource portal, and increase these parameters according to this page.
- You may need to decrease the Rate limit parameter if you envision that multiple recipes will run concurrently to call the API. For instance, if you want to allow 5 concurrent DSS activities, you can set this parameter at 300/5 = 60 requests per minute. This will ensure no activity exceeds your quota.
- The default Concurrency parameter means that 4 threads will call the API in parallel. This parallelization operates within the API Quota settings defined above. We do not recommend to change this default parameter unless your server has a much higher number of CPU cores.
- We do not recommend increasing the Batch size parameter above 5, to avoid exceeding the API data limits.
- Set the Permissions of your preset
- You can declare yourself as Owner of this preset and make it available to everybody, or to a specific group of users.
- Any user belonging to one of these groups on your Dataiku DSS instance will be able to see and use this preset.
Voilà! Your preset is ready to be used.
Later, you (or another Dataiku admin) will be able to add more presets. This can be useful to segment plugin usage by user group. For instance, you can create a “Default” preset for everyone and a “High performance” one for your Marketing team, with separate billing for each team.
How to use
Let’s assume that you have a Dataiku DSS project with a dataset containing text data. This text data must be stored in a dataset, inside a text column, with one row for each document.
As an example, we will use the Microsoft Research Question-Answering Corpus. You can follow the same steps with your own data.
To create your first recipe, navigate to the Flow, click on the + RECIPE button and access the Natural Language Processing menu. If your dataset is selected, you can directly find the plugin on the right panel.

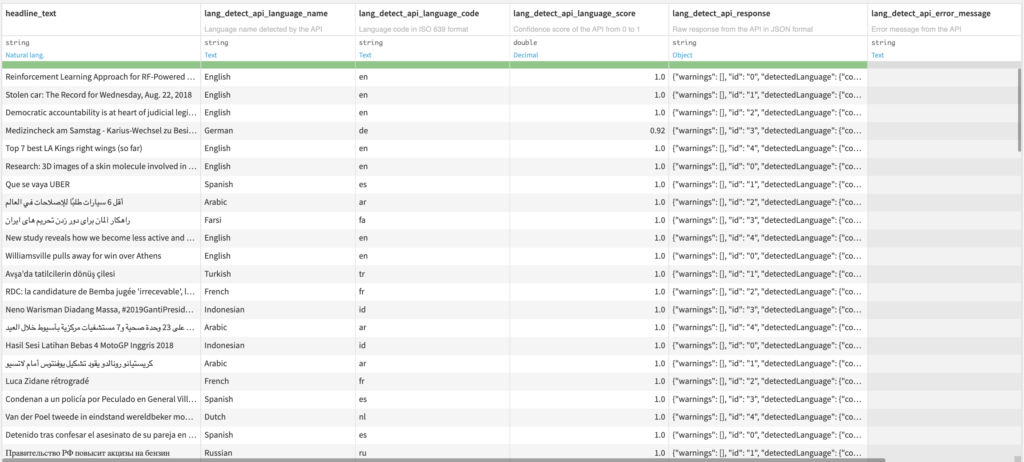
Language Detection
Input
- Dataset with a text column
Output
- Dataset with 5 additional columns
- Language code from the API in ISO 639 format
- Confidence score of the API from 0 to 1
- Raw response from the API in JSON format
- Error message from the API if any
- Error type (module and class name) if any
Settings
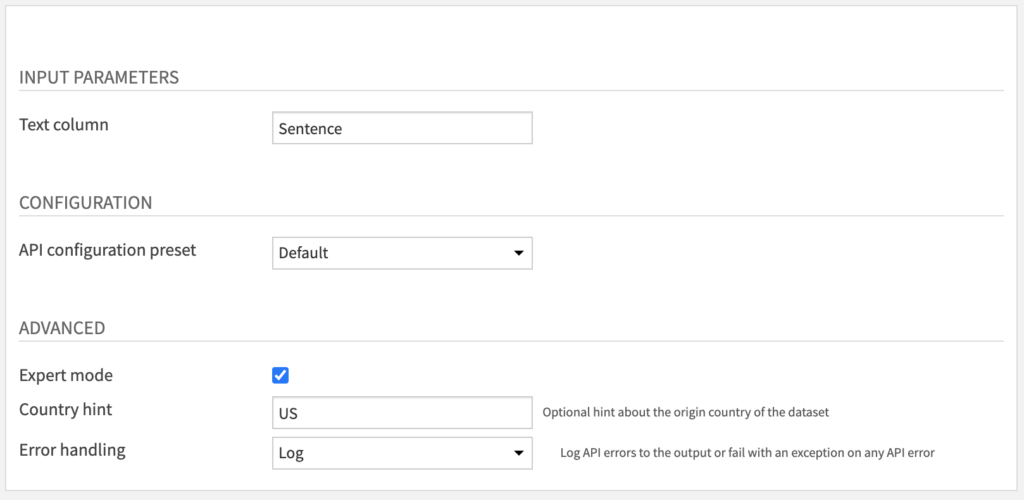
- Fill INPUT PARAMETERS
- Specify the Text column parameter for your column containing text data.
- Review CONFIGURATION parameters
- The API configuration preset parameter is automatically filled by the default one made available by your Dataiku admin.
- You may select another one if multiple presets have been created.
- (Optional) Review ADVANCED parameters
- You can activate the Expert mode to access advanced parameters.
- The optional Country hint parameter allows you to specify the origin country of your dataset.
- This can help the language detection model deal with ambiguous content.
- Use a 2-letter country/region code, as defined in the ISO 3166-1 alpha-2 standard.
- The Error handling parameter determines how the recipe will behave if the API returns an error.
- In “Log” error handling, this error will be logged to the output but it will not cause the recipe to fail.
- We do not recommend to change this parameter to “Fail” mode unless this is the desired behaviour.
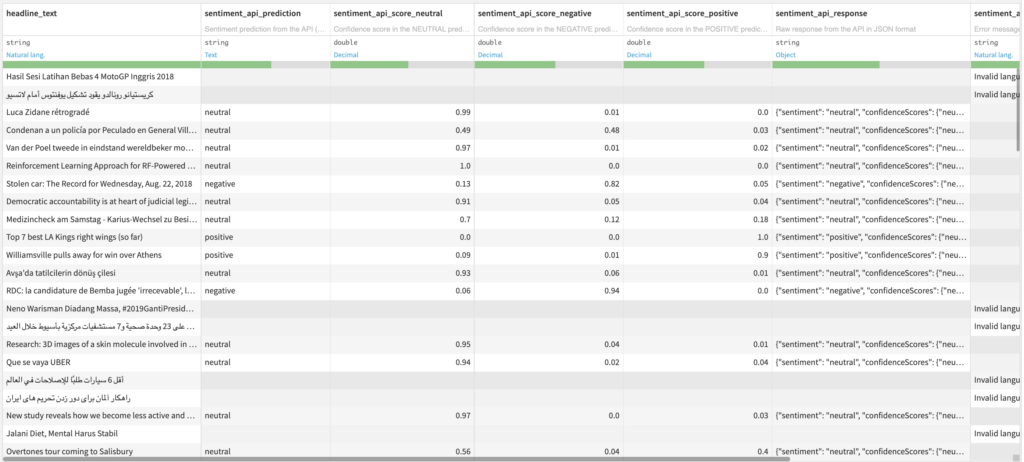
Sentiment Analysis
Input
- Dataset with a text column
Output
- Dataset with 7 additional columns
- Sentiment prediction from the API (NEUTRAL/NEGATIVE/POSITIVE)
- Confidence score in the NEUTRAL prediction from 0 to 1
- Confidence score in the NEGATIVE prediction from 0 to 1
- Confidence score in the POSITIVE prediction from 0 to 1
- Raw response from the API in JSON format
- Error message from the API if any
- Error type (module and class name) if any
Settings
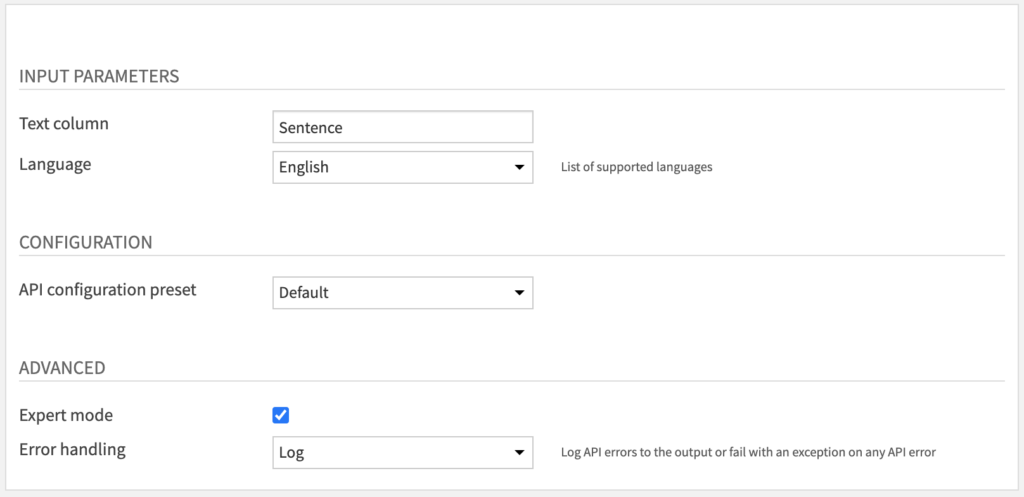
The parameters are almost exactly the same as the Language Detection recipe (see above).
The only change is the addition of Language parameters. By default, we assume the Text column is in English. You can change it to any of the supported languages listed here or choose “Detected language column” if you have multiple languages. In this case, you will need to reuse the language code column computed by the Language Detection recipe.
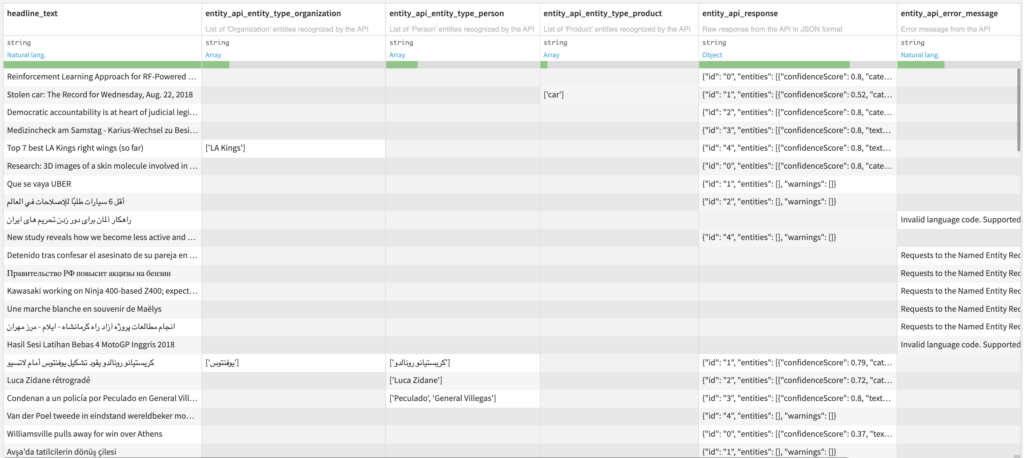
Named Entity Recognition
Input
- Dataset with a text column
Output
- Dataset with additional columns
- One column for each selected entity type, with a list of entities
- Raw response from the API in JSON format
- Error message from the API if any
- Error type (module and class name) if any
Settings
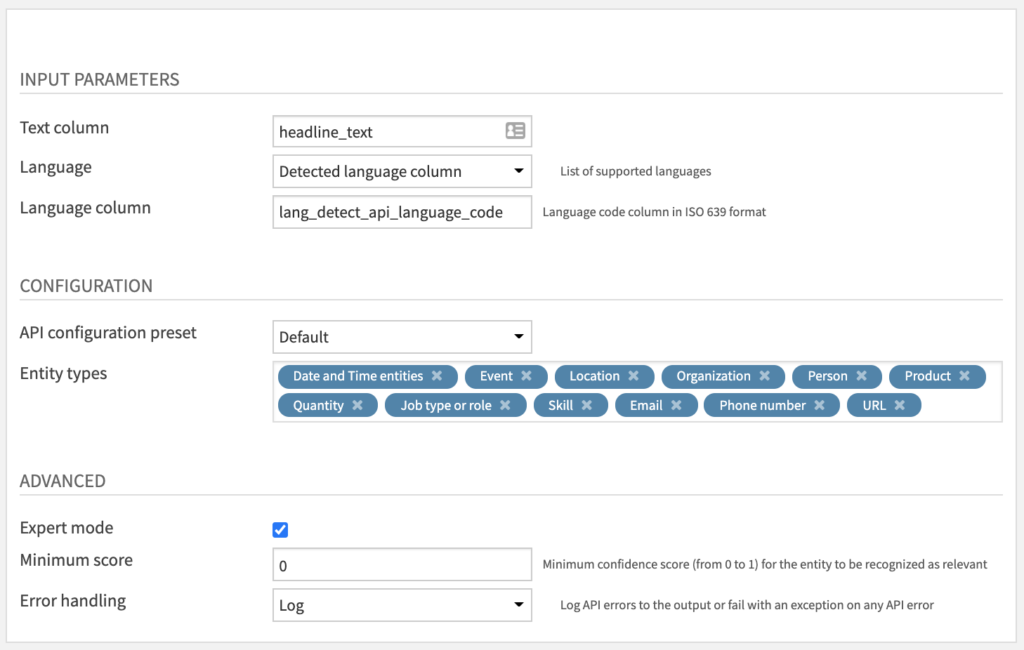
The parameters under INPUT PARAMETERS and CONFIGURATION are almost the same as the Sentiment Analysis recipe (see above). The additional parameters specific to this recipe are:
- Under CONFIGURATION
- Entity types: select multiple among this list.
- Under ADVANCED with Expert mode activated
- Minimum score: increase from 0 to 1 to filter results which are not relevant. Default is 0 so that no filtering is applied.
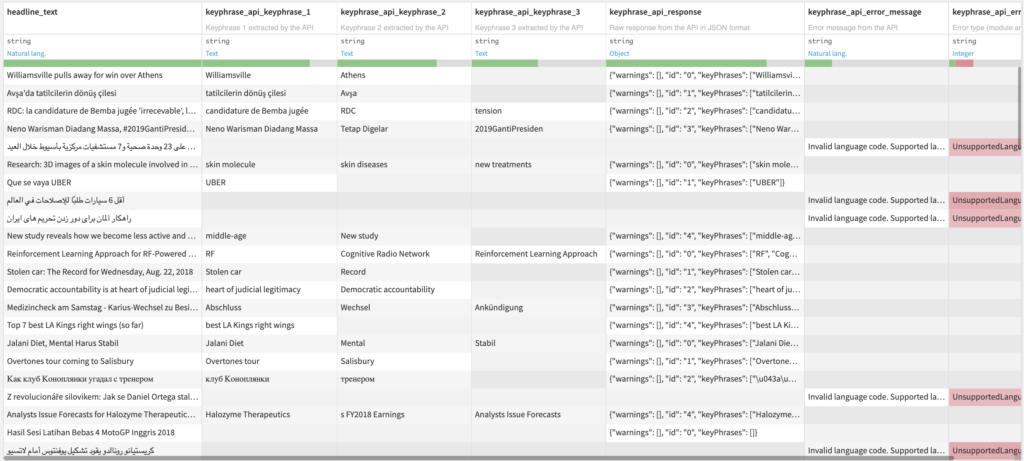
Key Phrase Extraction
Input
- Dataset with a text column
Output
- Dataset with additional columns
- One column for each key phrase (1-5 words from the input text) – see Number of key phrases parameter
- Raw response from the API in JSON format
- Error message from the API if any
- Error type (module and class name) if any
Settings
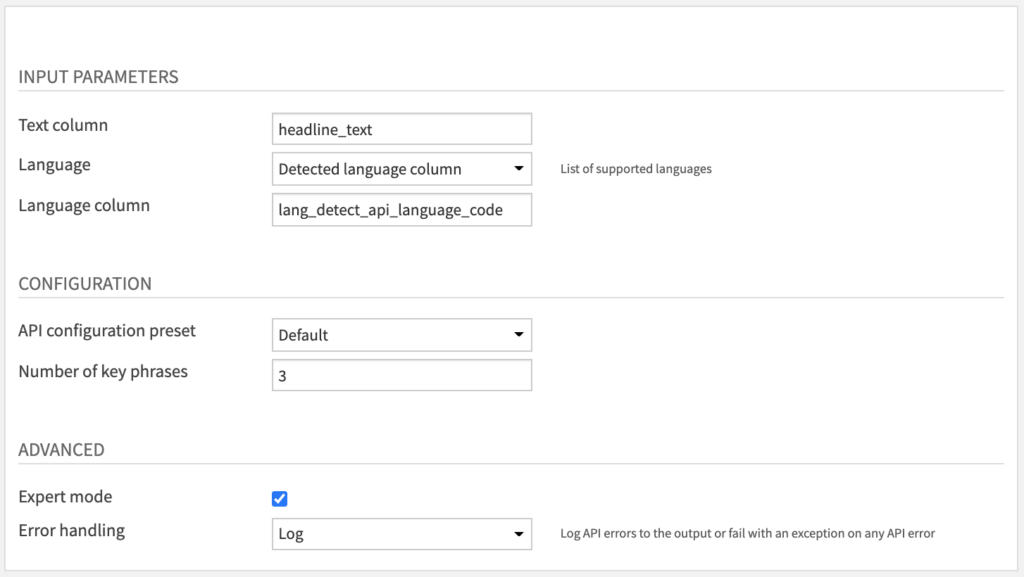
The parameters under INPUT PARAMETERS and CONFIGURATION are almost the same as the Sentiment Analysis recipe (see above). The additional parameter specific to this recipe is:
- Under CONFIGURATION
- Number of key phrases: choose how many to extract. The default value extracts the first 3 key phrases.
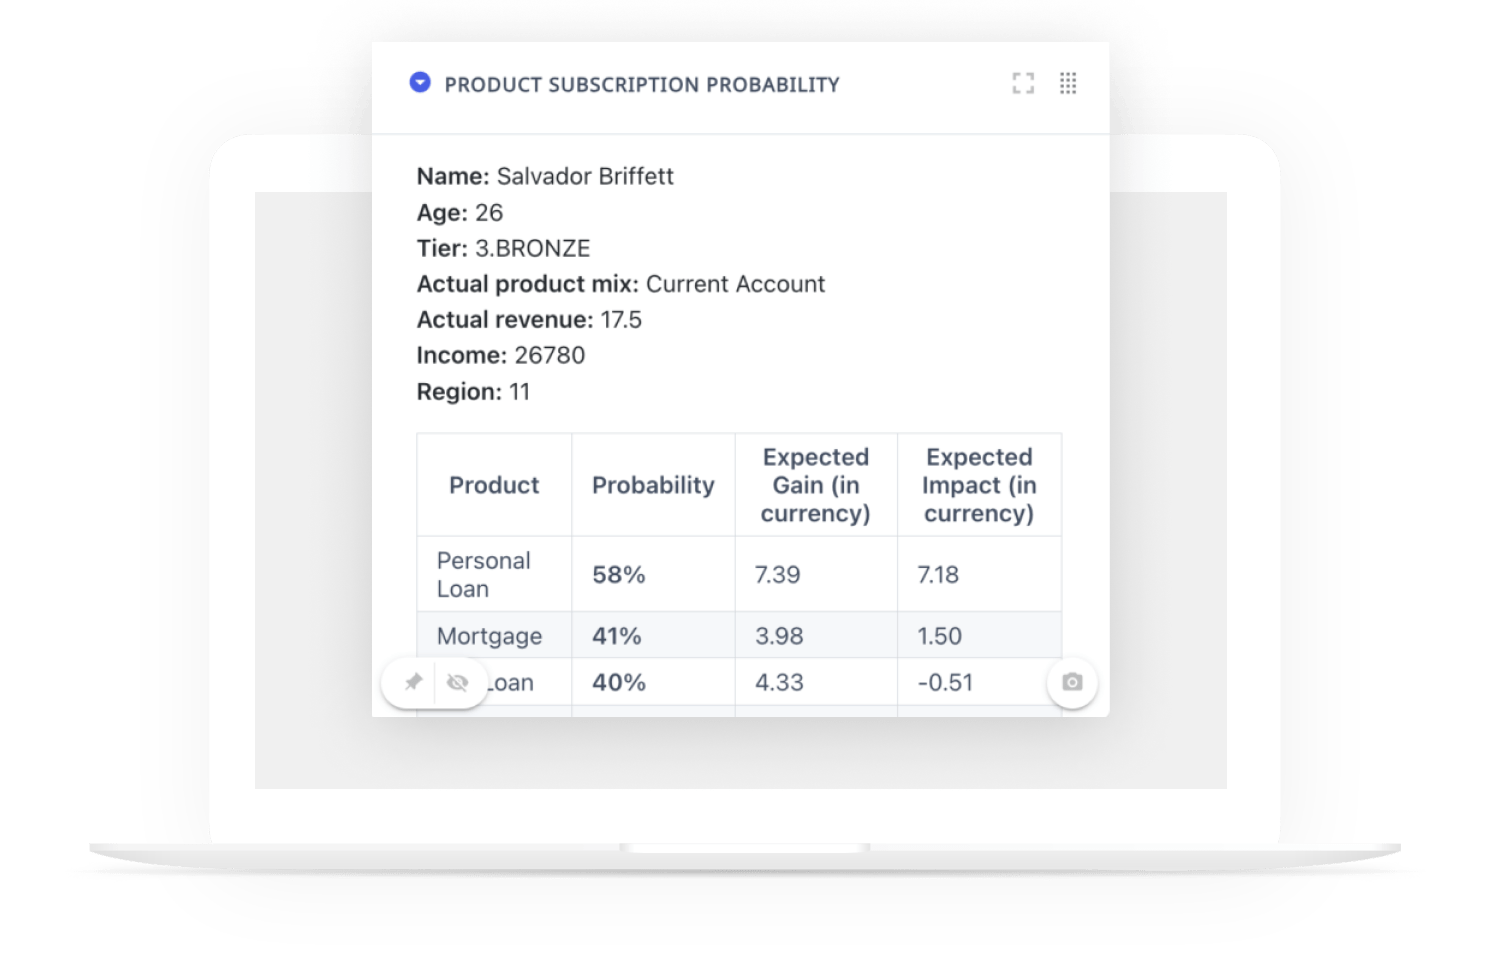
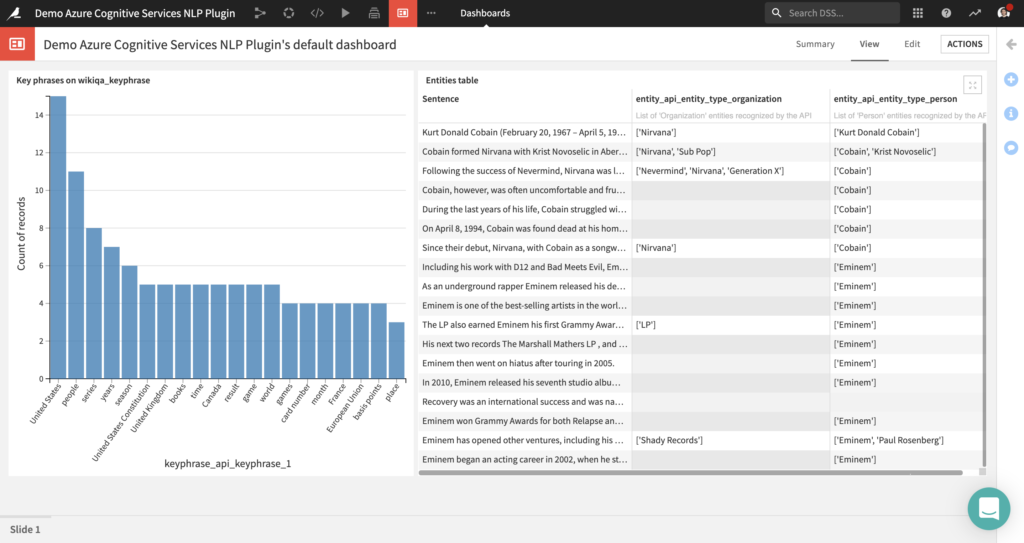
Putting It All Together: Visualization
Thanks to the output datasets produced by the plugin, you can create charts to analyze results from the API. For instance, you can:
- filter documents to focus on one language
- analyze the distribution of sentiment scores
- identify which entities are mentioned
- understand what are the key phrases used by responders
After crafting these charts, you can share them with business users in a dashboard such as the one below:
Happy natural language processing!