Turning off the cloud without turning off the AI: Dataiku using a local GLM-5.3-Flash
September 24, 2026/10 min read/Hannes Hapke
Every AI feature in a modern data platform relies on an API call to someone else's servers. That's a problem if your datasets are the kind that legally cannot leave the building — patient records, trading positions, anything under a data-residency clause. The usual answer is to switch the AI features off and go back to writing SQL by hand.
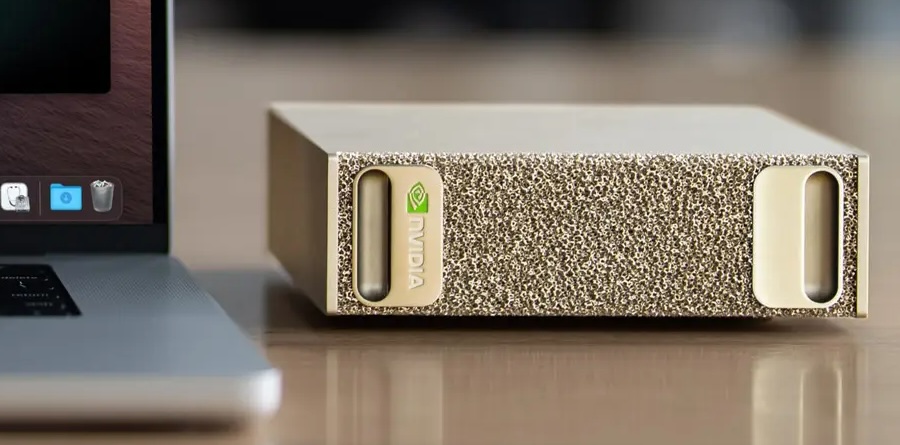
There's a better answer now. Open-weight models have advanced far enough that a locally hosted one is a real, working AI assistant, and NVIDIA's DGX Spark puts enough memory on a desk to run one. This post covers one of two options: run the model on the DGX Sparks and point your existing Dataiku instance at it. Your data never leaves your premises, and Dataiku's AI assistants, including Cobuild, work as designed.
We're using GLM-5.3-Flash: 321B total parameters, 18B active, MIT-licensed, with coding and agentic benchmark scores in the neighborhood of the frontier closed models. It needs more memory than one Spark has, which is why there are two.
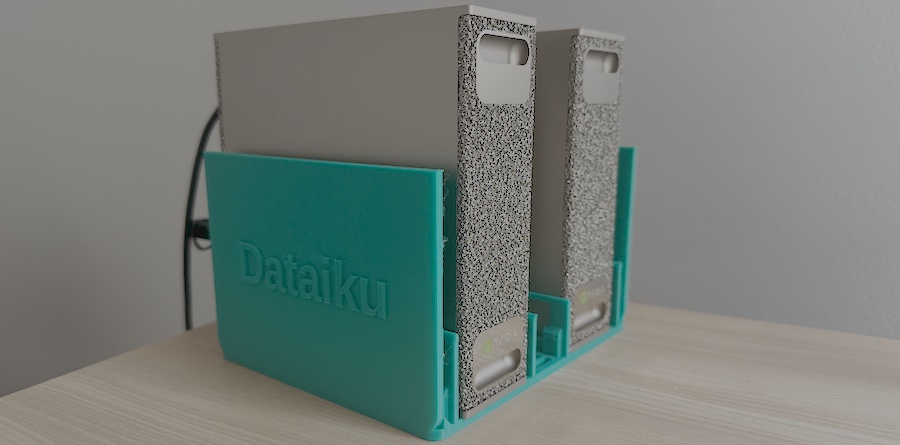
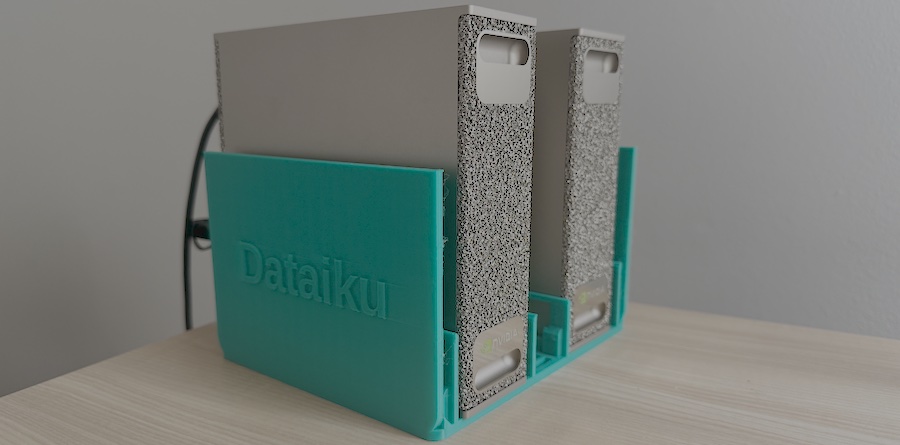
The entire AI infrastructure for this post. Two DGX Sparks and one cable.
This post assumes you already have:
Two DGX Sparks, clustered. If you don't, start with our two-Spark setup guide, which covers the ConnectX-7 cabling, the NVIDIA Sync Cluster Assistant, and — importantly — the firmware bug that silently caps the inter-Spark link at 13 Gbps until you update both nodes.
A running Dataiku instance with administrator access.
Network reachability from Dataiku to the head Spark. In our setup, Dataiku connects directly to Spark over the LAN at 192.168.1.40 (the IP address is assigned by our local router; it will change in your case).
GLM-5.3-Flash uses a new architecture (glm5next) that the main llama.cpp branch doesn't recognize yet; a stock build fails immediately with the error 'unknown model architecture: glm5next'. Support lives in an open pull request, so we build from that branch.
Run this on both nodes:
# Clone first if you haven't already
$ git clone https://github.com/ggml-org/llama.cpp ~/llama.cpp
$ cd ~/llama.cpp
$ git fetch origin pull/27754/head:glm5next
$ git checkout glm5next
$ cmake -B build -DGGML_CUDA=ON -DGGML_RPC=ON
$ cmake --build build --config Release -j --clean-first \
      --target llama-server ggml-rpc-server llama-cli
$ git rev-parse HEAD   # compare on both nodes — must match exactly
Two things worth knowing here. -DGGML_RPC=ON is what lets the two Sparks work as one; without it, you get a single-machine build. And the RPC worker binary is called ggml-rpc-server in the current llama.cpp, older guides say rpc-server, which fails with "No rule to make target".
Check that git rev-parse HEAD matches on both machines. A mismatched head and worker is a reliable source of inexplicable crashes, and this branch is moving fast.
If you read this post after November 2026, check whether the feature branch has already been merged into the llama.cpp main brain.
On the head node only, llama.cpp streams the worker's share across the cluster link at load time:
$ pip install -U "huggingface_hub[cli]" --break-system-packages
$ export PATH="$HOME/.local/bin:$PATH"
$ hf download unsloth/GLM-5.3-Flash-GGUF \
   --local-dir ~/models/GLM-5.3-Flash-GGUF \
   --include "*UD-Q4_K_XL*"
We use Unsloth's 4-bit dynamic quant. Across two Sparks, it splits to roughly 95 GB per node, leaving comfortable headroom for the KV cache, and 4-bit is where quality approaches the unquantized baseline. Smaller quants exist (the 1-bit is ~93 GB and fits a single Spark), but there's no reason to accept the quality hit when you have the second box.
Run the download inside tmux. It's a large transfer, and you don't want an SSH drop to kill it.
On the worker node, bind to that node's own cluster IP so traffic rides the 200 Gbit ConnectX-7 link rather than your LAN:
$ NVIDIA_TF32_OVERRIDE=0 ./llama.cpp/build/bin/ggml-rpc-server \
--host <WORKER_CLUSTER_IP> -p 50052
--host takes an address that the machine itself owns. We passed the head node's IP by mistake and got Failed to create server socket. Check with ip -4 addr if you're unsure which is which.
NVIDIA_TF32_OVERRIDE=0 is not optional. Without it, fp32 matrix multiplications run at reduced precision, and output quality degrades measurably. It's needed on both nodes, since layers execute on both.
When the head connects, the worker logs a line worth watching for:
RDMA probed: dev=roceP2p1s0f0 gid=3 RoCEv2 qpn=441 inline=316
RDMA activated: qpn=441->441
That's the RPC transport negotiating RDMA over your ConnectX-7 link. All the clustering work from the previous post is paying off.
On the head node:
$ NVIDIA_TF32_OVERRIDE=0 ./llama.cpp/build/bin/llama-server \
  --model ~/models/GLM-5.3-Flash-GGUF/UD-Q4_K_XL/GLM-5.3-Flash-UD-Q4_K_XL-00001-of-00006.gguf \
  --rpc <WORKER_CLUSTER_IP>:50052 \
  -ngl 99 -fa off \
  --ctx-size 65536 \
  -b 1024 -ub 256 \
  --temp 1.0 --top-p 0.95 \
  --jinja --chat-template-kwargs '{"reasoning_effort":"max","clear_thinking":true}' \
  --api-key YOUR_API_KEY \
  --host 0.0.0.0 --port 8080
The flags that matter:
Flag | Why |
| Not a flag but an environment variable, and not optional. Without it, fp32 matrix multiplications run at a floating-point format with 10 mantissa bits, and output quality degrades measurably. Needed on both nodes. |
| Points the head at the worker. Note the inversion: |
| Offload every layer to the GPUs. With |
| Flash attention must be off for this model. The attention path casts an F32 latent to F16, which this MLA variant can't tolerate — leave it on and output is wrong. |
| 64K context. The model itself supports far more, but there's an open bug where long generations collapse into repeated characters past a certain depth — and the failure depth shrinks as the configured context grows. 64K is a conservative starting point; raise it only after testing at your own depths. |
| Batch and micro-batch size. The compute buffers llama.cpp allocates scale with the micro-batch, and the defaults assume a machine that isn't mostly full of weights. If the worker dies during load with |
| The model author's recommended sampling settings. Don't lower the temperature out of habit — this family is tuned for it. |
|
|
| Requires callers to authenticate. Dataiku passes this in the OpenAI API key field. |
| Listens on every interface so Dataiku can reach it. This also exposes the server to your entire network — pair it with --api-key, or bind to a specific interface instead. |
Startup takes several minutes while weights stream to the worker. The server is ready when it logs that it's listening on port 8080.
llama.cpp ships its own web UI. Open http://<HEAD_SPARK_IP>:8080 in a browser and ask it something — this confirms the model works before you introduce a second system to debug.
Then test the API surface that Dataiku will actually use:
$ curl http://<HEAD_SPARK_IP>:8080/v1/chat/completions \
  -H "Content-Type: application/json" \
  -H "Authorization: Bearer YOUR_API_KEY" \
  -d '{
    "model": "glm-5.3-flash",
    "messages": [
      {"role": "system", "content": "You are a concise coding assistant."},
      {"role": "user", "content": "Write a Python one-liner that reverses the words in a sentence."}
    ],
    "max_tokens": 400
  }'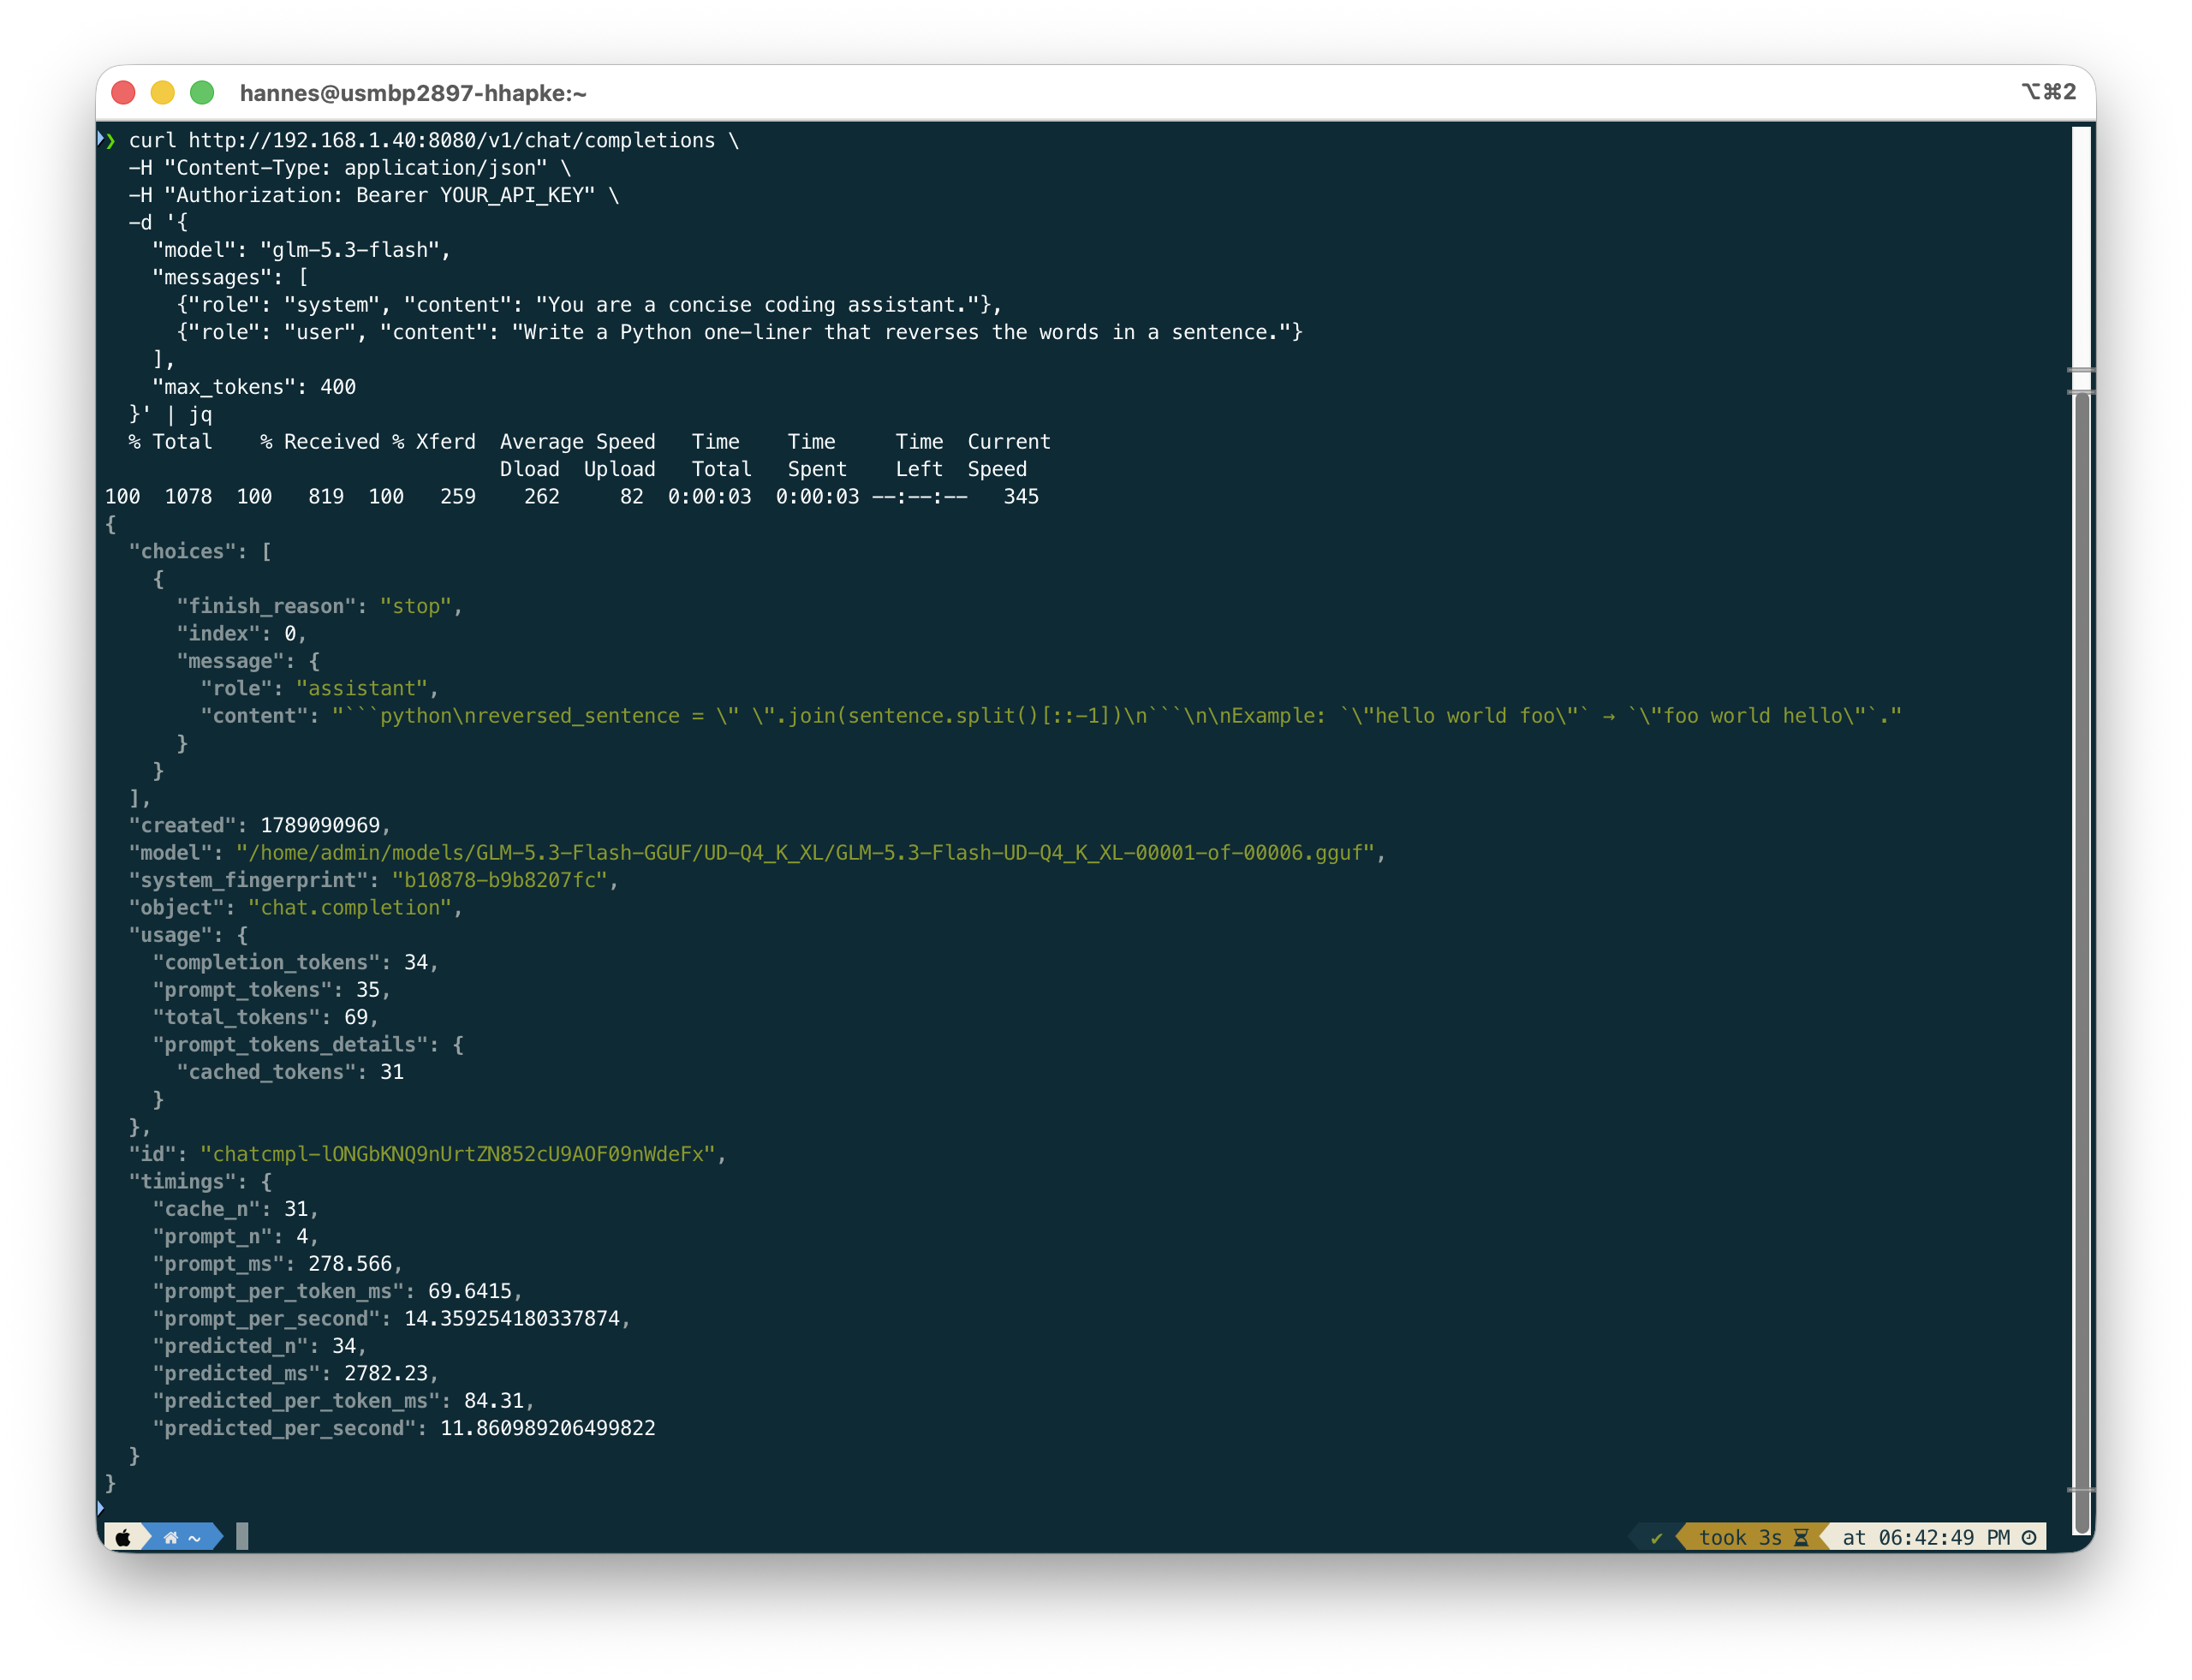
Your result should look like this. Note the timings block at the end, that is your real-world tokens per second.
If this returns a completion, the hard part is done. Everything from here is configuration.
llama.cpp implements the OpenAI client standard, so Dataiku treats it as an OpenAI connection pointed at a different address.
Go to Administration → Connections → New Connection and choose OpenAI.
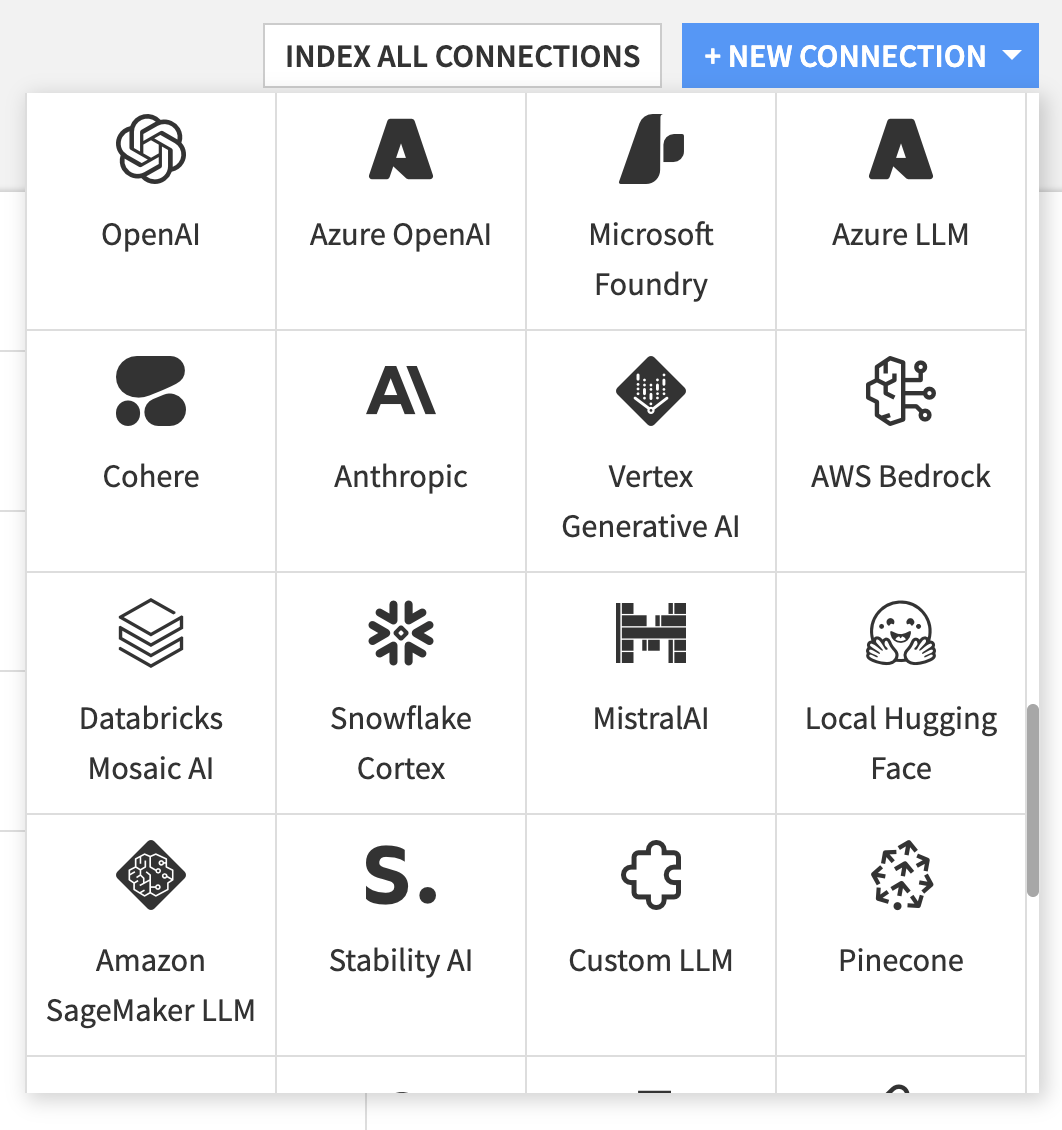
Administration → Connections → + NEW CONNECTION → OpenAI.
Then fill in the connection details:
Custom URL — the IP of your head DGX Spark followed by /v1. In our case: http://192.168.1.40:8080/v1. The /v1 suffix is required.
OpenAI API key — the key you passed to --api-key. If you started llama-server without one, leave this blank.
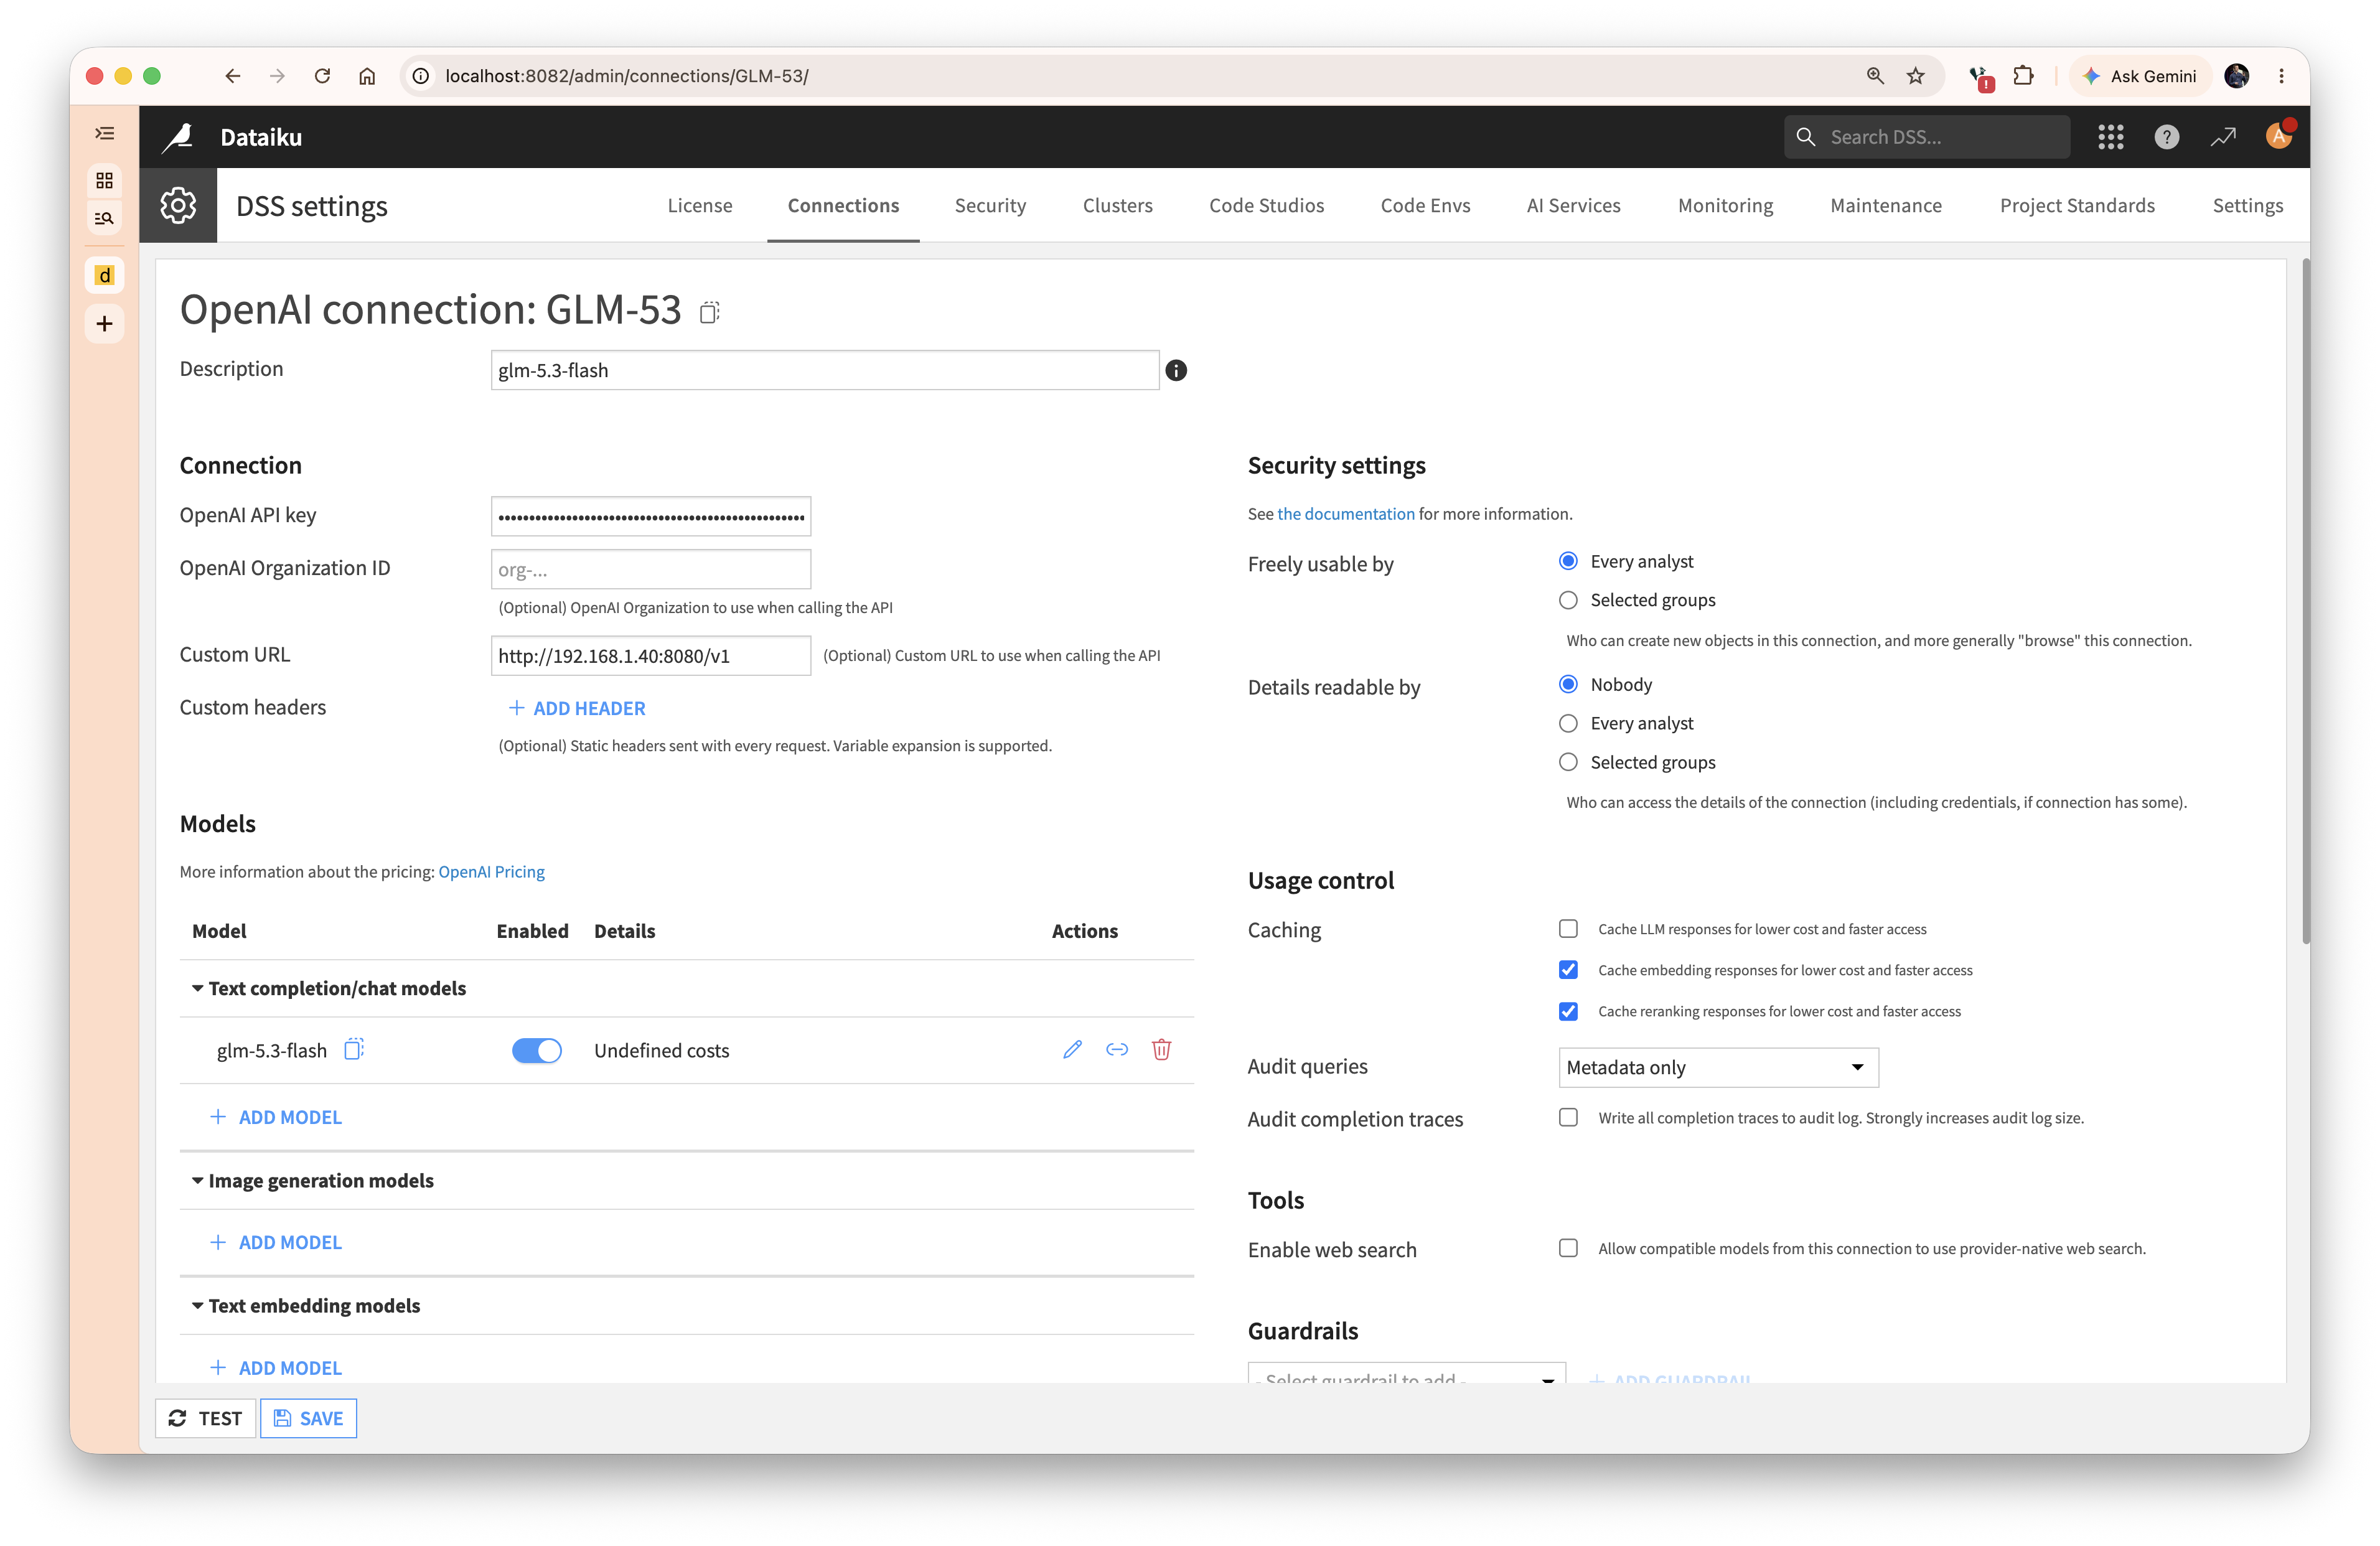
The two fields that matter: Custom URL and OpenAI API key.
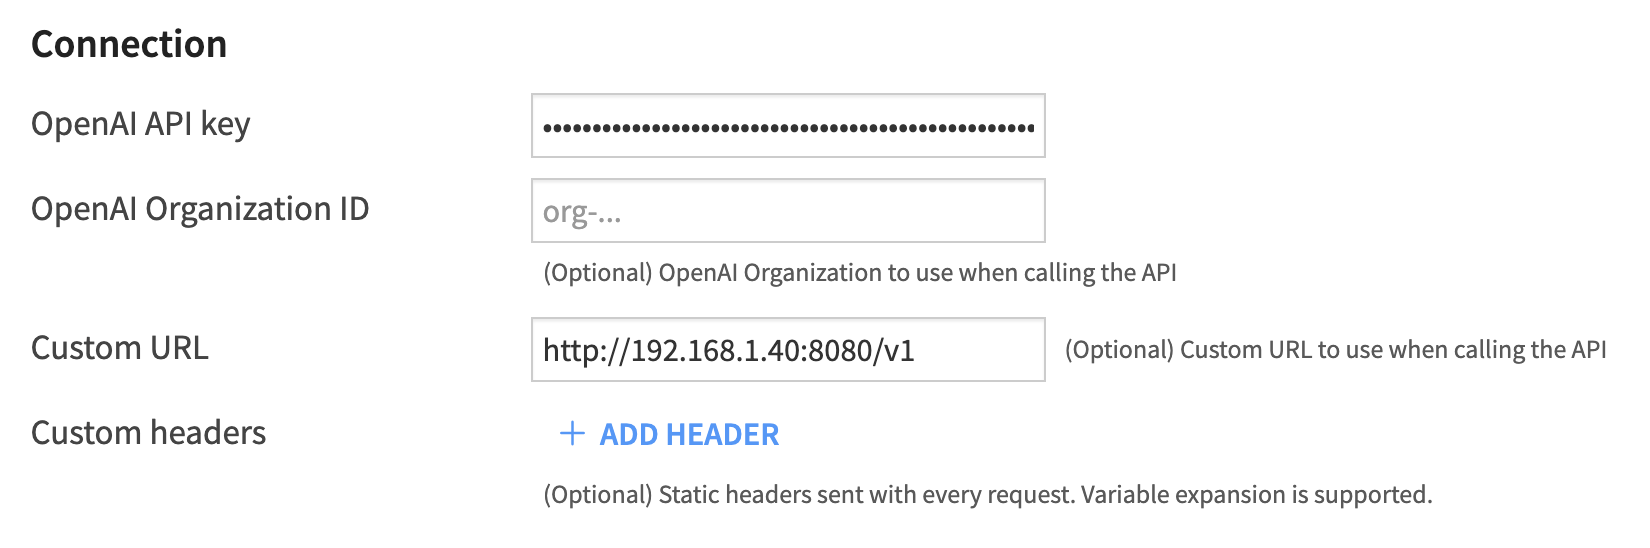
Don't forget the /v1.
Dataiku pre-populates the connection with OpenAI's own model list. Those all point to a server that doesn't exist in your setup, so disable or delete each one, including the text embedding models, which llama-server isn't serving here.
Then + ADD MODEL and configure:
Model id: glm-5.3-flash — used in Dataiku LLM ID references, must be unique within the connection
Provider model ID: glm-5.3-flash
API Mode: Chat Completions API (not the Responses API — llama.cpp implements chat completions)
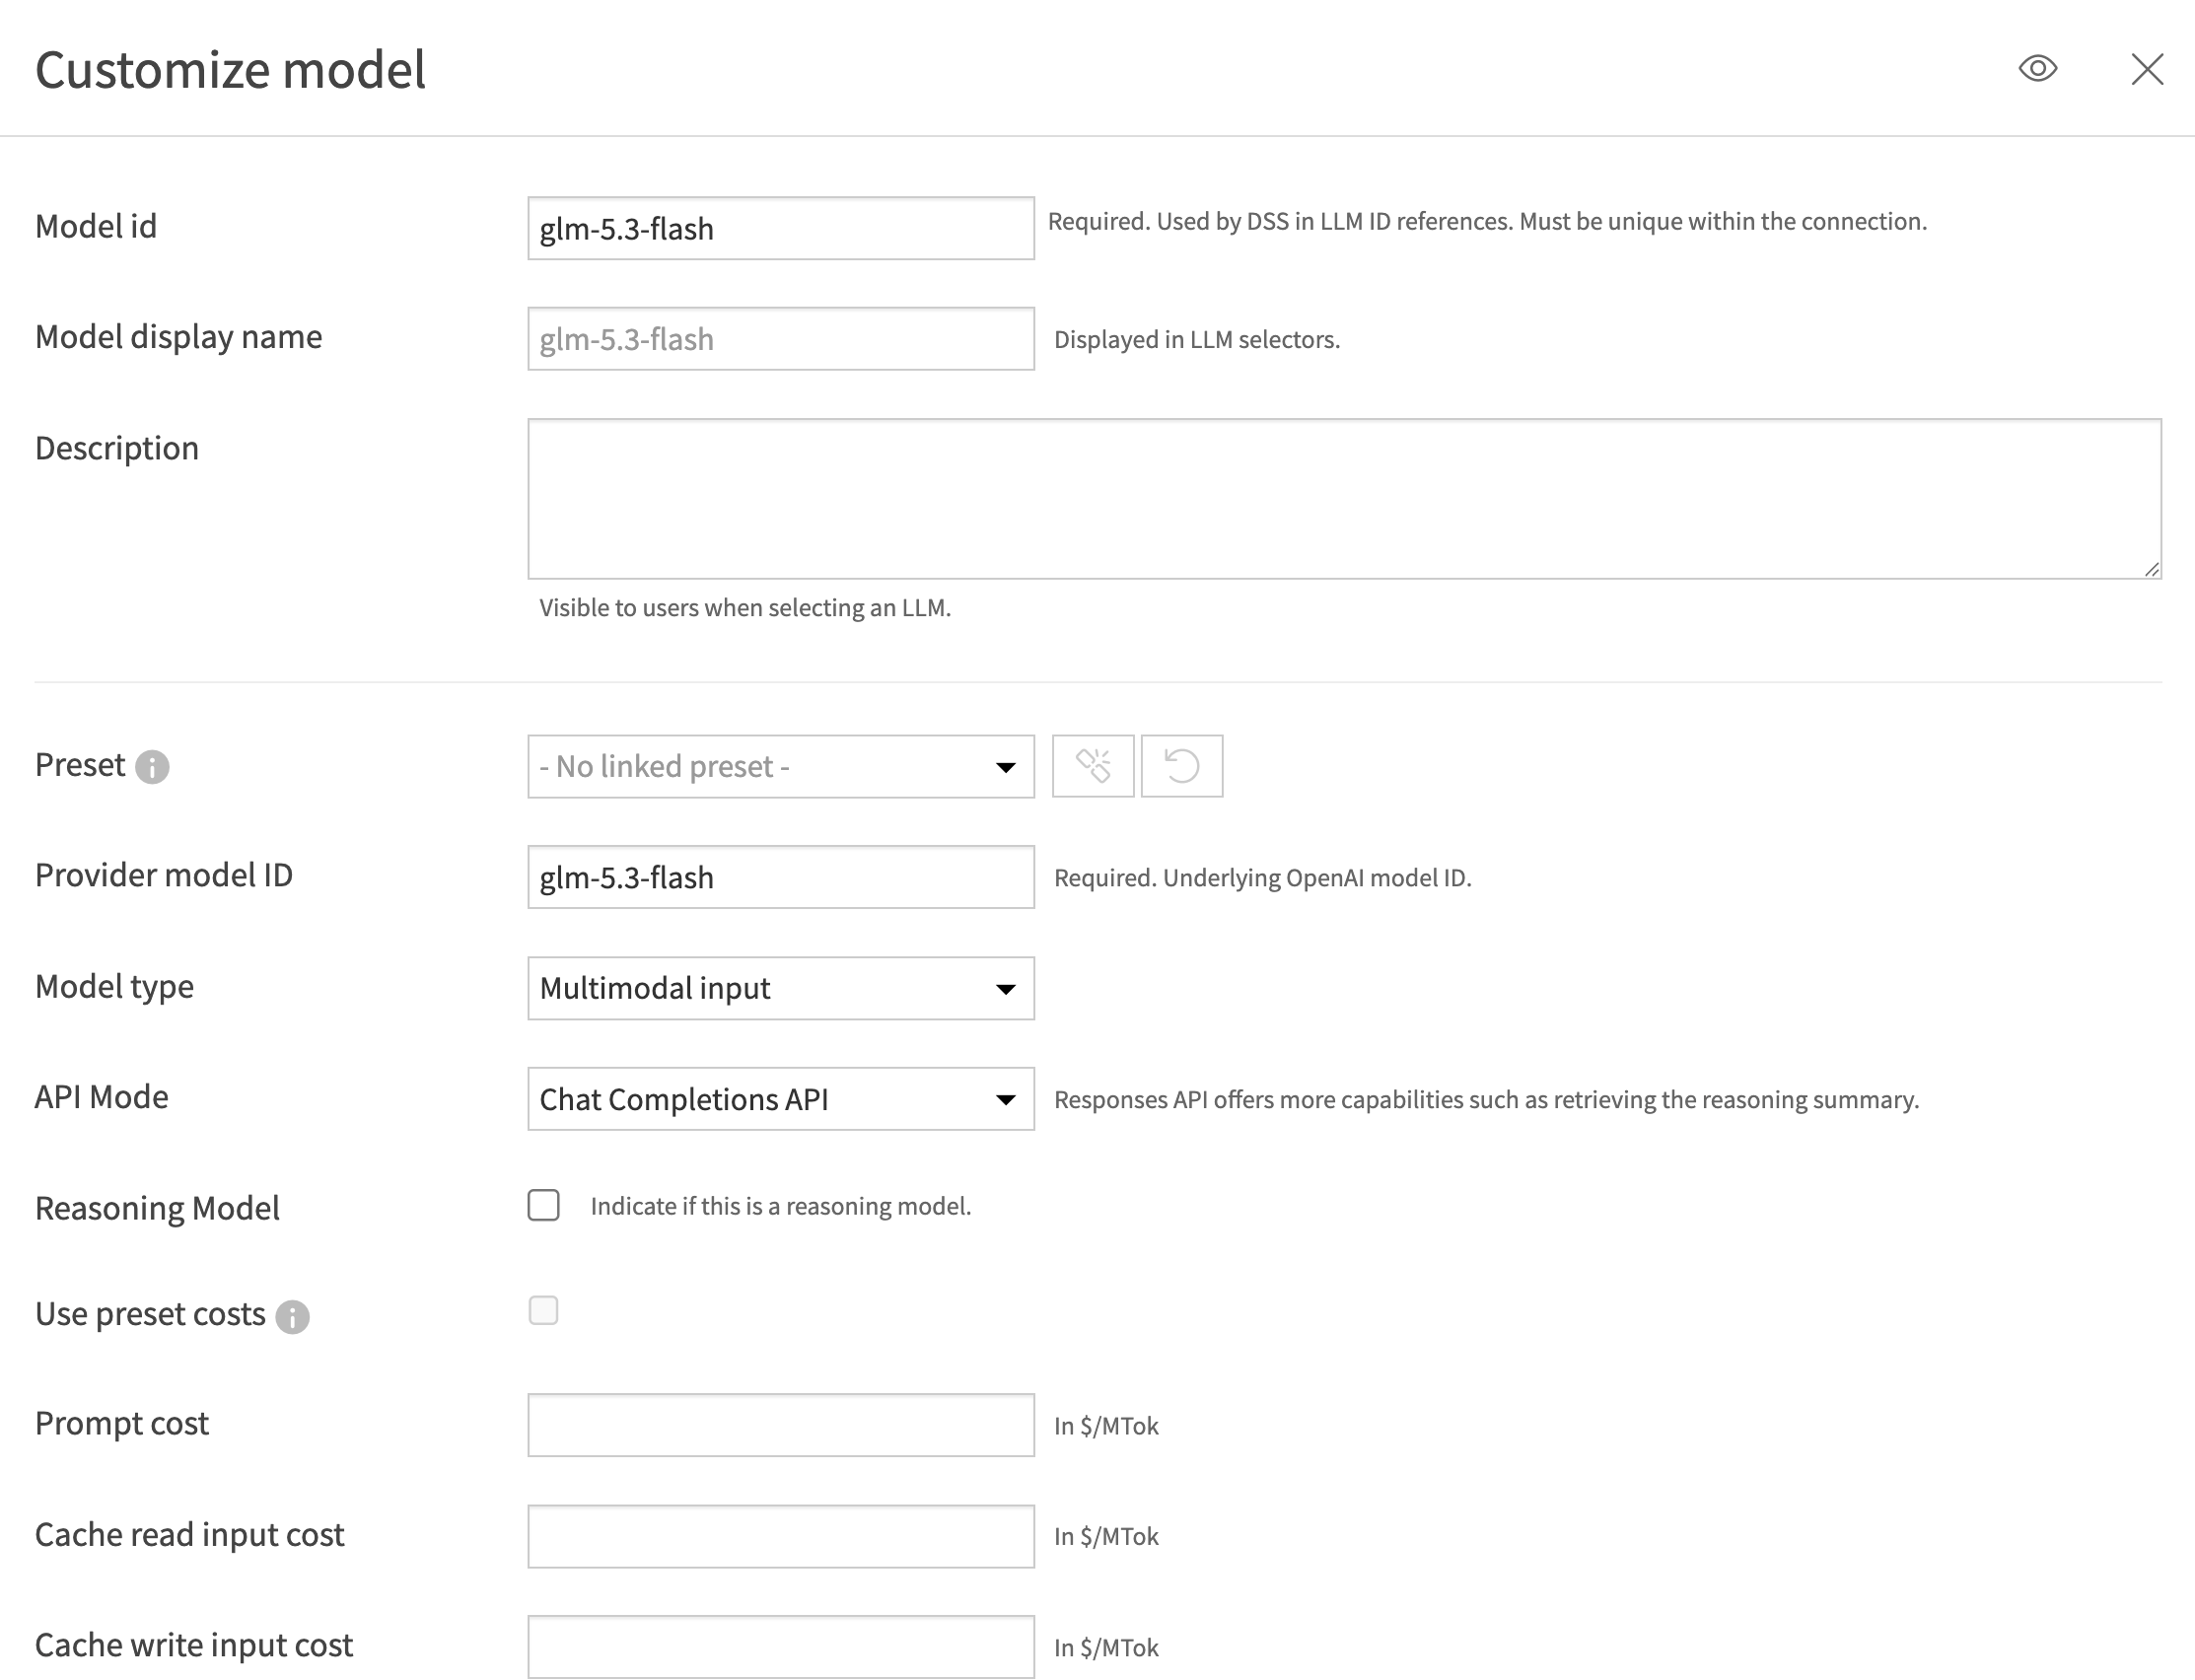
API Mode must be "Chat Completions API".
Save, and your model list should show a single enabled entry:
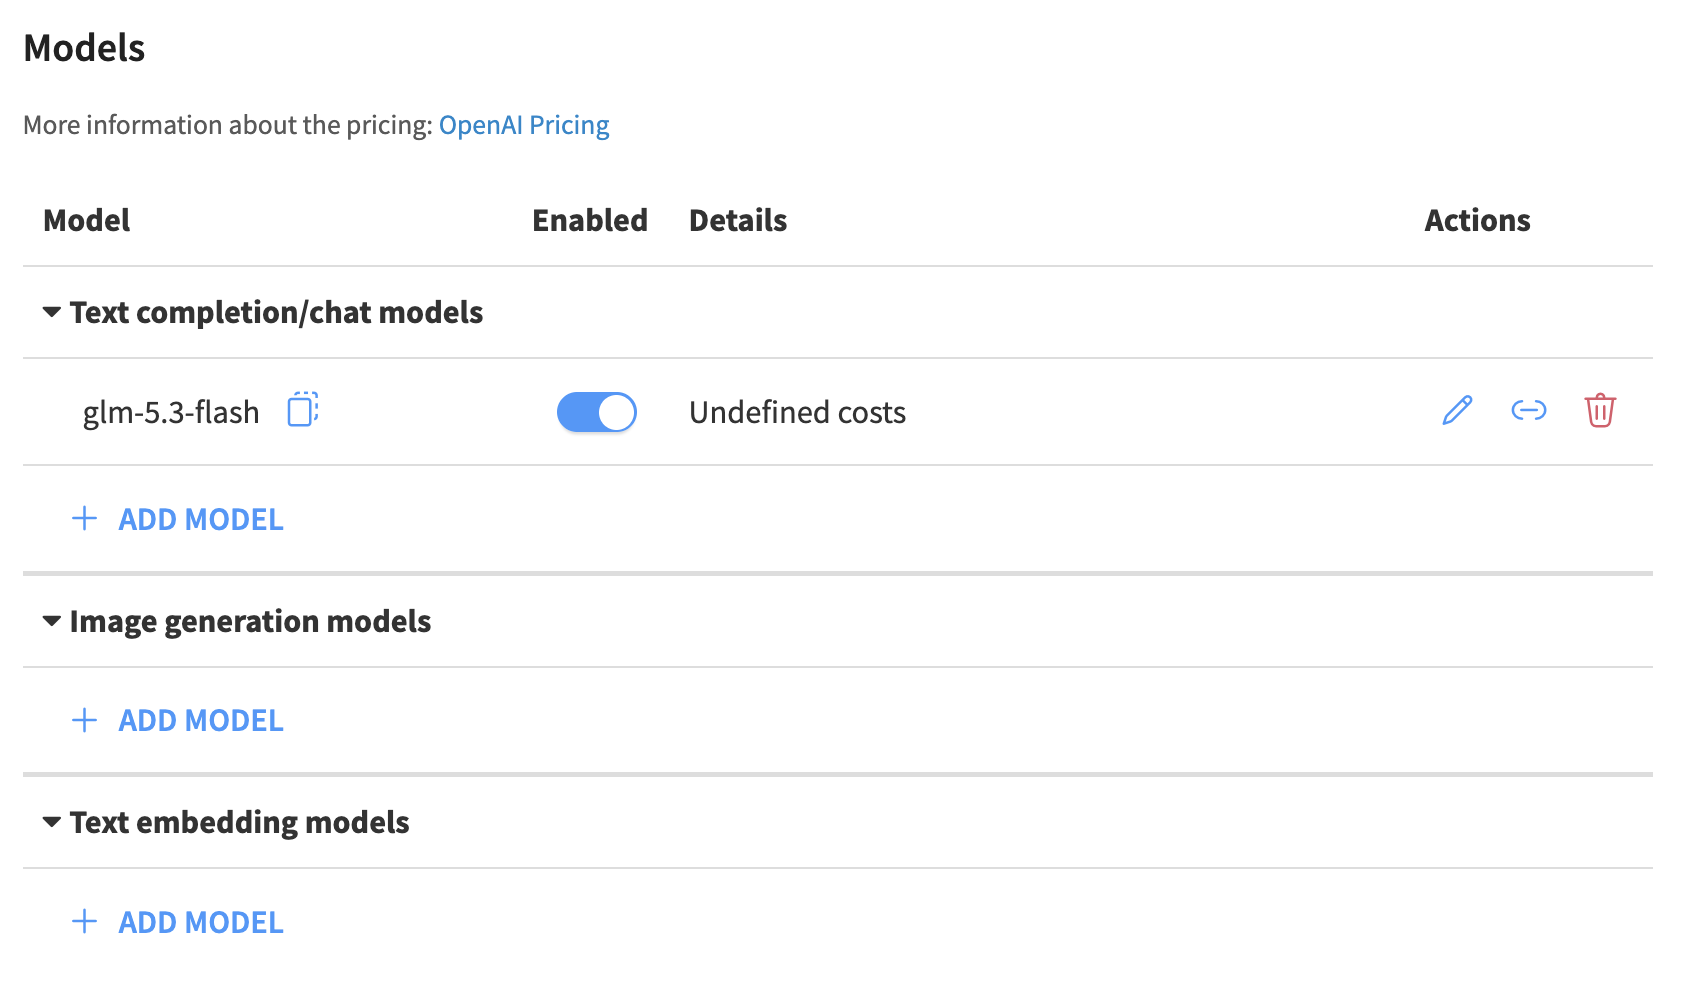
One model, no OpenAI leftovers, no embedding models.
Hit TEST at the bottom of the connection page before moving on. A green "Connection OK" here means Dataiku can reach the Sparks.
The connection alone doesn't wire up Dataiku's assistants. Go to Administration → AI Services and switch Operation mode to Bring your own LLM, then select glm-5.3-flash as both the Main model and the Fast / light model.
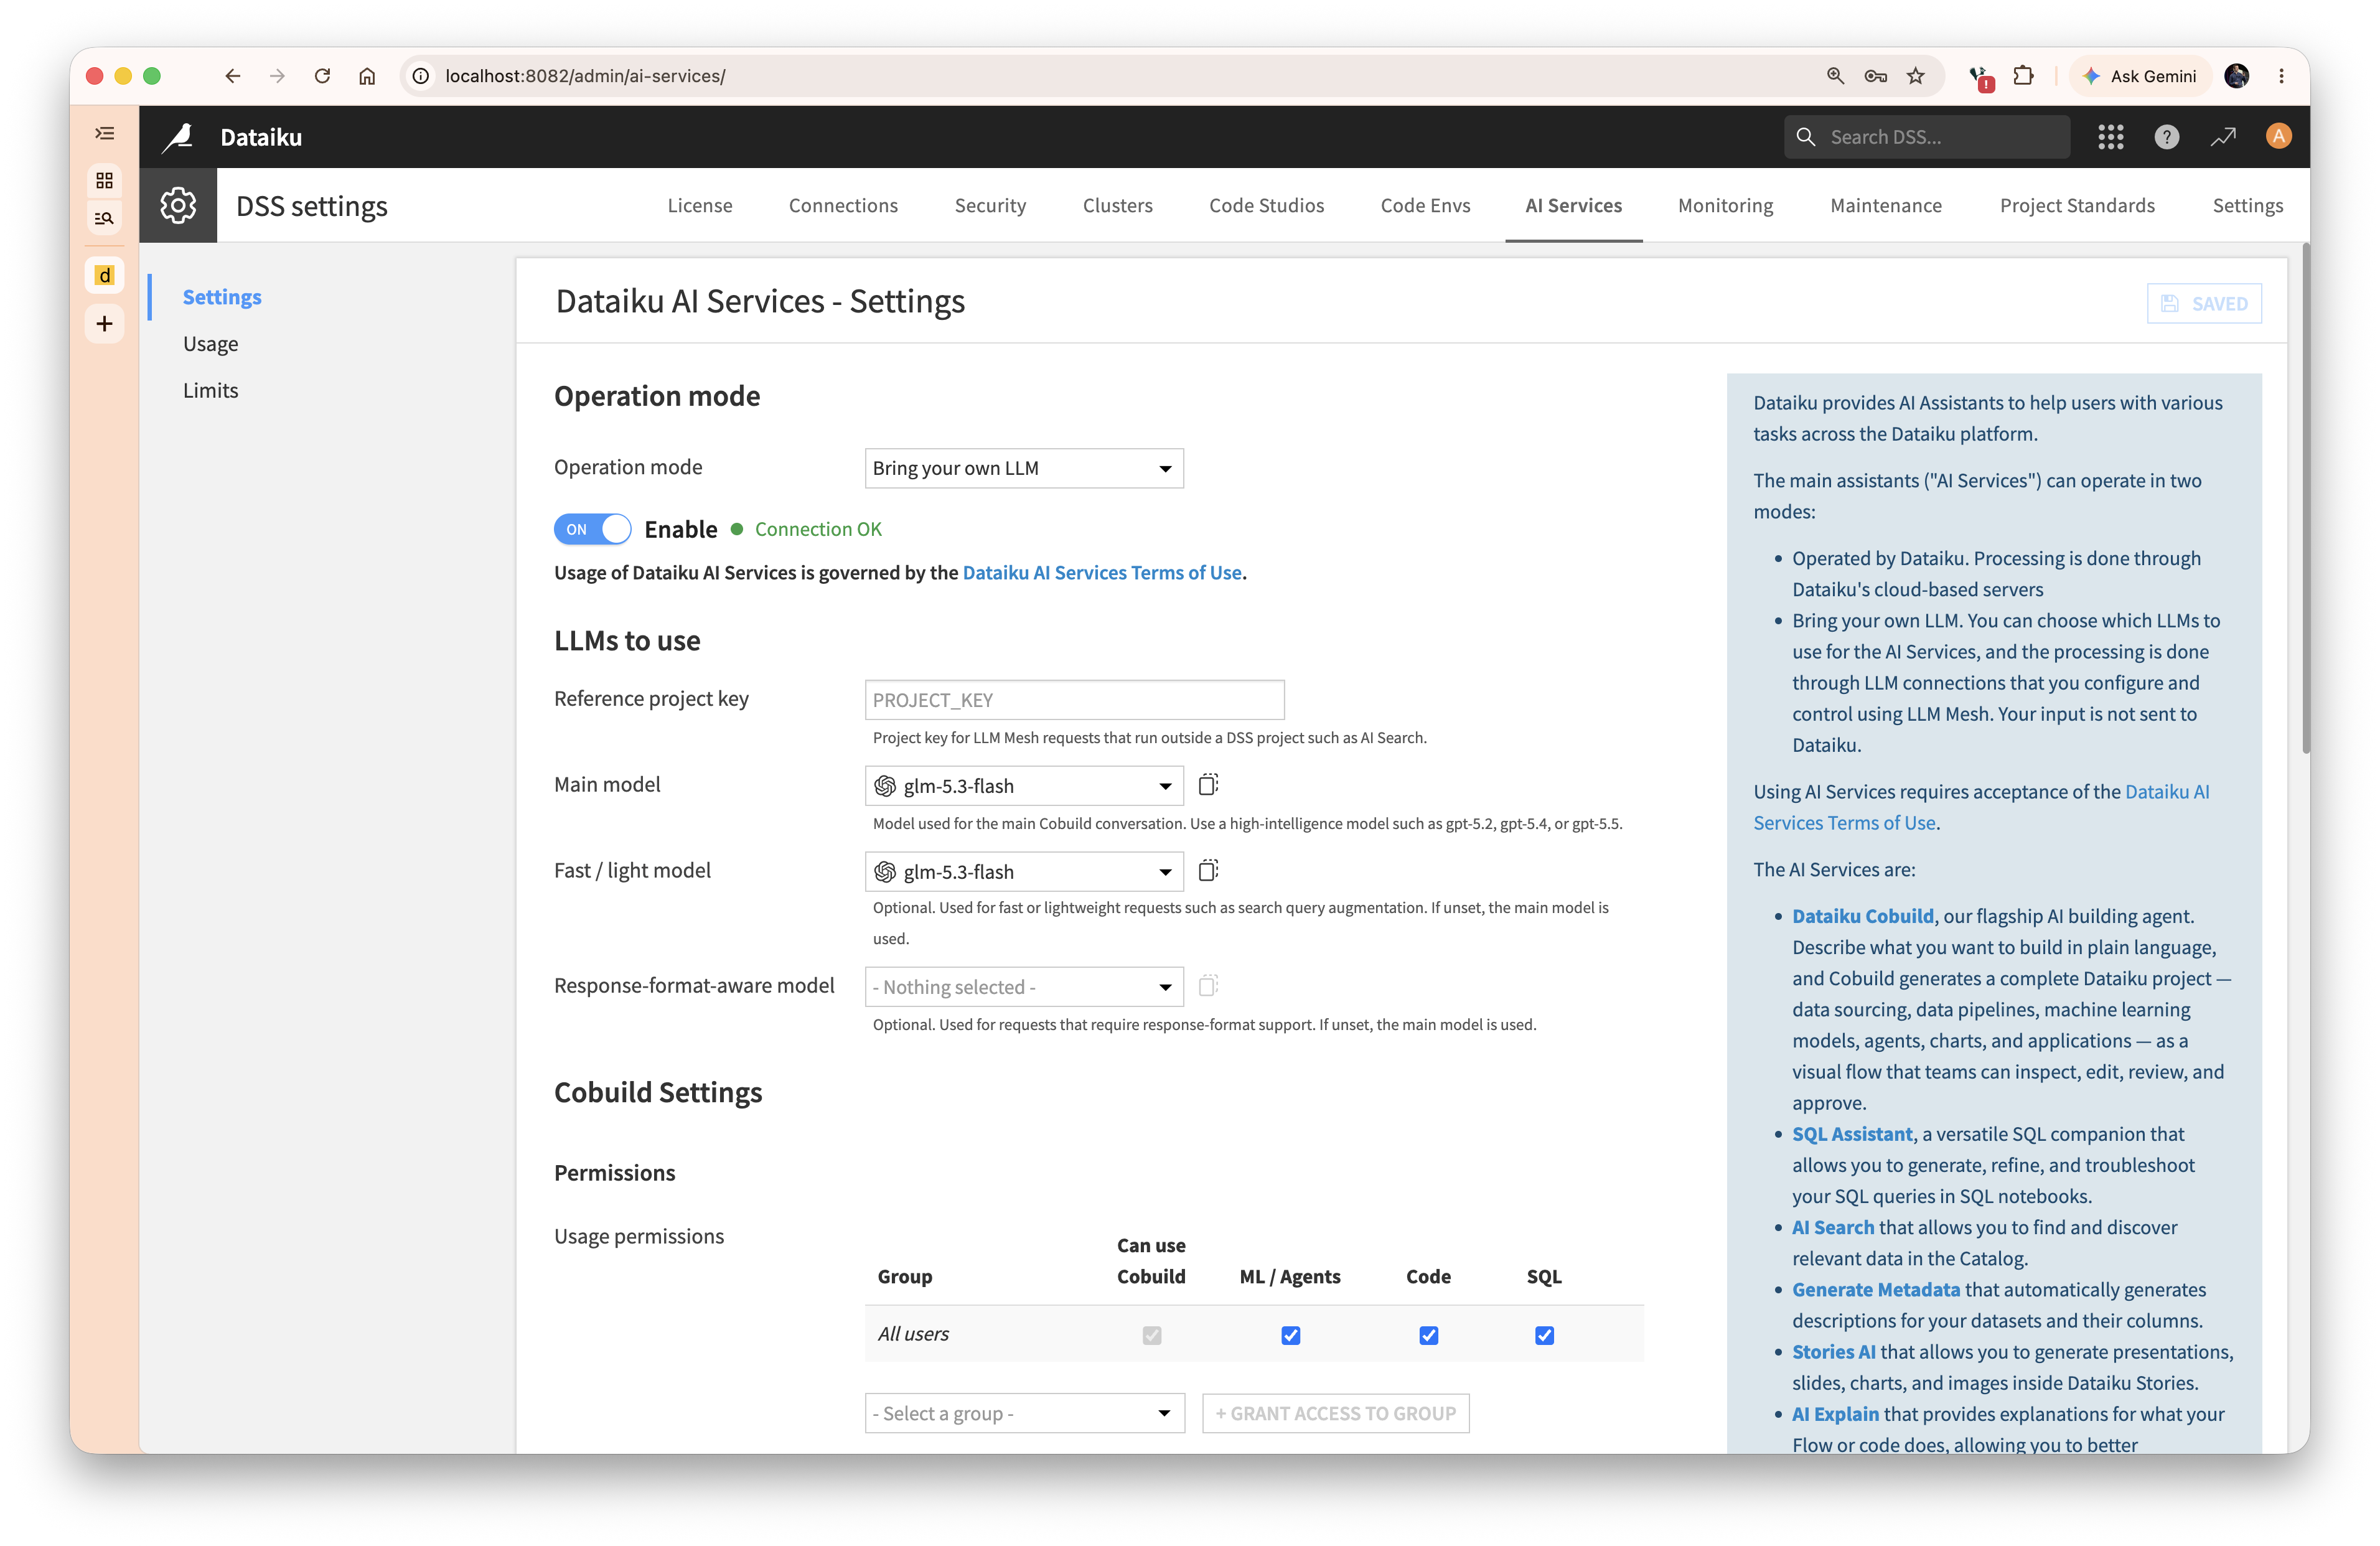
"Bring your own LLM" means keeping prompts and data on your own hardware.
In the default mode, AI Services run through Dataiku's cloud servers. In this mode, processing is performed via the LLM connections you configure, and your input never reaches Dataiku. That's the entire point of the exercise.
Cobuild now works against a model running on two boxes under your desk. Here it is, building a Flow to find congestion hotspots in a flight dataset; reading the data, writing the recipes, and interpreting the results, with nothing leaving the premises.
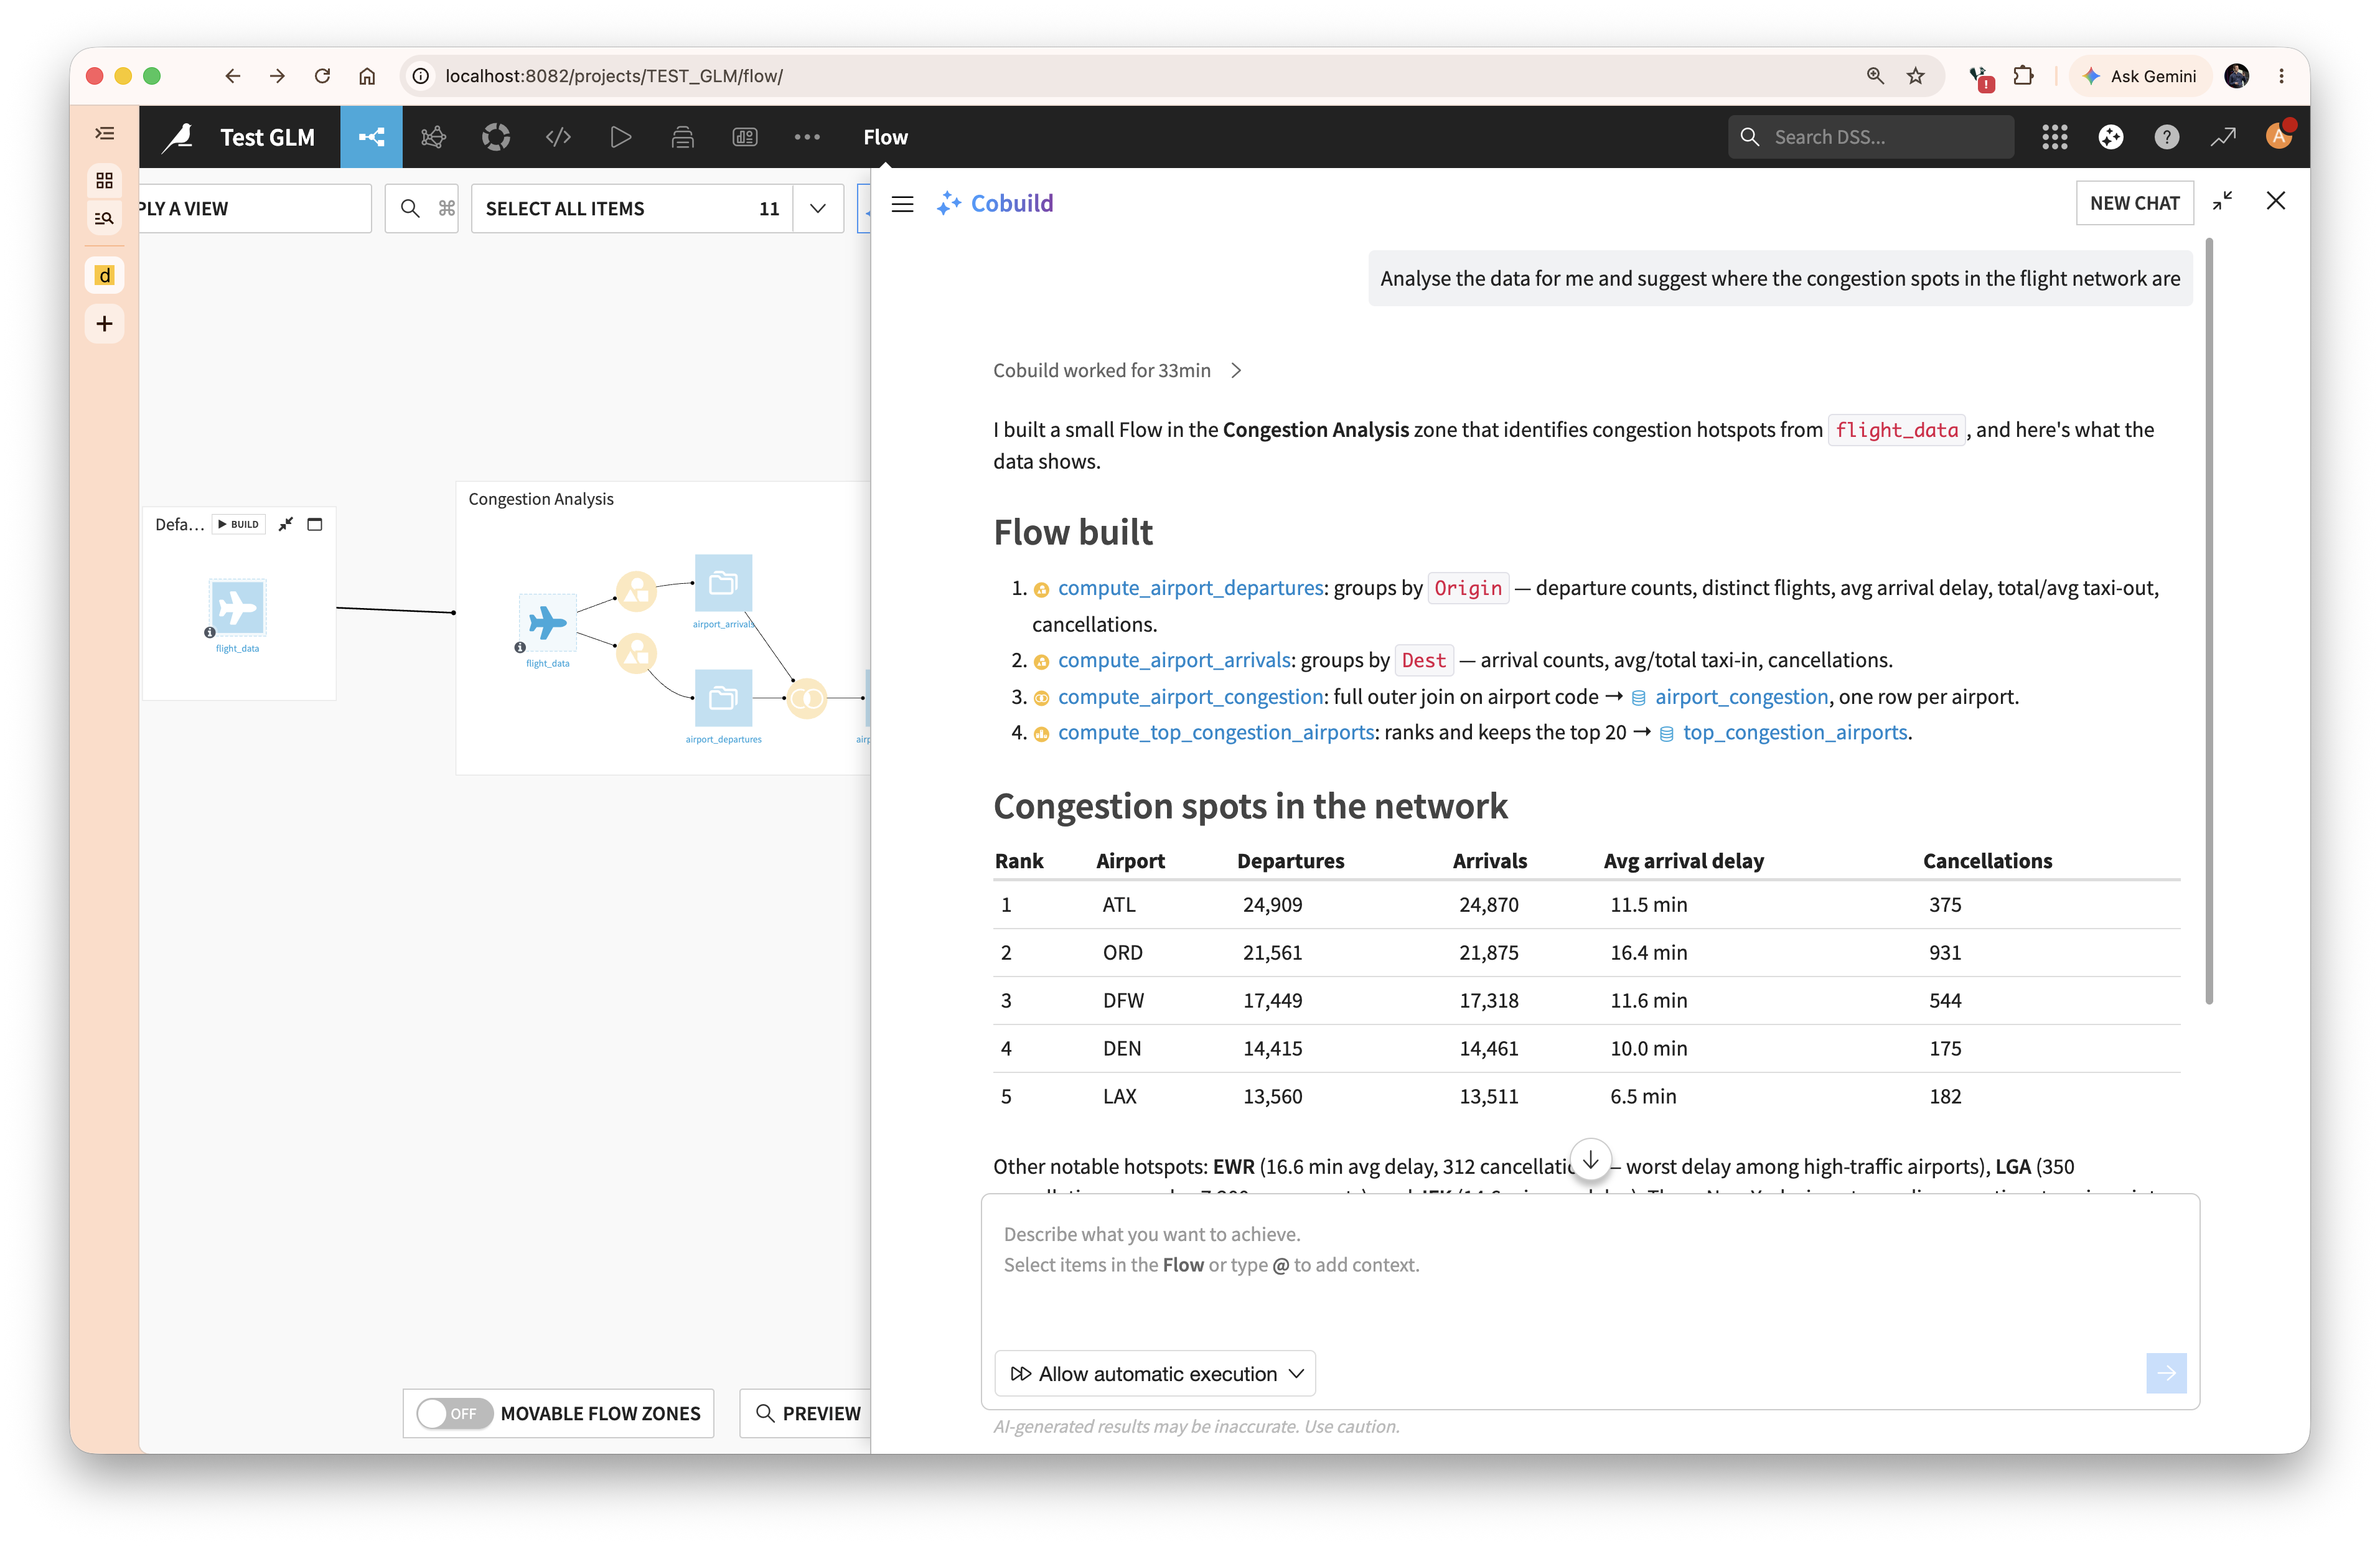
Cobuild working on the flight dataset — the Flow it built, and the congestion table it produced.
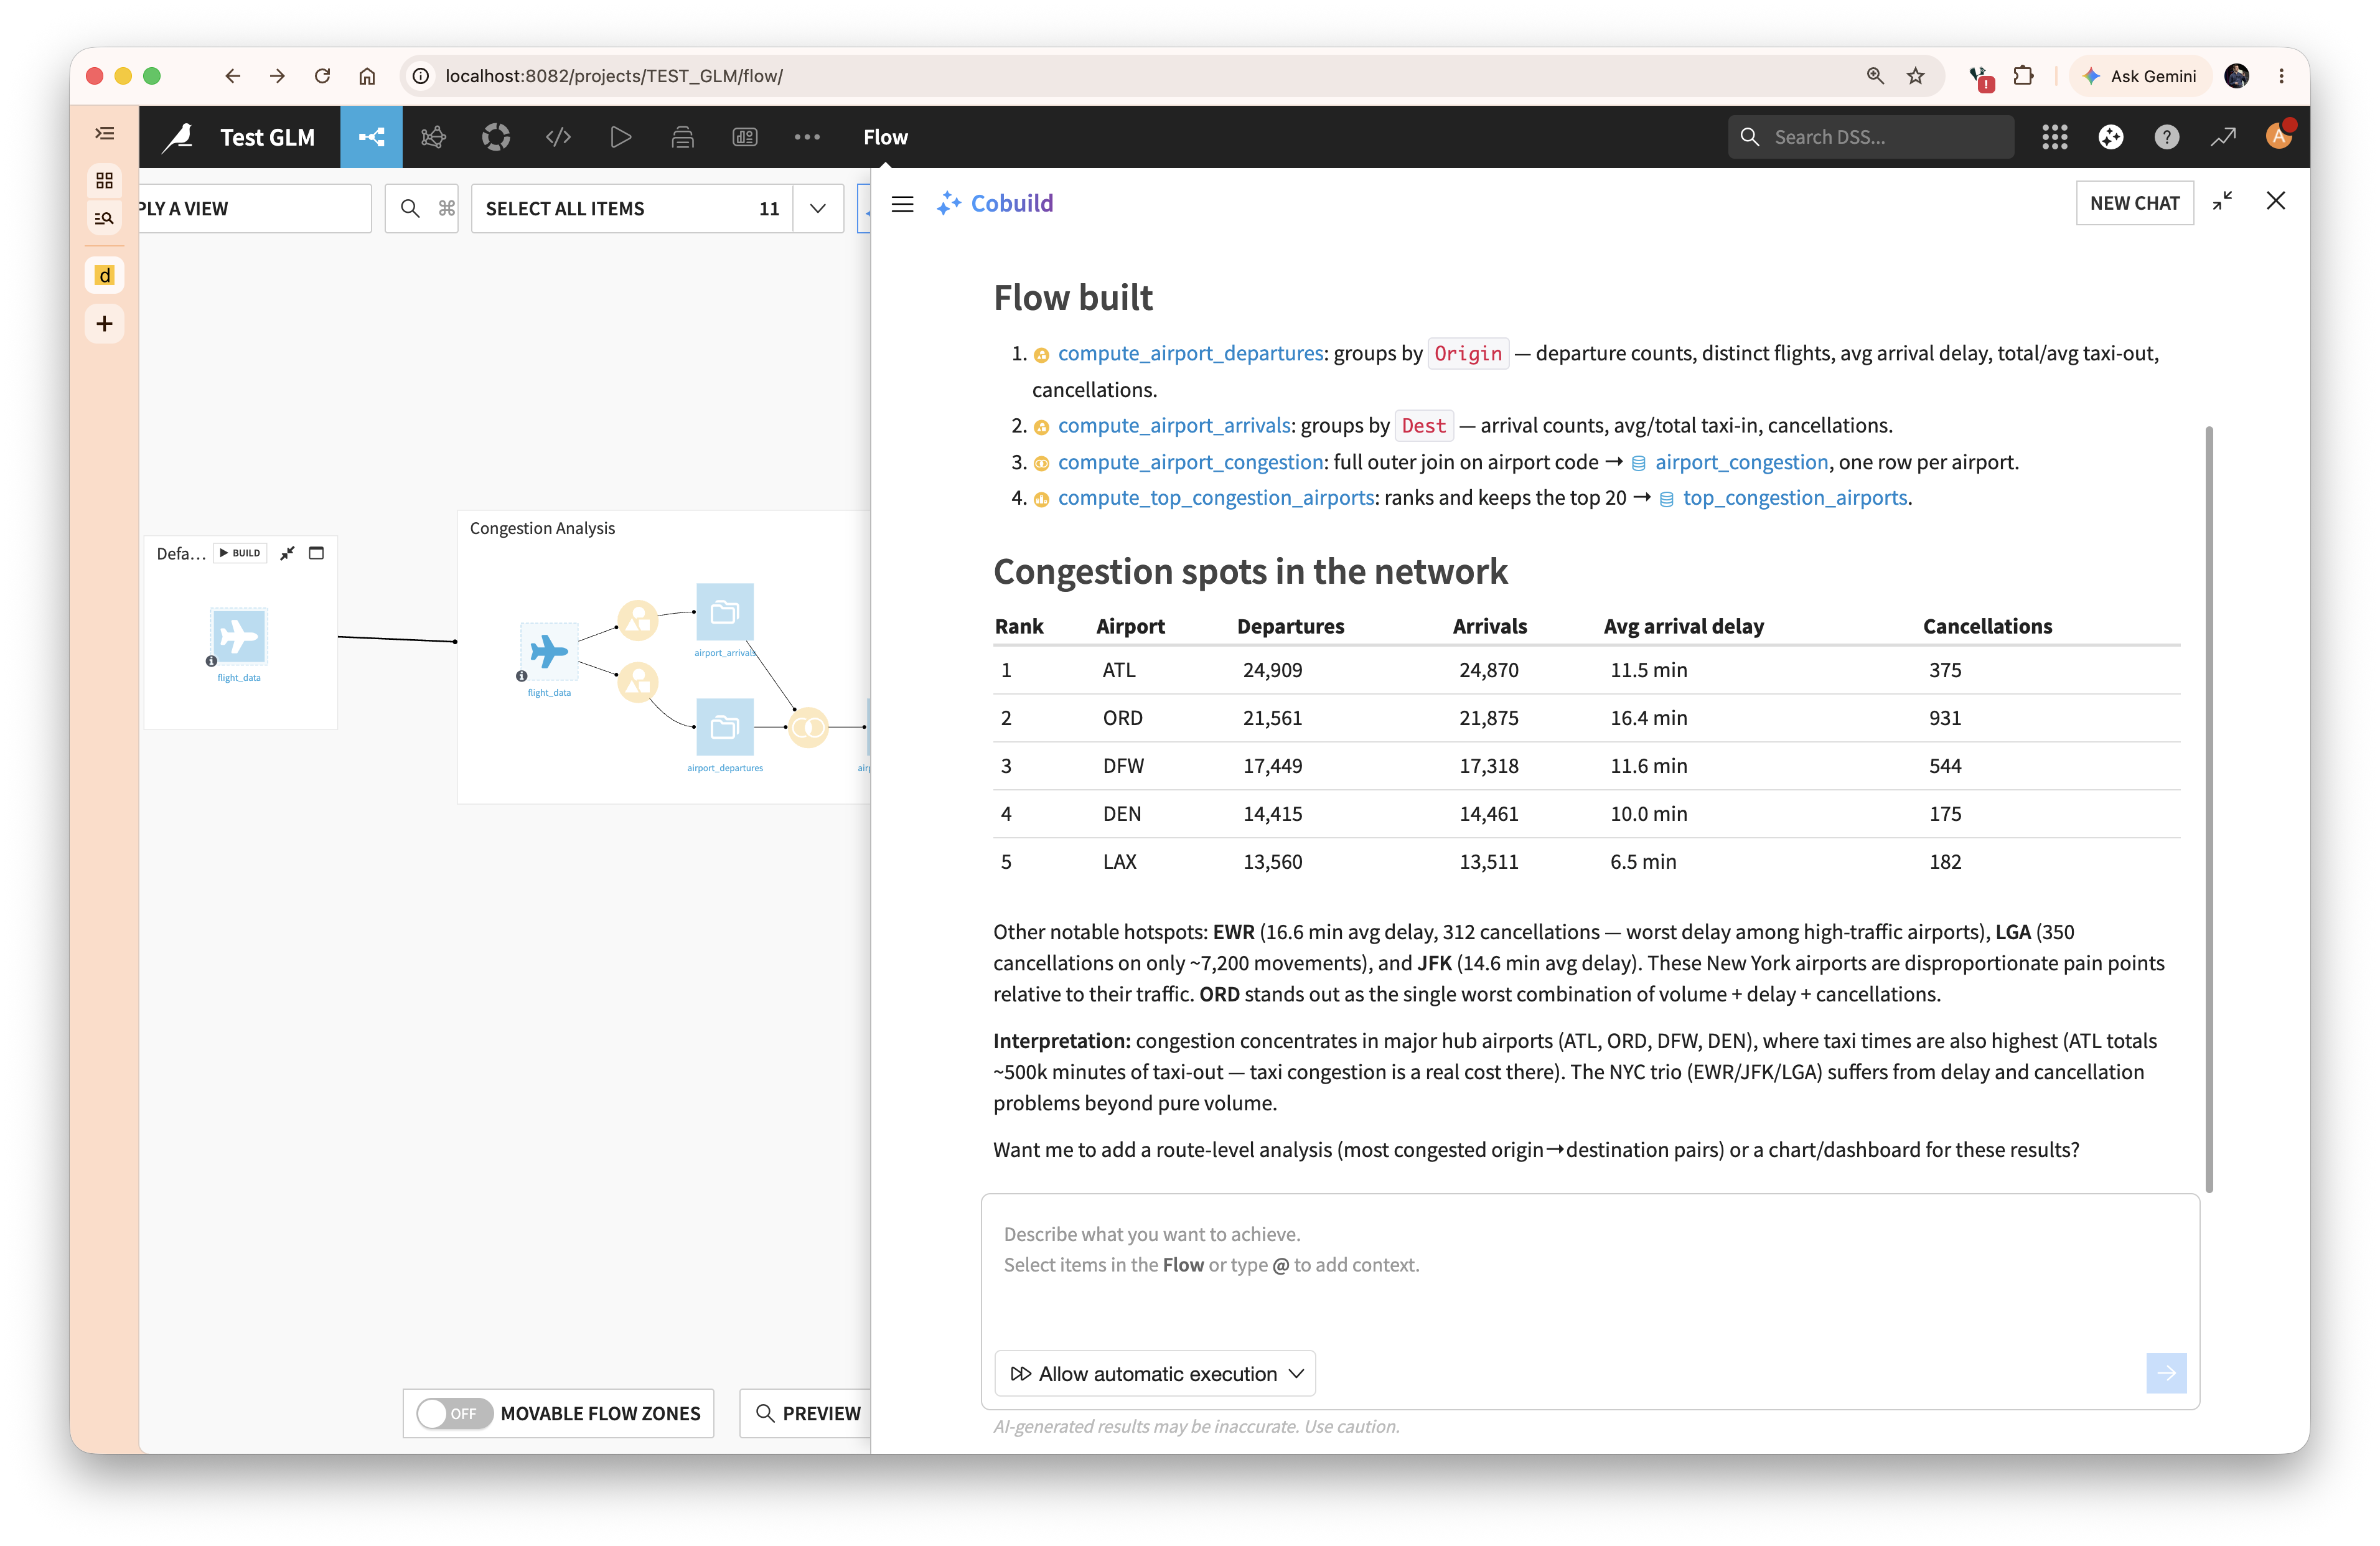
The interpretation step. This is a local model reasoning about your data.
Tada — you can investigate your valuable datasets without sharing your data with third parties. Your data stays on your premises, on your desk.
One request at a time. llama-server serializes requests by default. Fine for a single analyst; add --parallel N if several people will use it concurrently, keeping in mind the context budget is split between slots.
Make it a service. The commands above run in the foreground. Wrap both the worker and the server in systemd units (or, at a minimum, tmux) before anyone depends on them.
Restart the worker after any crash. A head crash takes the worker with it, and the worker must be started first.
Keep an eye on the PR. GLM-5.3-Flash support is not yet merged into mainline llama.cpp. Pin a known-good commit for production rather than tracking the branch head, and rebuild both nodes together when you update.
Latency is a trade. A 320B model on two Sparks is not an API endpoint's latency. Set expectations with your analysts: Cobuild sessions take minutes, not seconds. The compensation is that the data never moves.
In a future post, we'll outline how you can run Dataiku directly on the ARM architecture on the DGX Spark; no separate Dataiku instance, no network hop, the entire stack on one appliance.