Add order to LLM chaos with frameworks: CrewAI
August 20, 2026/9 min read/Thierry Chantier
The emergence of LLMs has been a huge technological disruption. Their uses, whether direct or through chatbots, have gradually been integrated into many activities.
The next step was to create AI Agents, which are LLM-powered systems designed to achieve objectives across multiple steps, leveraging tools autonomously as needed.
Then the question is: how to organize, orchestrate, and control all the possibilities offered by these Agents?
The answer came from frameworks that defined all the different concepts used in such an orchestration, providing all the necessary tooling. They are the ones that will enable the implementation of entire systems for assembling resources, whether they are based on LLMs or other tools already in place.
Among the many frameworks that have appeared, I find it interesting not to overlook those that are emerging outside the shadow of the tech giants. It is often an opportunity to discover new ideas, different approaches, even if it means having already strong biases.
In this article, I will guide you on an exciting learning adventure through the CrewAI framework and the universe of Agentic systems.
The approach chosen by CrewAI was to bring together existing concepts like LLMs and Agents, and propose the elements they deemed necessary to organize complete systems.
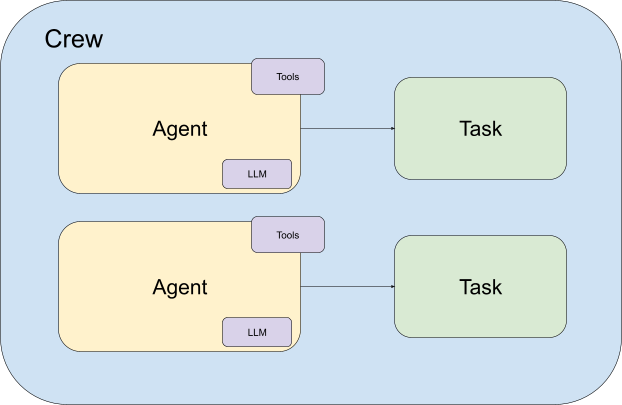
Thus, objects and an architecture were conceived by the CrewAI team. You will indeed find Agents responsible for the actions themselves. They will allow specifying the LLMs to implement, the Tools that will complement it, as well as the potential use of elements defined within MCP servers.
Tasks will be there to define more precisely what the Agents must solve and how.
To organize the interactions between Agents, the Crew object will allow creating a first level of organization.
And to close the whole, the action of the Crews will be framed within a Workflow.
But to truly discover what this framework offers, nothing beats getting into real, concrete code.
To begin, I suggest creating a simple agent whose mission will be to search for information. As I write this article, you just need a Python with version 3.10 or greater and to install the crewai package. In the next chapter, we will see how to define a more complete environment for working with Crewai.
Without further delay, here is the code you will need. We will comment on it.
# simple_agent.py
from crewai import Agent, Task, Crew

# Set up your environment with a valid OPENAI_API_KEY

# Create an agent
search_agent = Agent(
   name="Web search agent",
   description="An agent that performs web searches to gather information on a given topic.",
   role="Web search expert",
   goal="Perform web searches on a given topic.",
   backstory="You are in charge of web searches for all kinds of topics.",
   llm="gpt-5-mini",
)

result = search_agent.kickoff("What information do you have about Dataiku?")
print(result)
The Agent object itself only requires a few parameters to be operational.
name and description are there to help you identify what you want to do with this Agent and have a descriptive value for yourself and your teams.
role will define the agent's action and its domain of expertise.
goal will direct the Agent's effort and guide its decision-making.
backstory will give the Agent depth and background.
llm is as simple as it sounds: it's the model you will use for this agent.
The role/goal/backstory triptic will allow you to define the expected action from this Agent as precisely as possible.
For this first Agent, we will use its kickoff method to use it directly and get a result to test our code.
Remember to set an OPENAI_API_KEY environment variable or the equivalent for the LLM provider you have chosen to use. You can then test this first agent with the command:
python simple_agent.py
Here is the kind of result you will get. I deliberately truncated part of the returned text, LLMs are very talkative beings.
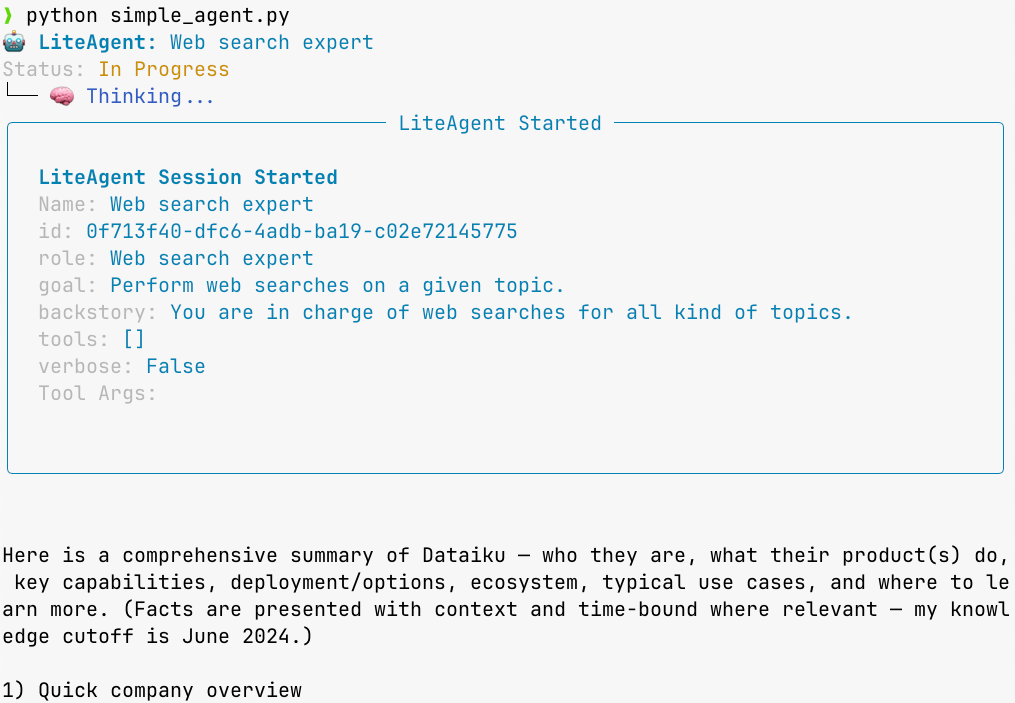
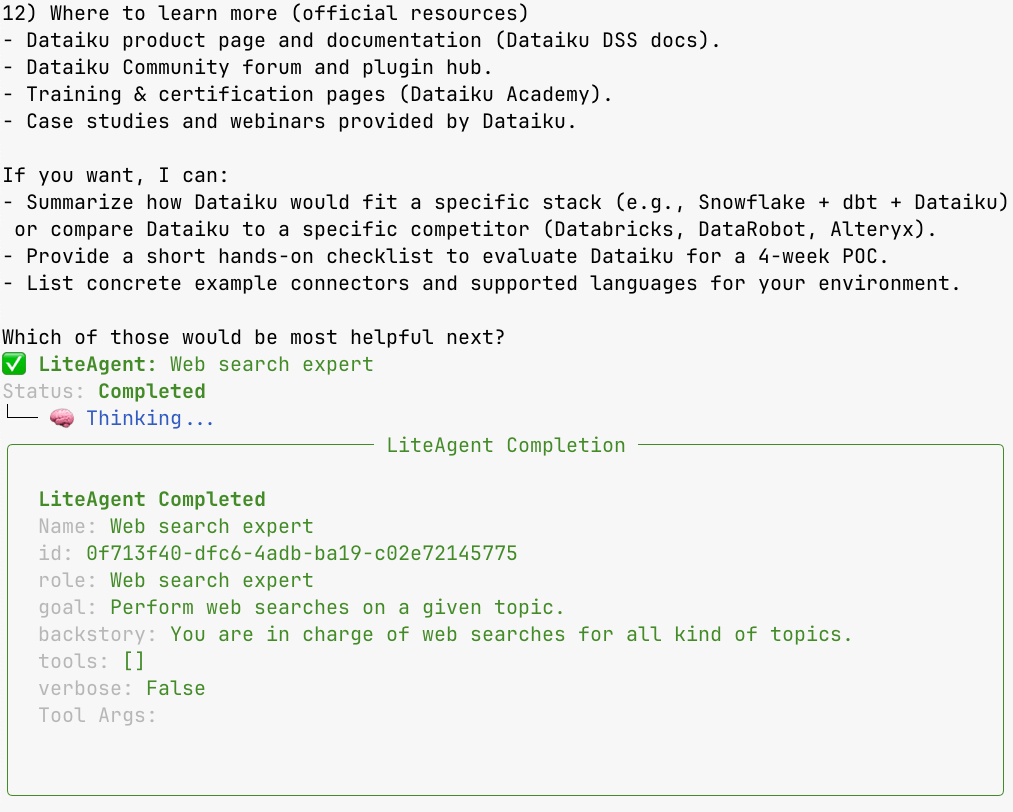
Among the choices made by CrewAI, you can see here that, by default, you have quite detailed information on the execution of your Agent. The formatting and color are provided by the Rich library, which gives this rather pleasant appearance to your CLIs.
To fully leverage crewAI, it is recommended to install the entire package and the proposed CLI. Follow the documentation in this regard, which mainly consists of using the uv tool (which I warmly recommend for your Python projects) to install the CrewAI CLI.
It is from this point that the CrewAI team's choices will become apparent. Their CLI tool will allow you to create a complete project for your first Crew. The CLI provides a templating system to scaffold a project with a starting point for your coding experience of a Crew.
To do this, run the following command:
crewai create crew my_first_crew
During the project creation, the tool will ask you to choose the model provider you will be using.
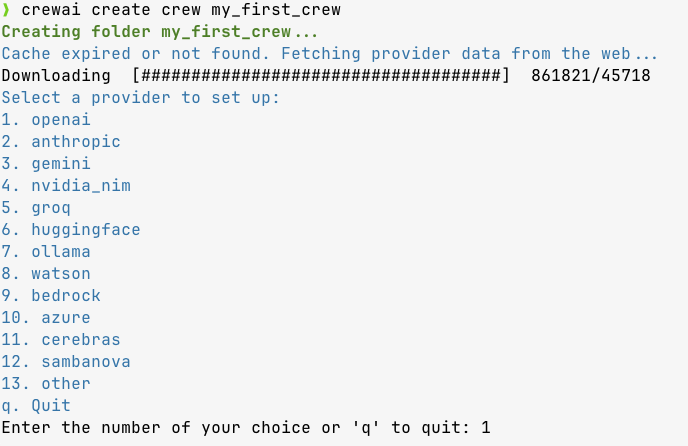
Just like the first Agent, I chose to use OpenAI, but you are free to use the provider of your choice.
You will then choose the desired model, here gpt-4o-mini.
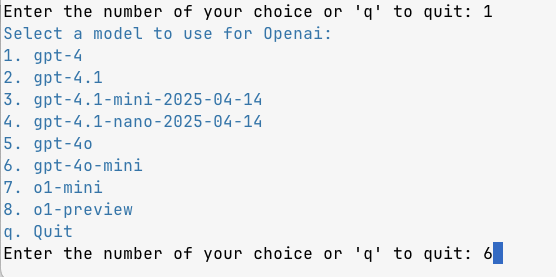
You can enter your provider key at this stage or ignore it and add it later in an environment variable.
From there, you have a complete project created by the CLI in a dedicated folder.
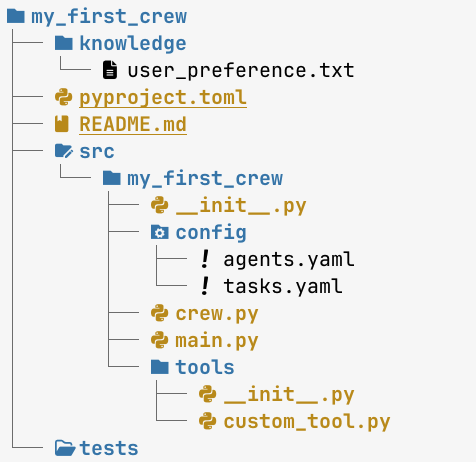
The definition of your agents will be done through the agents.yaml file.
You will be able to specify the expected behavior of your agents by indicating their roles, their goals, and as we did in the first example, giving them depth.
researcher:
 role: >
   Senior Data Searcher about professional information
 goal: >
   Give all the professional information you can about {topic}.
 backstory: >
   You're a seasoned journalist used to search and gather professional information about people and companies around the world.
   Known for your ability to find the most relevant information and present it in a clear and concise manner.


reporting_analyst:
 role: >
   Reporting Analyst
 goal: >
   Create detailed reports based on professional information about people and research findings about companies
 backstory: >
   You're a meticulous analyst with a keen eye for detail.
   You're known for your ability to turn complex data into clear and concise reports, making
   it easy for others to understand and act on the information you provide.
Using the tasks.yaml file, you will define the tasks you want to assign to the agents. You will need to describe what you want to achieve, the expected results, and the agents that can perform them.
research_task:
 description: >
   Conduct in-depth research about {topic}
   Make sure you find any interesting and relevant professional information given
   the current year is {current_year}.
   Add all information you find to related employers of {topic}
 expected_output: >
   A list with 10 bullet points of the most relevant professional information about {topic}
 agent: researcher


reporting_task:
 description: >
   Review the context you got and expand each topic into a full section for a report.
   Ensure the report is detailed and includes all relevant information.
 expected_output: >
   A fully fledged report with the main topics, each with a full section of information.
   Formatted as markdown without '```'
 agent: reporting_analyst
All that remains is to code the Agents that will rely on these definitions within a Crew that will allow you to orchestrate the execution of the expected tasks.
# crew.py
from crewai import Agent, Crew, Process, Task
from crewai.project import CrewBase, agent, crew, task
from crewai.agents.agent_builder.base_agent import BaseAgent
from typing import List


@CrewBase
class MyFirstCrew():
   """MyFirstCrew crew"""

   agents: List[BaseAgent]
   tasks: List[Task]

   @agent
   def researcher(self) -> Agent:
       return Agent(
           config=self.agents_config['researcher'],
           verbose=True
       )

   @agent
   def reporting_analyst(self) -> Agent:
       return Agent(
           config=self.agents_config['reporting_analyst'],
           verbose=True
       )

   @task
   def research_task(self) -> Task:
       return Task(
           config=self.tasks_config['research_task'],
       )

   @task
   def reporting_task(self) -> Task:
       return Task(
           config=self.tasks_config['reporting_task'],
           output_file='report.md'
       )

   @crew
   def crew(self) -> Crew:
       """Creates the MyFirstCrew crew"""

       return Crew(
           agents=self.agents,
           tasks=self.tasks,
           process=Process.sequential,
           verbose=True,
       )
The necessary code then makes full use of the framework proposed by CrewAI.
A succession of annotations will define your agent system.
The use of @CrewBase indicates the definition of a class representing your Crew.
The Agent creation methods use the @agent annotation, which will indicate that your method creates an agent to be added to the list of agents for this class. The method itself relies on the use of the configuration that we previously defined. The agents_field['researcher'] is mapped to the first level element in the agents.yaml with the same name. The second one in the configuration file is called reporting_analyst and will be mapped to agents_field['reporting_analyst'].
return Agent(
           config=self.agents_config['researcher'],
           verbose=True
       )
Tasks are defined by using the @task annotation, which adds this task to the class's list of tasks. The Task is created by reading the corresponding configuration:
return Task(
           config=self.tasks_config['research_task'],
       )
The Crew assembly itself only requires an @crew annotation and the use of lists of agents and tasks.
return Crew(
           agents=self.agents,
           tasks=self.tasks,
           process=Process.sequential,
           verbose=True,
       )
The last element to implement will be to indicate in your main.py file the settings you will use for the execution of your Crew
#!/usr/bin/env python
import warnings
from datetime import datetime
from my_first_crew.crew import MyFirstCrew
warnings.filterwarnings("ignore", category=SyntaxWarning, module="pysbd")

# This main file is intended to be a way for you to run your
# crew locally, so refrain from adding unnecessary logic into this file.
# Replace with inputs you want to test with, it will automatically
# interpolate any tasks and agents information

def run():
   """
   Run the crew.
   """
   inputs = {
       'topic': 'Florian Douetteau',
       'current_year': str(datetime.now().year)
   }

   try:
       MyFirstCrew().crew().kickoff(inputs=inputs)
   except Exception as e:
       raise Exception(f"An error occurred while running the crew: {e}")
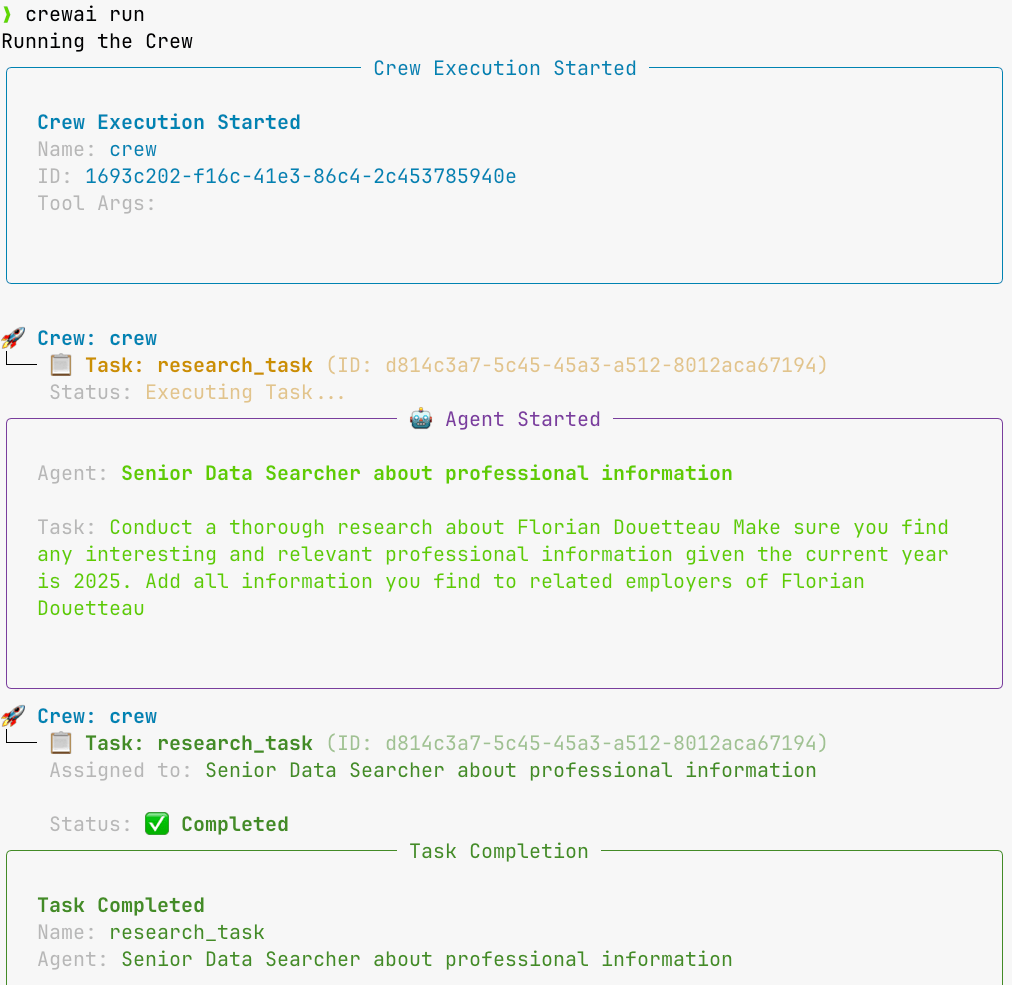
You will then execute your Crew using the crewai run command.
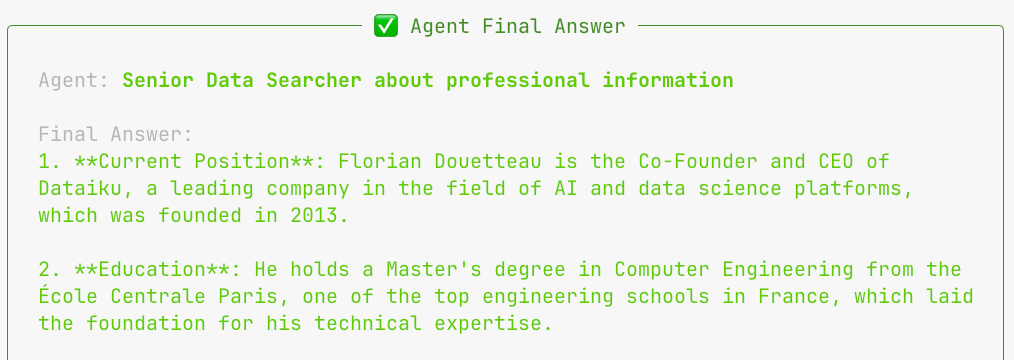
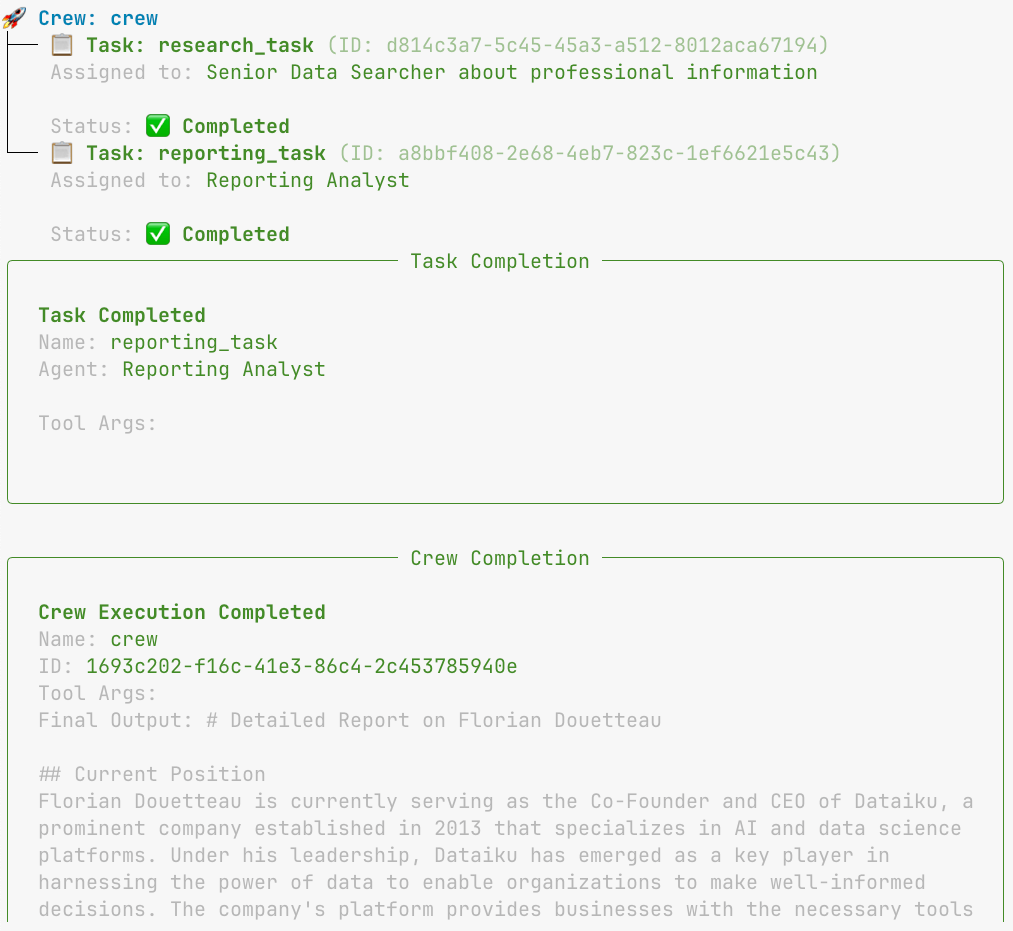
You will then see the different steps displayed in your console, always visually enhanced by the Rich library. The screenshots below show you part of those logs.
Your Crew can now be improved and complemented by adding Tools.
You will have the choice of using tools written or integrated by CrewAI, but you can also add one of your tools accessible through an MCP server.
I will illustrate this capability by integrating a tool developed in a Dataiku project. The tool is then exposed as an MCP server running in a Dataiku instance. The complete process is described in the following tutorial: Building your MCP Server in Dataiku.
You will need the URL of this tool in the form https://<DATAIKU_HOST>/webapps/<PROJECT_KEY>/<WEBAPP_ID>/mcp
To connect, you will also need a Dataiku API key, which you can obtain by following the dedicated chapter in the tutorial. Store it in an environment variable named, for example, DSS_API_KEY.
With this information, you can then enrich your researcher agent creation:
@agent
def researcher(self) -> Agent:
   dss_params = {
       "url": "https://<DATAIKU_HOST>/webapps/<PROJECT_KEY>/<WEBAPP_ID>/mcp",
       "transport": "streamable-http",
       "headers": {"Authorization": f"Bearer {os.getenv('DSS_API_KEY')}"},
   }
   dss_adapter = MCPServerAdapter(dss_params)
   return Agent(
       config=self.agents_config['researcher'], # type: ignore[index]
       verbose=True,
       tools=dss_adapter.tools,
   )
The CrewAI framework allows you to link the tools served by your MCP server using an MCPServerAdapter, which relies on a simple dictionary containing the connection information.
The tools parameter will then be populated from this adapter, which will have previously queried your MCP server to find out the exposed tools.
You can then test your enriched Crew and observe the traces that mention the call to your MCP server.
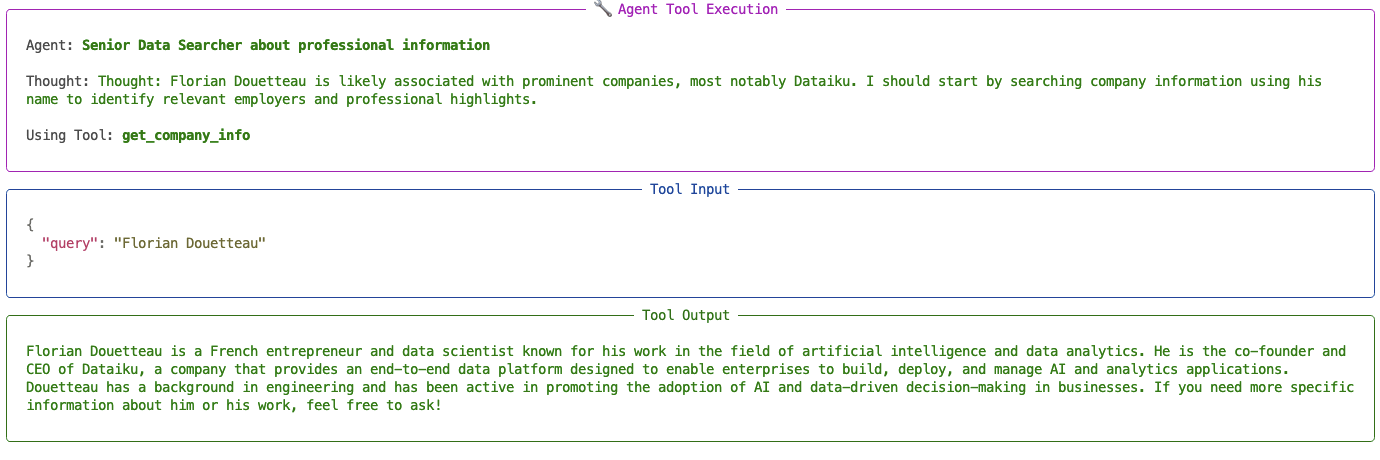
You will see a first section called “🔧 Agent Tool Execution” which will tell you which agent decided to use a tool, what the process leading to this call was, and which tool was precisely called.
The following sections, “Tool Input” and “Tool Output,” allow you to see the information given to the tool and its response.
As this article has shown, using a framework helps to clarify concepts and simplify the way an agentic system is articulated.
It remains very important to clearly define the role of each agent and the expected operation.
We have also seen that adding tools through the MCP protocol is a simple but effective improvement for any agent.
It is now up to you to create what will suit your context, and to help you, take the time to browse the available documentation:
The tutorial Building your MCP Server in Dataiku
The documentation for the MCP protocol
Go further with Dataiku.